Saving Showback Report
The Saving Showback report helps internal IT personnel show end-customers how the final AWS bill was calculated by breaking down all the costs and charges in the net bill by service type.In previous CloudCheckr versions, IT personnel had to cobble together calculations from several reports manually to show this data to their end-customers.
Procedure
- Navigate to Cost> AWS Partner Tools > Report > Saving Showback.
CloudCheckr displays the parameters on which you can filter your data.
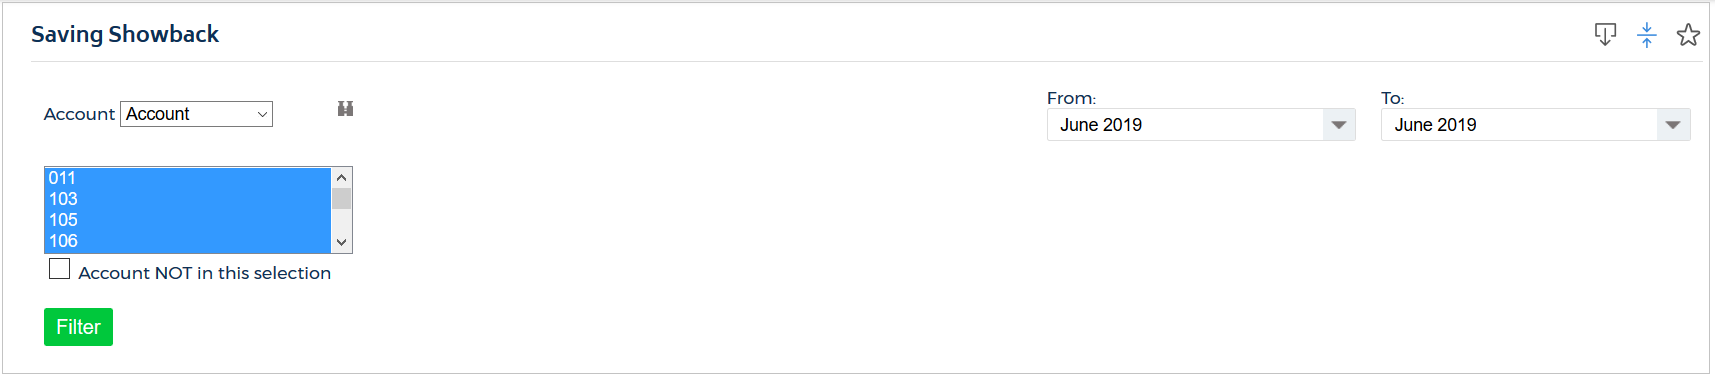
- In the Account section:
- Select Account or Account Family from the drop-down menu.
- From the list, select the account(s) or account families on which to filter your data.
- For your date range, select the months you want to use as your starting and end dates.
Because AWS billing is done monthly, you only have the option to select months for your date range.
- Click Filter.
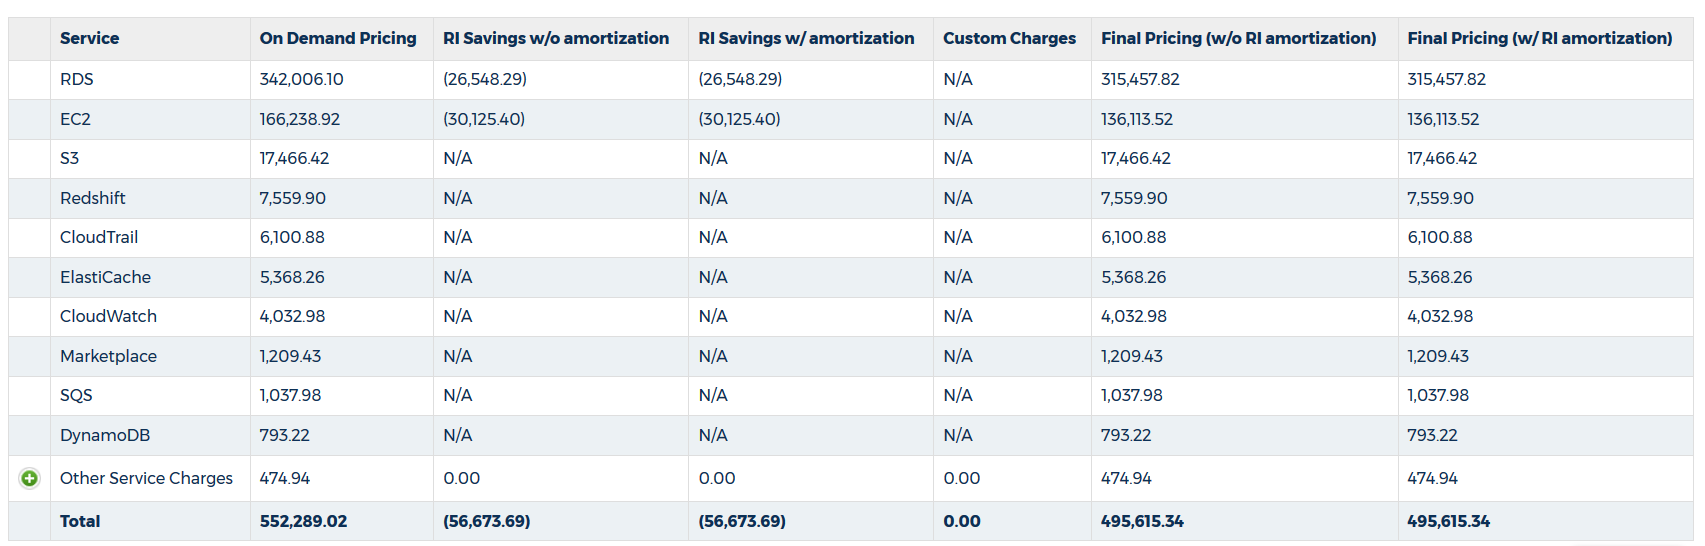
CloudCheckr displays a list of each service's charges—broken down to show you On Demand pricing and the discounted pricing.
You can see the savings via Reserved Instances (RIs)—with or without amortization— and any custom charges and discounts such as negotiated discounts. With this information, you can show your customers the value that you provide by buying RIs and negotiating on their behalf.
In this example, you can quickly spot big savings for key services such as RDS ($26,548.29 in RI savings) and EC2 ($30,125.40 in RI savings):
