Copy Billing Data (Payees)
Before you continue, please make sure you are on the correct Copy Billing Data page:
The Copy Billing Data report allows you to copy your complete billing report or a subset of charges from your billing report into an S3 bucket inside a payee account.
CloudCheckr checks for updates to the Payer account every hour. When it finds a change, it downloads the file, creates a subset for each of the payee accounts, and copies that file into your selected S3 bucket.
This topic shows you how to copy your billing data for a payee or payees into a selected S3 bucket.
- From Cost > AWS Partners > Configure > Account Families: copy charges from an account family into an S3 bucket
- From Cost > AWS Partners > Files > Copy Billing Data: copy your complete billing report or charges from a payee into an S3 bucket
Procedure
- From the navigation pane, choose Cost > AWS Partner Tools > Files > Copy Billing Data.
The Copy Billing Data page opens.
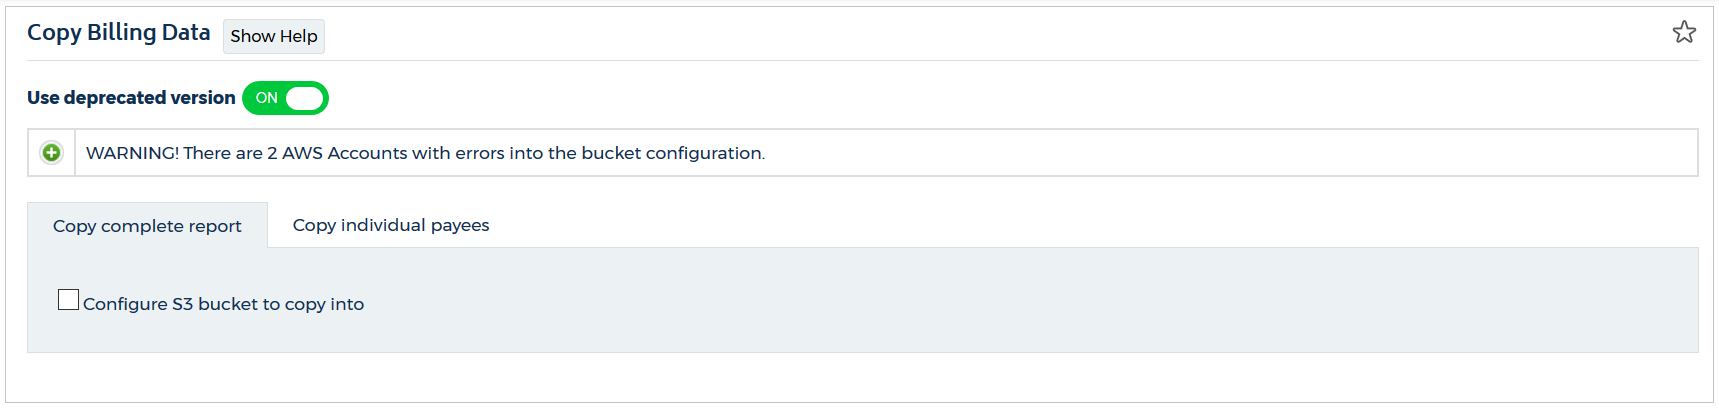
- Select the Copy complete report or Copy individual payees tab.
- Click a button to follow the instructions related to your selected tab:
These instructions assume that you:
- created an S3 bucket and saved it to an AWS payer or payee account
- created a CloudCheckr account that will ingest the data from your AWS account
- configured your CloudCheckr account using IAM access keys or a cross-acount role
- Log in to the AWS Management Console.
- Click All services, locate the Security, Identity & Compliance section, and select IAM.
- From the dashboard, click Policies.
- Click the JSON tab.
- Replace the JSON text with the following policy:
{
    "Version": "2012-10-17",
    "Statement": [
        {
            "Sid": "Stmt1443712554000",
            "Effect": "Allow",
            "Action": [
                "s3:DeleteObject",
                "s3:GetBucketLocation",
                "s3:ListObject",
                "s3:PutObject"
            ],
            "Resource": [
                "arn:aws:s3:::your-target-S3-bucket-name-here*"
            ]
        }
    ]
} - Replace your-target-S3-bucket-name-here with the name of your S3 bucket.
- Click Review policy.
- Type a name for your policy, and click Create policy.
AWS adds the new policy to the list.
- Return to the Copy Billing Data page in CloudCheckr.
- Verify that you are in the Copy complete report tab.
- Select the Configure S3 bucket to copy into checkbox.
CloudCheckr displays additional options.
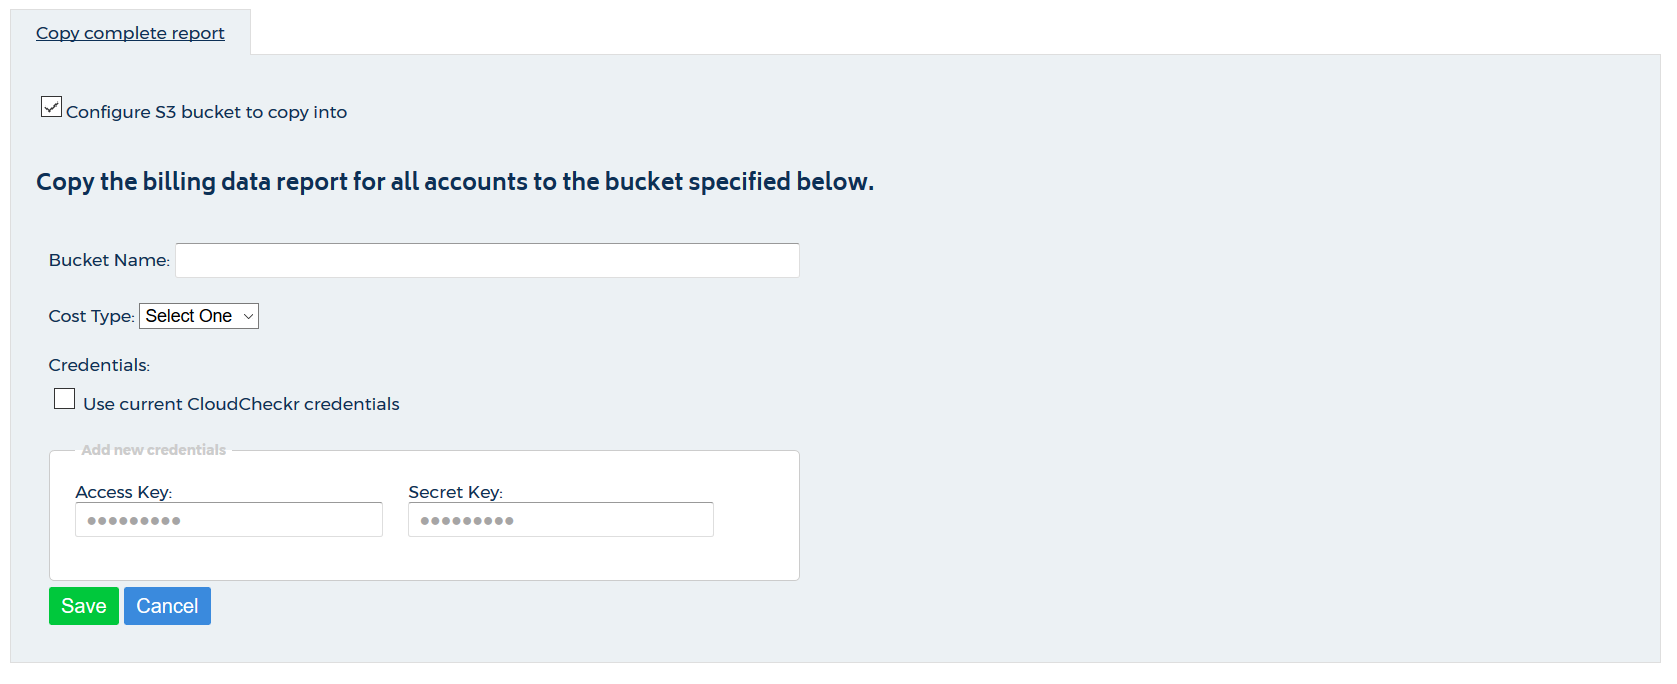
- In the Bucket Name field, type the name of the bucket.
- From the Cost Type drop-down menu, select:
- Amazon to use Amazon Unblended or Blended costs or
- Custom to use CloudCheckr List cost
- Apply the correct credentials.
- If the S3 bucket exists in the AWS account associated with the current CloudCheckr account, select the Use current CloudCheckr credentials checkbox.
- If the S3 bucket exists in a different account, paste the access key and secret key of the IAM user for that account.
- Click Save.
These instructions assume that you:- created an S3 bucket and saved it to an AWS payer or payee account
- created a CloudCheckr account that will ingest the data from your AWS account
- configured your CloudCheckr account using IAM access keys or a cross-acount role
- Log in to the AWS Management Console.
- Click All services, locate the Security, Identity & Compliance section, and select IAM.
- From the dashboard, click Policies.
- Click the JSON tab.
- Replace the JSON text with the following policy:
{
    "Version": "2012-10-17",
    "Statement": [
        {
            "Sid": "Stmt1443712554000",
            "Effect": "Allow",
            "Action": [
                "s3:DeleteObject",
                "s3:GetBucketLocation",
                "s3:ListObject",
                "s3:PutObject"
            ],
            "Resource": [
                "arn:aws:s3:::your-target-S3-bucket-name-here*"
            ]
        }
    ]
} - Replace your-target-S3-bucket-name-here with the name of your S3 bucket.
- Click Review policy.
- Type a name for your policy, and click Create policy.
AWS adds the new policy to the list.
- Return to the Copy Billing Data page in CloudCheckr.
- Click the Copy individual payees tab.
The page provides options to modify existing payees or configure other payees that you want to copy.
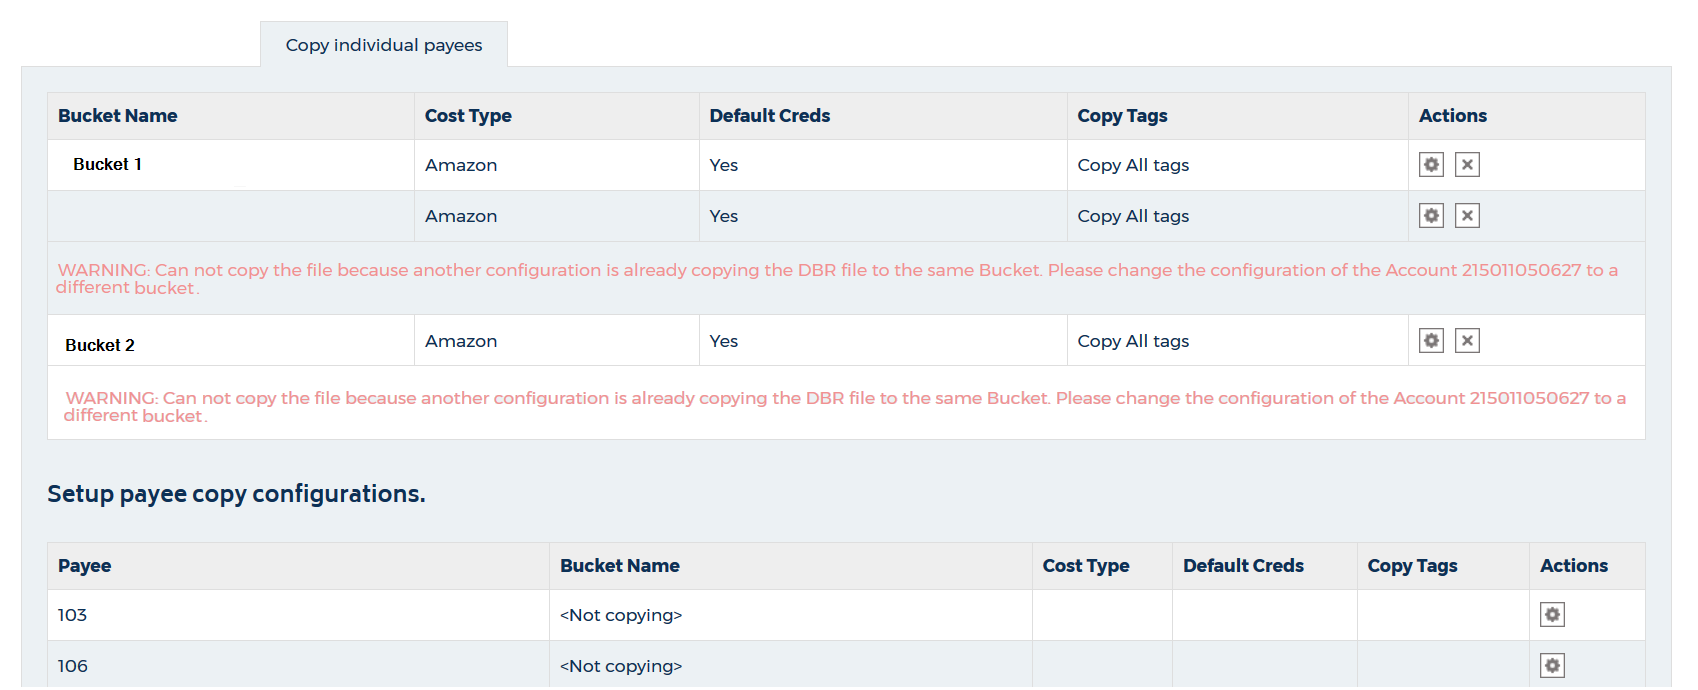
- Select a bucket from the first table.
- Click the Edit icon.
A new page opens—allowing you to modify the configuration.
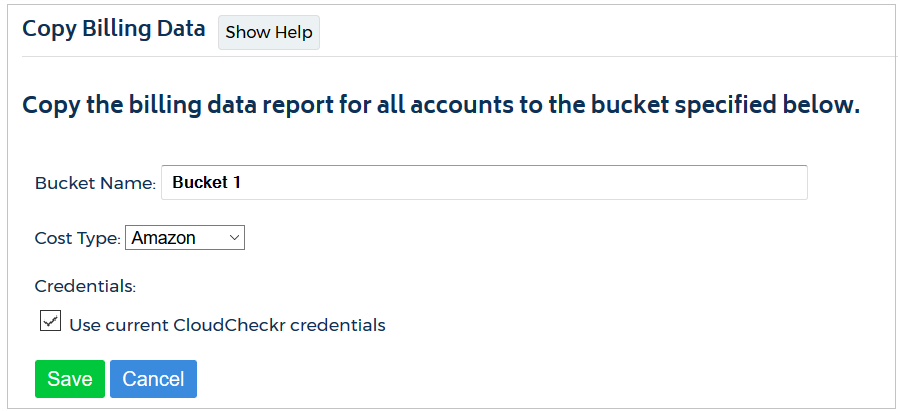
- In the Bucket Name field, change the name of the bucket.
- From the Cost Type drop-down menu, select:
- Amazon to use Amazon Unblended or Blended costs or
- Custom to use CloudCheckr List cost
- Modify your credentials.
- If the S3 bucket exists in the AWS account associated with the current CloudCheckr account, select the Use current CloudCheckr credentials checkbox.
- If the S3 bucket exists in a different account, paste the access key and secret key of the IAM user for that account.
- Click Save.
- From the Setup payee configurations section, select a payee from the table.
- Click the Edit icon.
A new page opens—allowing you to configure a new payee.

- In the Bucket Name field, change the name of the bucket.
- From the Cost Type drop-down menu, select:
- Amazon to use Amazon Unblended or Blended costs or
- Custom to use CloudCheckr List cost
- In the Tags section, select one of these radio buttons:
- Copy only tag columns with data
- Copy ALL tag columns from your payer DBR (even if no data)
- Copy selected tag columns from payer DBR (even if no data)
If you select this radio button, you must also select the tag columns from the list
- Apply the credentials.
- If the S3 bucket exists in the AWS account associated with the current CloudCheckr account, select the Use current CloudCheckr credentials checkbox.
- If the S3 bucket exists in a different account, paste the access key and secret key of the IAM user for that account.
- Click Save.