Configure a Subscription Family in CloudCheckr
- Go to the left navigation pane, and choose Cost > Azure Partner Tools > Configure > Subscription Families.
The Subscription Families page opens.
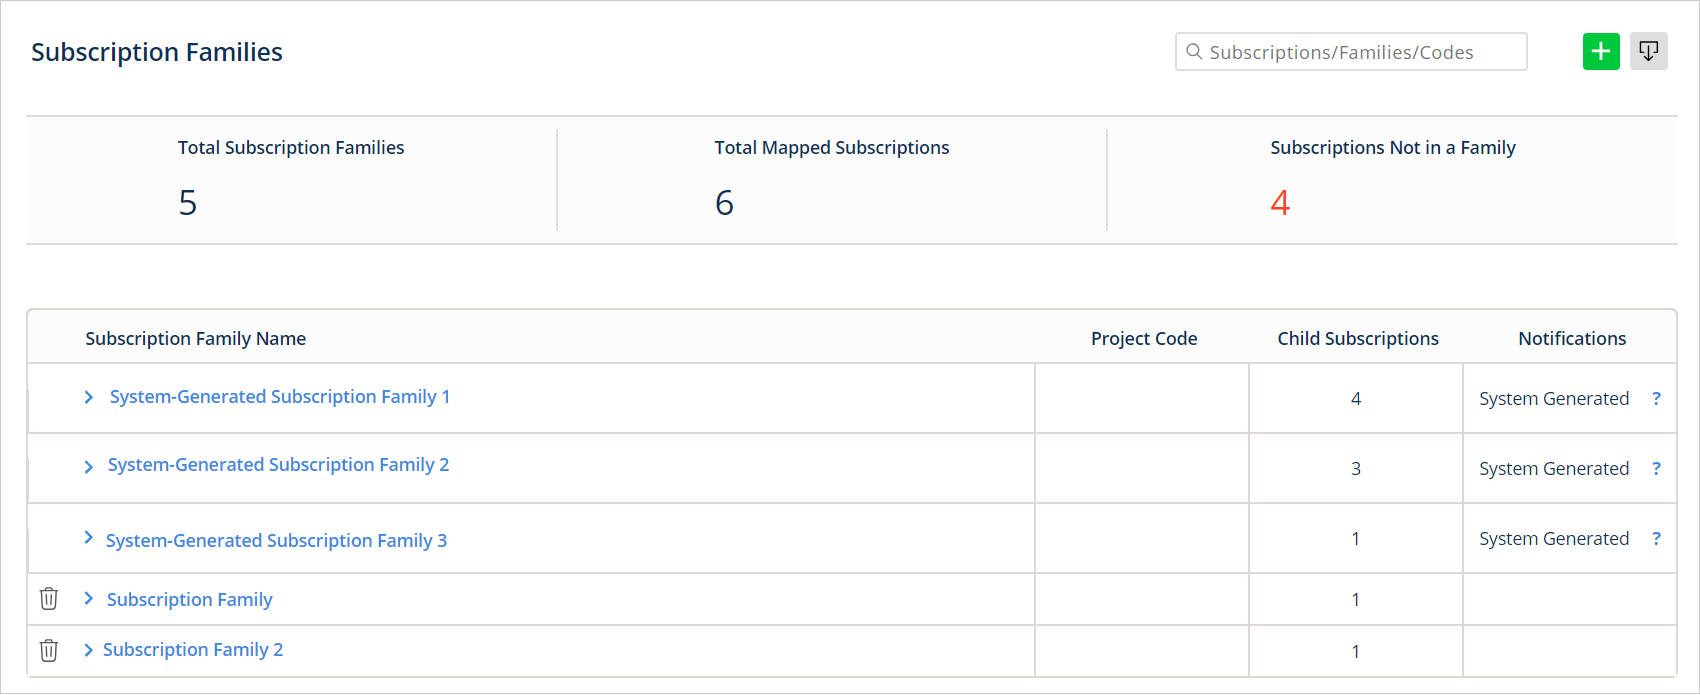
- Click the subscription name to expand the section and see the subscription details.
- Click Configure Subscriptions.
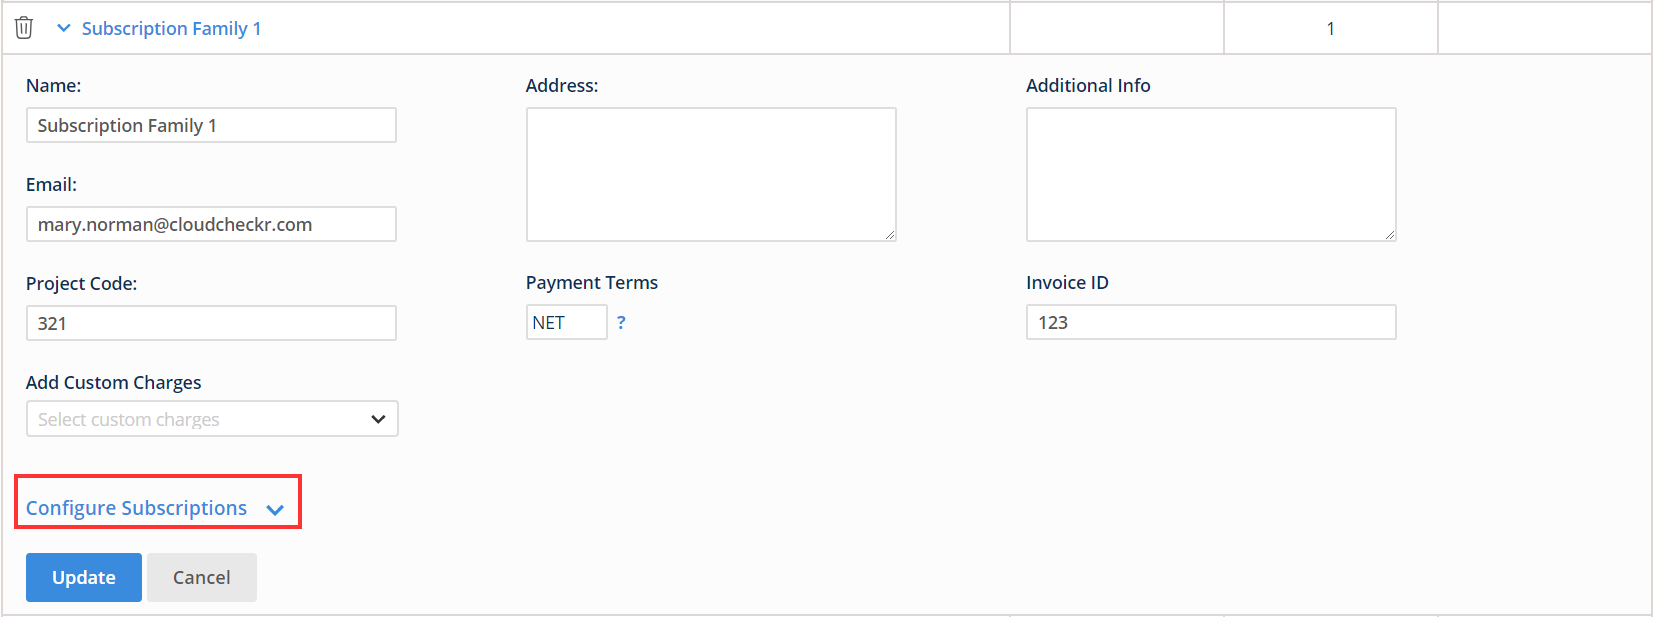
Additional options display.
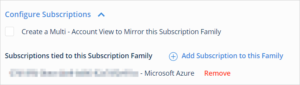
- If you selected the Create a Multi-Account View to Mirror this Subscription Family check box in the Create Subscription Family dialog box, that selection is reflected in this section. This section also shows any Azure subscriptions that are already mapped to this subscription family.
- Click Remove to remove a subscription from the subscription family.
- Click Add account to this Family if you want to add an additional Azure subscription to this subscription family.
The Add Accounts dialog box opens.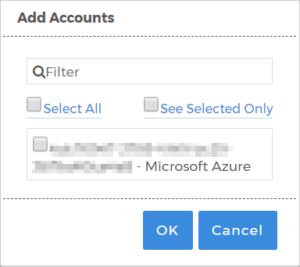
- In this dialog box, you can type a keyword in the Filter text field to search for subscriptions that meet your search criteria, click Select All to select all subscriptions in the list, or click Selected Only to see only the filtered results.
- Click OK.
- When you are done making changes, click Update.