Enable Detailed Billing Reports
Prerequisite: If you are
preparing your account for the first time and you using the Detailed Billing Report (DBR) as your billing source, we recommend that you create your role a cross-account role
manually or
using CloudFormation before you enable your DBR.
By the end of 2019, AWS will deprecate the Detailed Billing Report (DBR) and replace it with the CUR. As a result, the CUR will become CloudCheckr's primary billing method. At this time, CloudCheckr customers can use the DBR or the CUR. For more information,
review the
Transition from DBR to CUR FAQ.
For several years, AWS has provided the DBR as its default billing method. CloudCheckr relies on the DBR billing data to build its cost reports.
Before CloudCheckr can ingest the billing data from your DBR, you will need to:
- enable the DBR in AWS
- verify the S3 bucket where AWS will write the DBR data in CloudCheckr
Procedure
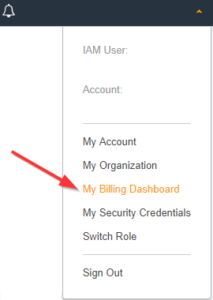
- Log in to the AWS Management Console.
- Go to the menu bar and right-click your account name, and select My Billing Dashboard from the fly-out menu.
- From the Dashboard, click Billing Preferences.
- Under the Cost Management Preferences section, click Detailed Billing Reports [Legacy].
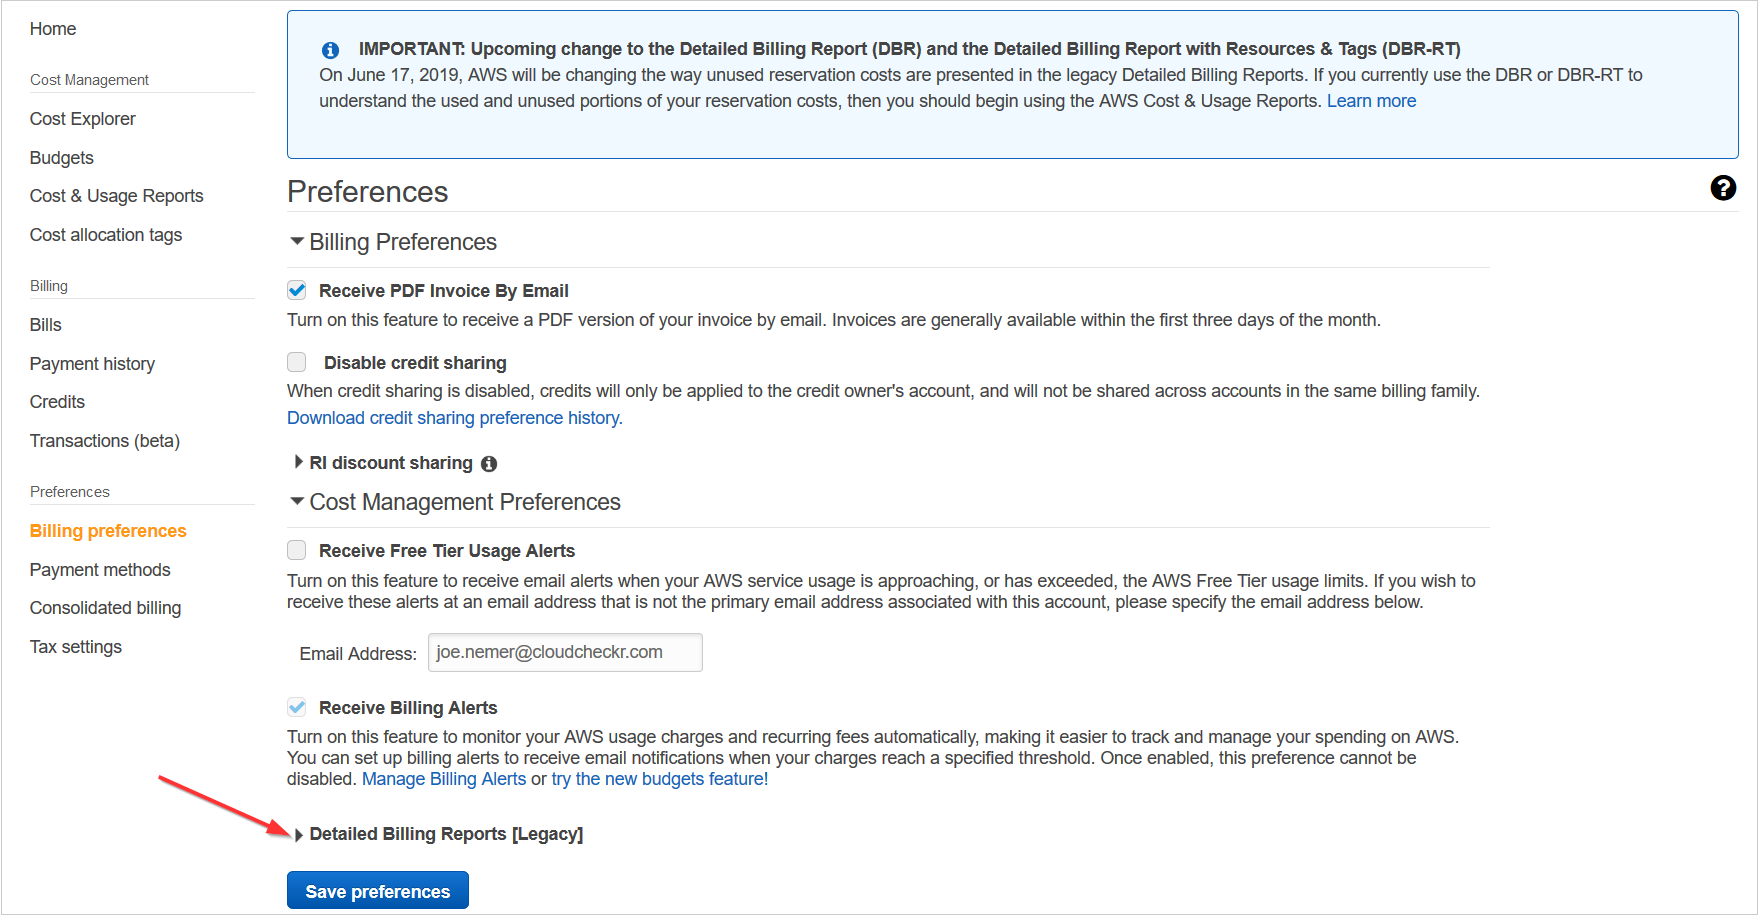
- Verify that the Turn on the legacy Detailed Billing Reports feature...check box is selected.

- To receive billing reports, you must choose an S3 bucket where AWS will write and store your billing data.
By default, AWS selects the S3 bucket associated with the AWS account that you are currently signed into. A green checkbox indicates that the bucket is configured correctly.
- Click Configure.
- First, you need to select an existing S3 bucket from the drop-down list or create a new bucket and select the region where it will be located.
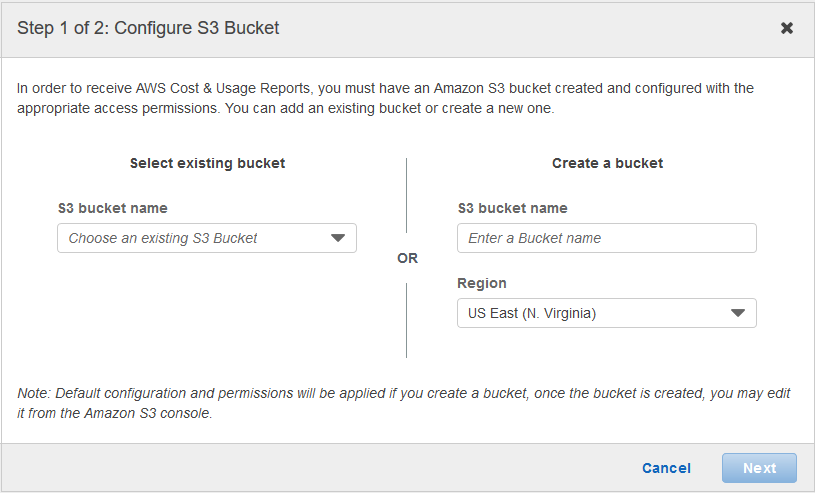
- Click Next.
Now you need to attach a policy that will provide AWS with the permissions to write the CUR files to your S3 bucket.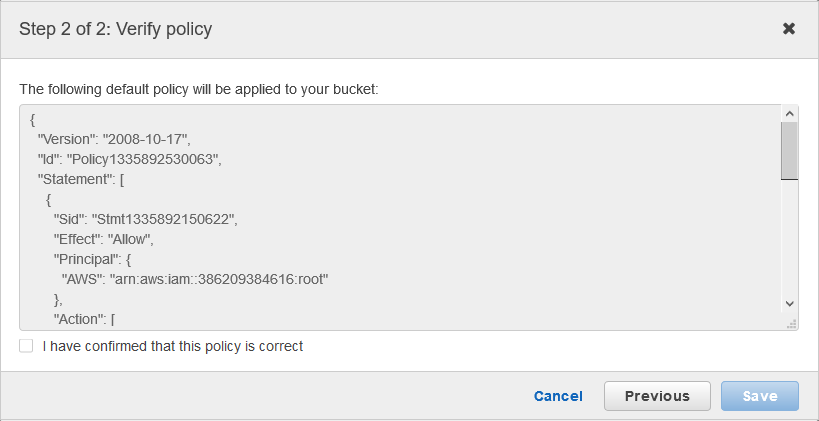 As a safeguard, AWS does not allow you to edit the S3 bucket policy. The default policy has everything that AWS needs to access the S3 bucket and write the CUR files to that bucket.
 - Select the I have confirmed that this policy is correct checkbox and click Save.
AWS displays the new bucket name. The Valid bucket message means that you attached a policy to your S3 bucket and the policy has the required permissions and correct syntax.
- First, you need to select an existing S3 bucket from the drop-down list or create a new bucket and select the region where it will be located.
- Click Configure.
- Scroll down to the Report section. By default, AWS selects all options, which means that CloudCheckr will receive all the AWS billing reports.
 Because CloudCheckr is migrating from the DBR to the CUR, some of the reports identified in the screenshot may not be available for new AWS accounts. As a result, if you are an existing CloudCheckr customer and you have not migrated to the new CloudCheckr platform that uses the CUR, you may have problems ingesting AWS billing data. If this situation applie to you, contact your Technical Account Manager (TAM) to request your migration to the new platform. If you do not have a TAM, please contact Support.Although you can choose not to receive some of these reports, we highly recommend that you keep the Detailed billing report with resources and tags selection. If you only select Detailed billing report, CloudCheckr cannot configure your bill by resources.
 - Click Save preferences.
It can take a few days for AWS to build these reports. Once they are available in AWS, CloudCheckr will use the data to build your cost reports.If you are preparing your account for the first time and you are using the DBR as your billing source, your configuration is now complete.
Changing the S3 Bucket
If you decide at later date that you want to use a different S3 bucket to collect the DBR information from AWS, follow these steps:
- In AWS, identify or create an S3 bucket where you want the DBR to be stored.
- Make sure that CloudCheckr has permissions to access this bucket.
- Launch CloudCheckr.
- If you have already created an account in CloudCheckr, select the account where you need to enable the DBR.
- From the left navigation pane, choose Account Settings > Billing and Usage.
The Billing and Usage Configuration page opens and identifies the account you are configuring and your S3 bucket: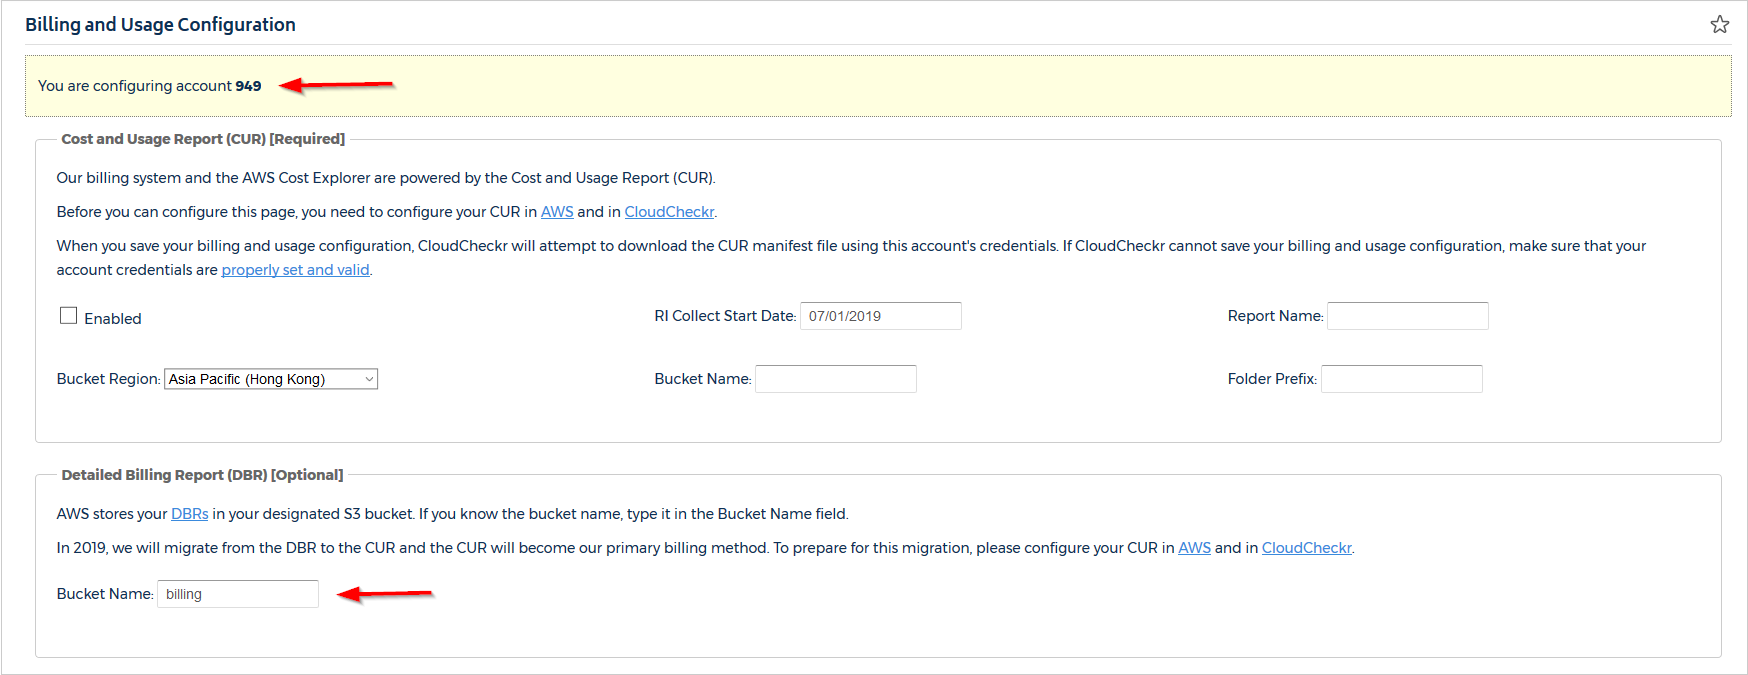
If you have not configured an account in CloudCheckr, the Billing and Usage Configuration screen will have a note at the top prompting you to add your credentials and the Bucket Name field may or may not be populated:
- Replace the name of the existing S3 bucket with a new name. Or, type a name of an S3 bucket if the Bucket Name field is blank.
- Click Save Configuration.