Copy Billing Data (Account Families)
- From Cost > AWS Partners > Configure > Account Families: copy charges from an account family into an S3 bucket
- From Cost > AWS Partners > Files > Copy Billing Data: copy your complete billing report or charges from a payee into an S3 bucket
The Copy Billing Data report allows you to copy charges associated with a selected account family and designate an S3 bucket where AWS updates or reprocesses the Master Payer billing report, it delivers the new raw billing data to your S3 bucket.
CloudCheckr's Copy Billing Report will write the data to an S3 bucket. The Copy Billing Data report retains the same file structure as the AWS version of the report.
This topic shows you how to grant permissions to allow CloudCheckr to access your S3 bucket using the IAM credentials of a selected AWS account or a cross-account role.
Procedure
- On the Account Family page, go the Copy Billing Report section and click
 (Edit).
The Copy Billing Data page opens.
- Select Upload with a CloudCheckr Account or Use a Role for Cross-Account Access and follow the instructions to grant permissions to CloudCheckr.
- created an S3 bucket and saved it to an AWS account
- created a CloudCheckr account you want to associate with the AWS account
- configured your CloudCheckr account using IAM access keys
- Log in to the AWS Management Console.
- Click All services, locate the Security, Identity & Compliance section, and select IAM.
- From the dashboard, click Policies.
- Click the JSON tab.
- Replace the JSON text with the following policy:
{
    "Version": "2012-10-17",
    "Statement": [
        {
            "Sid": "Stmt1443712554000",
            "Effect": "Allow",
            "Action": [
                "s3:DeleteObject",
                "s3:GetBucketLocation",
                "s3:ListObject",
                "s3:PutObject"
            ],
            "Resource": [
                "arn:aws:s3:::your-target-S3-bucket-name-here*"
            ]
        }
    ]
} - Replace your-target-S3-bucket-name-here with the name of your S3 bucket.
- Click Review policy.
- Type a name for your policy and click Create policy.
AWS adds the new policy to the list.
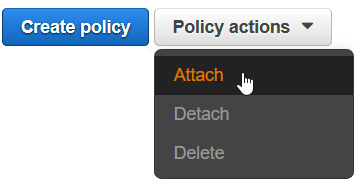
- From the IAM dashboard, click Policies.
- From the list of policies, select the checkbox next to the S3 Bucket policy.
- From the Policies actions menu, select Attach.
The Attach Policy page opens.
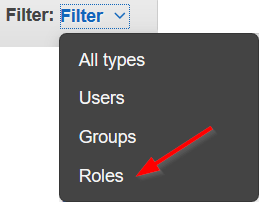
- From the Filter drop-down menu, select Users.
- Select the checkbox next to the user you used to credential your AWS account in CloudCheckr and click Attach policy.
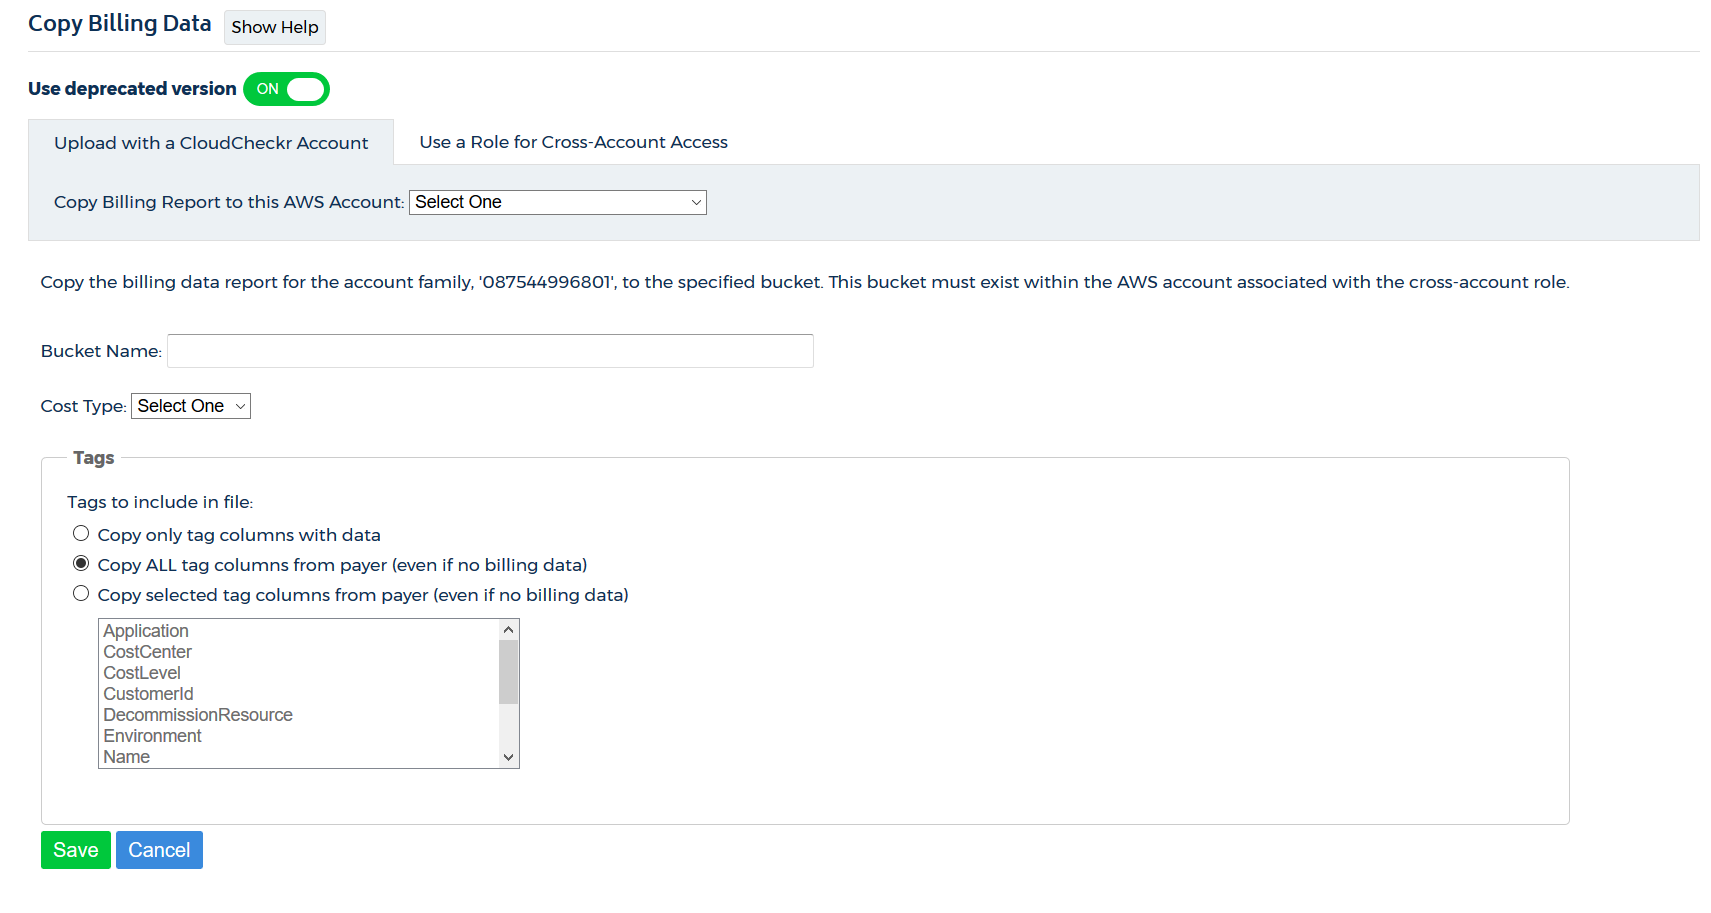
- Return to the Copy Billing Data page in CloudCheckr.
- Verify that you are in the Upload with a CloudCheckr Account tab.
- From the Copy Billing Report to this AWS Account drop-down menu, select an AWS account.
- In the Bucket Name field, type the name of the bucket.
- From the Cost Type drop-down menu, select:
- Amazon to use Amazon Unblended or Blended costs or
- Custom to use CloudCheckr List cost
- In the Tags section, select one of these radio buttons:
- Copy only tag columns with data
- Copy ALL tag columns from your payer DBR (even if no data)
- Copy selected tag columns from payer DBR (even if no data)
If you select this radio button, you must also select the tag columns from the list
- Click Save.
- created an S3 bucket and saved it to an AWS account
- created a CloudCheckr account you want to associate with the AWS account
- configured your CloudCheckr account using a cross-account role
- Log in to the AWS Management Console.
- Click All services, locate the Security, Identity & Compliance section, and select IAM.
- From the dashboard, click Policies.
- Click the JSON tab.
- Replace the JSON text with the following policy:
{
    "Version": "2012-10-17",
    "Statement": [
        {
            "Sid": "Stmt1443712554000",
            "Effect": "Allow",
            "Action": [
                "s3:DeleteObject",
                "s3:GetBucketLocation",
                "s3:ListObject",
                "s3:PutObject"
            ],
            "Resource": [
                "arn:aws:s3:::your-target-S3-bucket-name-here*"
            ]
        }
    ]
} - Replace your-target-S3-bucket-name-here with the name of your S3 bucket.
- Click Review policy.
- Type a name for your policy and click Create policy.
AWS adds the new policy to the list.
- Return to the IAM dashboard and click Policies.
- From the list of policies, select the checkbox next to the S3 Bucket policy.
- From the Policies actions menu, select Attach.
The Attach Policy page opens.
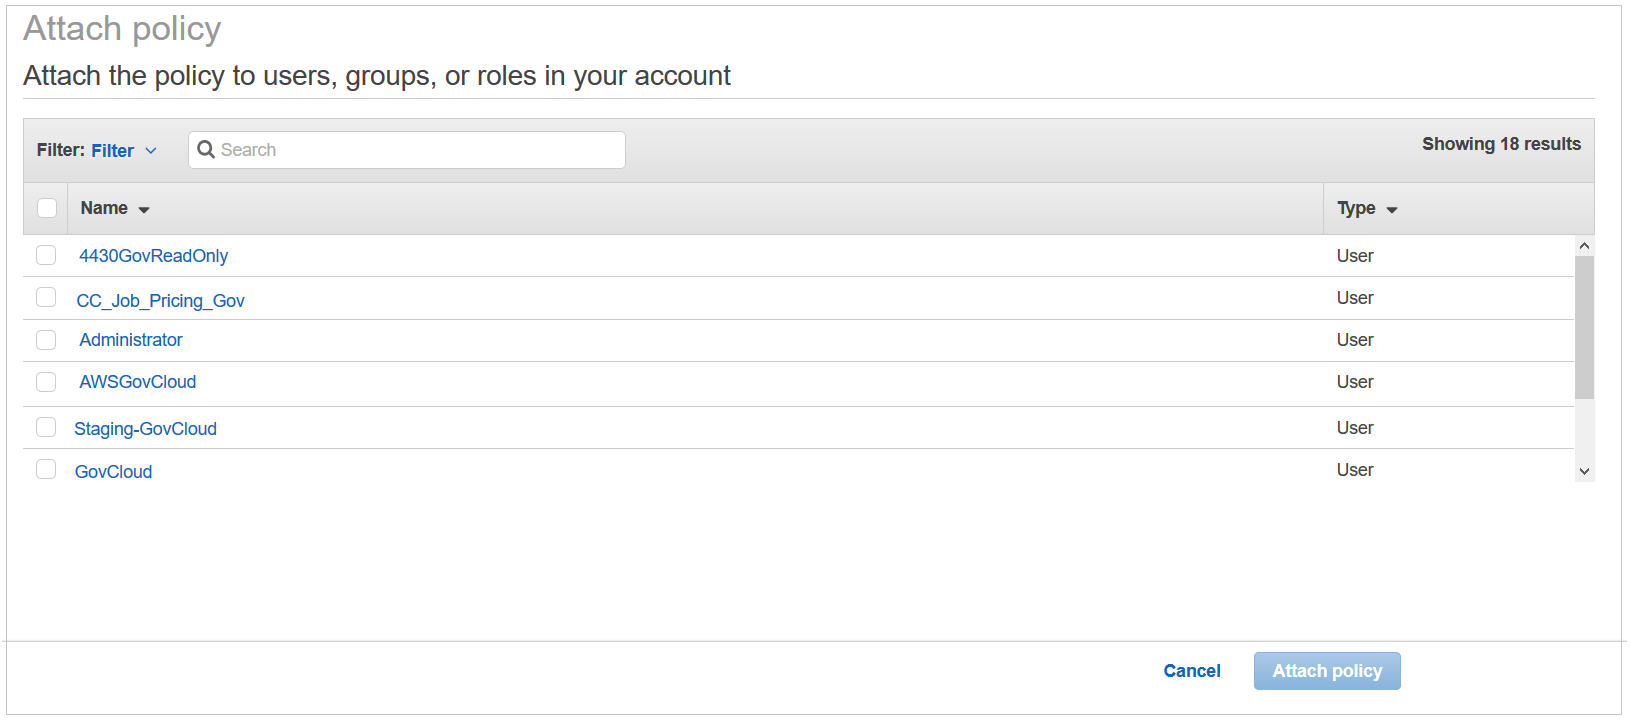
- From the Filter drop-down menu, select Roles.
- Select the checkbox next to your cross-account role and click Attach policy.
- Return to the Copy Billing Data page in CloudCheckr.
- Click the Use a Role for Cross-Account Access tab.
- From the Copy Billing Report to this AWS Account drop-down menu, select an AWS account.
- In the Bucket Name field, type the name of the bucket.
- From the Cost Type drop-down menu, select:
- Amazon to use Amazon Unblended or Blended costs or
- Custom to use CloudCheckr List cost
- In the Tags section, select one of these radio buttons:
- Copy only tag columns with data
- Copy ALL tag columns from your payer DBR (even if no data)
- Copy selected tag columns from payer DBR (even if no data)
If you select this radio button, you must also select the tag columns from the list
- Click Save.