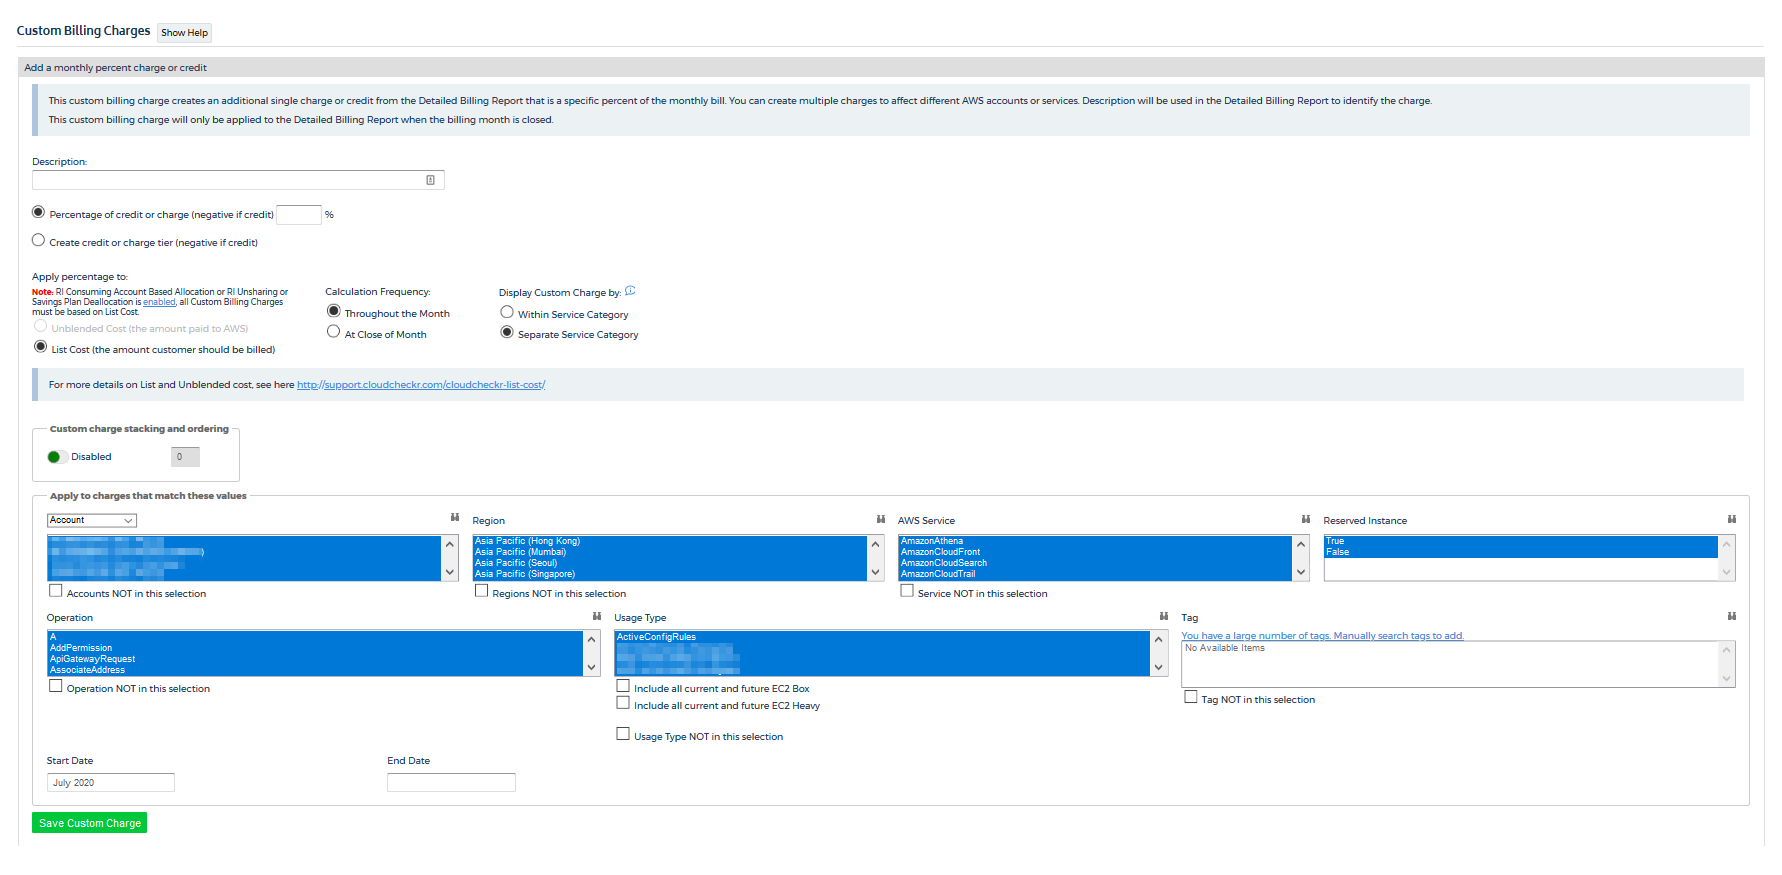
Add a Monthly Percent Custom Billing Charge or Credit
This type of custom billing charge allows you to apply a monthly percent custom billing charge or credit to List costs in selected accounts or services after AWS closes the billing month.
Prerequisite
Options and Procedure
Click a button to learn more about the options that you can configure and to see instructions on how to apply this custom billing charge:
| Option | Action | Example (if applicable) |
|---|---|---|
| Description | Type a description that uniquely identifies the custom billing charge. | 5% discount on EC2 services |
| Percentage of credit or charge (negative if credit) | Type the percentage premium (positive number) or discount (negative number) you want to add to the custom billing charges you apply to selected accounts or services. | A discount of 50% would be -50 |
| Create credit or charge tier (negative if credit) | Allows you to create tiered charges for your customers. If you select this option, CloudCheckr displays the following additional configuration fields: 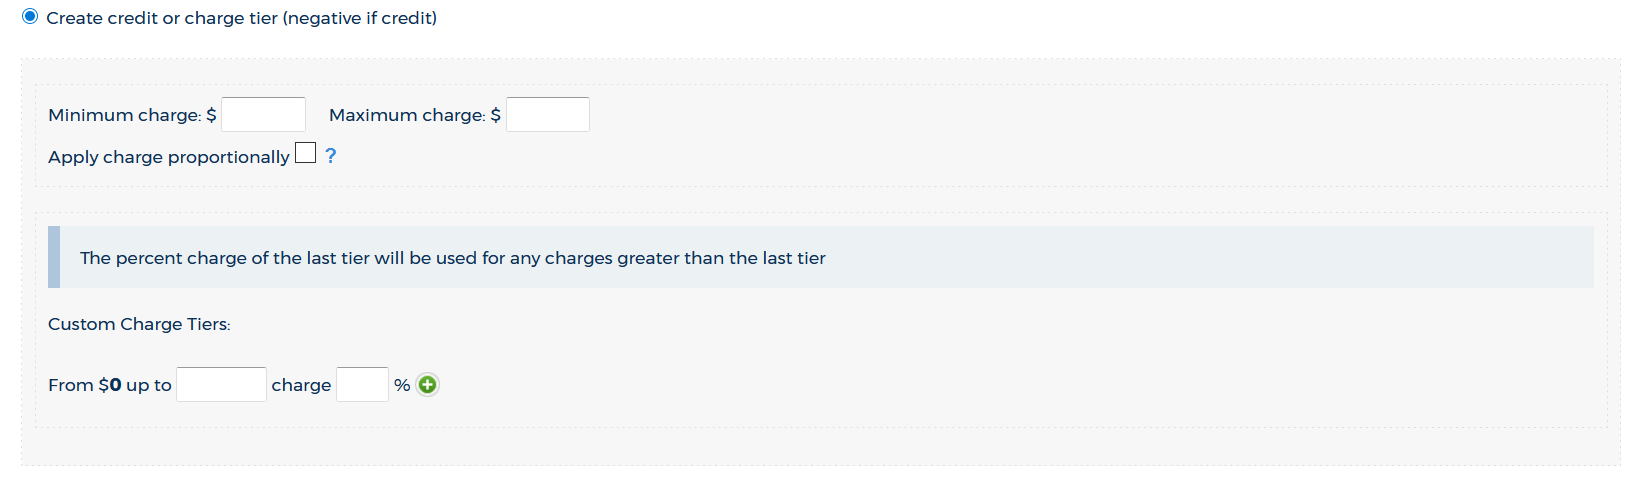
Minimum charge: minimum amount you want to enforce Maximum charge: maximum amount you want to enforce Apply charge proportionally: CloudCheckr will use the total spend of the selected accounts when evaluating a tier's custom billing charge and will assign the final cost to each account proportionally. Custom Charge Tiers: Type the monetary limit and percentage for each tier.
|
You can charge one or more accounts a 5% premium for their first $10,000 spend and a 3% premium on their spend from $10,000 and up. |
| Apply percentage to | Apply the custom billing charge to Unblended cost—the amount that AWS bills a customer—or to List cost—the amount that CloudCheckr bills the customer based on usage and contractual charges. If you are an MSP/Reseller, you must select List cost so that CloudCheckr can modify your customer's costs. If you configured your custom cost to include RI Consuming Account Based Allocation, RI Unsharing, or Savings Plan Deallocation, you must apply List cost to your custom billing charge. Otherwise, you will get an error message.
|
NA |
| Calculation Frequency | Select Throughout the Month to calculate custom billing charges any time there is a change. Customers can view this change in real time. Select At close of Month to only calculate custom billing charges at the end of the month. Customers will only be able to see the final calculation. The frequency doesn't affect the value of the final custom billing charge.
By default, CloudCheckr sets:
|
NA |
| Display Custom Charge by | If you select Within Service Category:
|
If have a 10% charge on EC2 and RDS services, here is how the calculations work: Service Category: CloudCheckr calculates (EC2+RDS).10 and writes a new service category labeled Custom Charge. Separate Service Category: CloudCheckr calculates (EC2.1) + (RDS*.10) and writes those charges to EC2 and RDS respectively. |
| Custom charge stacking and ordering | Allows you to choose the order in which your custom billing charges will take effect. By default, this feature is disabled.Toggle the button and type a number that identifies how you want to stack your custom biling charges. |
You want to apply a 5% charge on all charges and then add another premium on top of that for support charges only. |
| Apply to charges that match these values | Only applies your custom billing charge when the parameters in your billing report match the values you selected for one or more of the following properties:
Select Include all current and future EC2 Box and/or Include all current and future EC2 Heavy if you want the custom billing charge to inherit these usage types automatically any time AWS introduces a new usage type.
|
All accounts in the Asia Pacific (Sydney) region that used the Amazon CloudTrail service |
| Start/End Date | Choose a month and year from the Date Picker (required). If you want the custom billing charges to continue indefinitely, do not choose an end date. If the start date is any date in the past, you will need to reload the billing report for the months where you want to apply the custom billing charge. |
December 2017 |
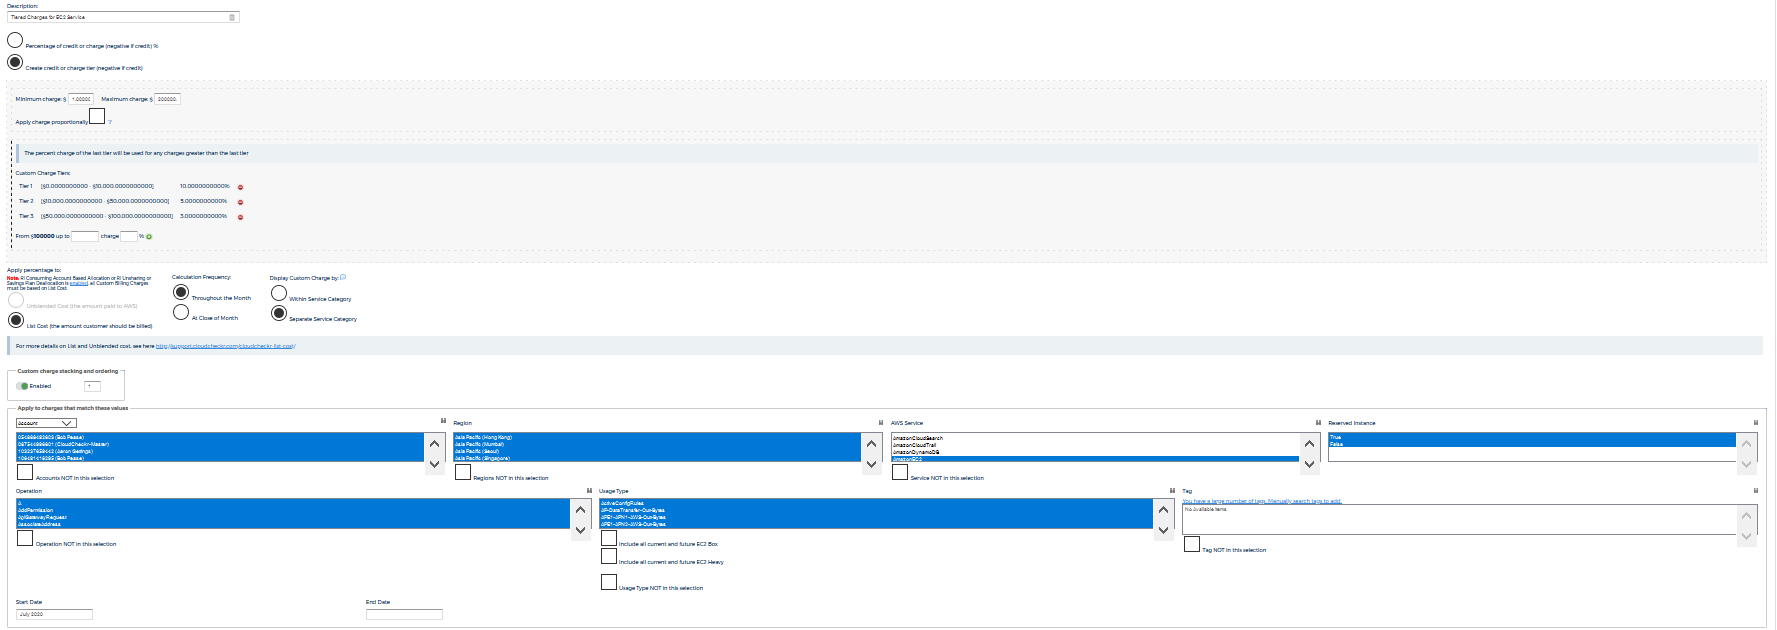
For our use case, let's say we want to create three tiered custom billing charges that go down in percentage the more the customer spends. Follow this procedure to see how to configure a custom billing charge that meets these requirements:
- Launch CloudCheckr.
- Select your account from the Accounts List page.
- From the left navigation pane, choose Cost > AWS Partner Tools > Configure > Custom Billing Charges.
- On the Custom Billing Charges page, click + New Custom Charge.
- Click Add a monthly percent charge or credit.
- Under Description, type Tiered Charges for EC2 Service
- In the Minimum Charge field, type 1 and in the Maximum Charge field, type 200,000
- In the Custom Charge Tiers section:
- Type 10000 in the first field, type 10 in the second field, and click
 to add Tier 1.
 - Type 50000 in the first field, type 5 in the second field, and click to add Tier 2.
- Type 100000 in the first field, type 3 in the second field, and click to add Tier 3.
This is the last tier. Any charges more than $100,000 will continue to have a 3% charge.
- Type 10000 in the first field, type 10 in the second field, and click
- In the Apply percentage to section, select the List Cost radio button.
- In the Start Date field, select July 2020 from the Date Picker, and leave the End Date field blank.
Here is what the screen looks like after configuration:
- Click Save Custom Charge.
CloudCheckr returns to the Custom Billing Charges page and displays the new custom billing charge:
