Use CloudCheckr CMx Access Tokens to Manage Existing API Calls
In our existing CloudCheckr product, you use access keys when you run API calls to get your data programmatically.
The new API interface in CloudCheckr CMx uses access tokens—which provide better security, more consistent authorization management, and the ability to access multiple projects and accounts.
And now, you can reap the technological and security benefits of access tokens by using them to run API calls in our existing CloudCheckr product.
This worfklow shows you how to:
- configure the CloudCheckr CMx permissions and role you need to access the existing CloudCheckr API
- create the CloudCheckr CMx Client ID and access key that are required to generate the access token
- run one of the existing API calls using that access token
Workflow
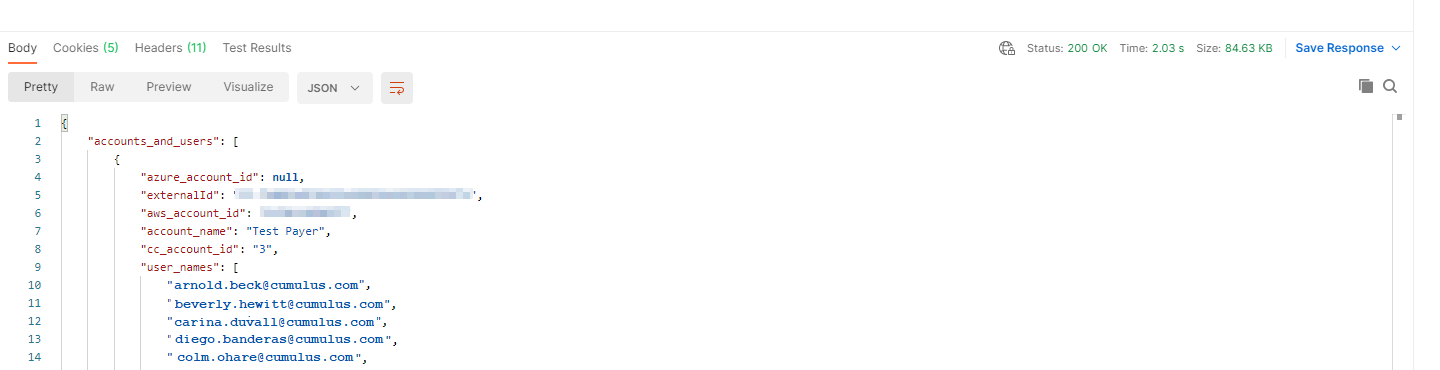
For the purposes of this workflow, let's run the API call, Get Accounts V4, in our existing CloudCheckr product using an access token that we generate in CloudCheckr CMx.
Click the drop-down boxes to review and follow each step:
To use an access token in our existing CloudCheckr product, you must first ensure that you have access to the following permissions:
ExecuteLegacyAdminApisExecuteLegacyAccountApis
In this procedure, we will create a permission set that contains those required permissions.
- Launch CloudCheckr CMx.
- Click the Settings icon.

- From the fly-out menu, select Access Management > Permission Sets.
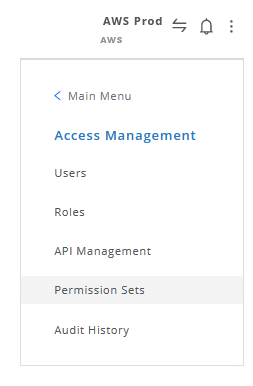
The Access Management page opens with the Permission Sets tab selected by default.
- Click the + NEW button.
The Create Permission Set sub-drawer opens.
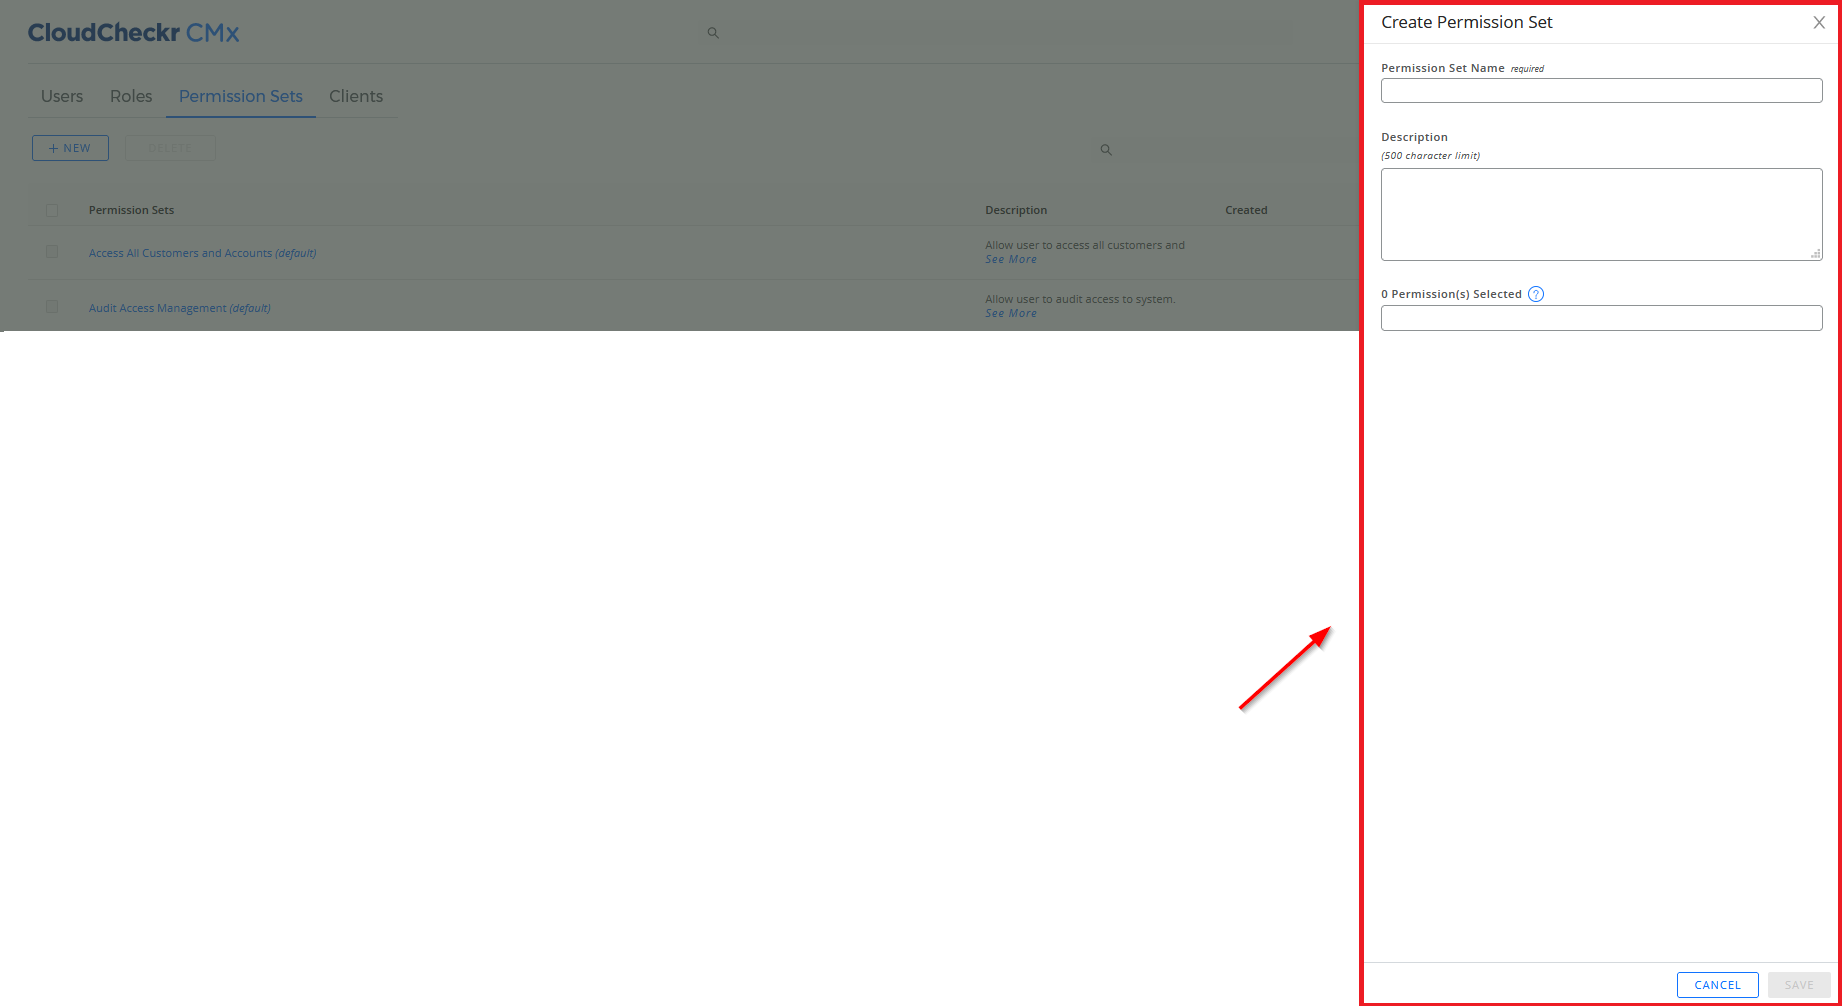
- Type a name for the permission set.
- Type a description for the permission set if applicable.
- From the Permissions drop-down list, select ExecuteLegacyAdminApis and ExecuteLegacyAccountApis.
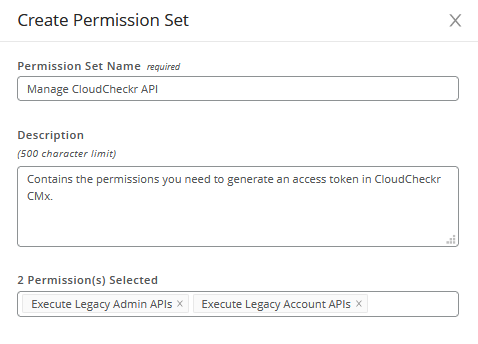
Here is an example of what the screen would look like after applying the details of our use case:
- Click SAVE.
A pop-up message indicates that CloudCheckr CMx created your permission set successfully.
Now that you have created your permission set, you must assign the permission set to a role.
Rather than use one of the default roles in CloudCheckr CMx, we will create a new role specifically for running API calls using access tokens.
- On the Access Management page in CloudCheckr CMx, click the Roles tab.
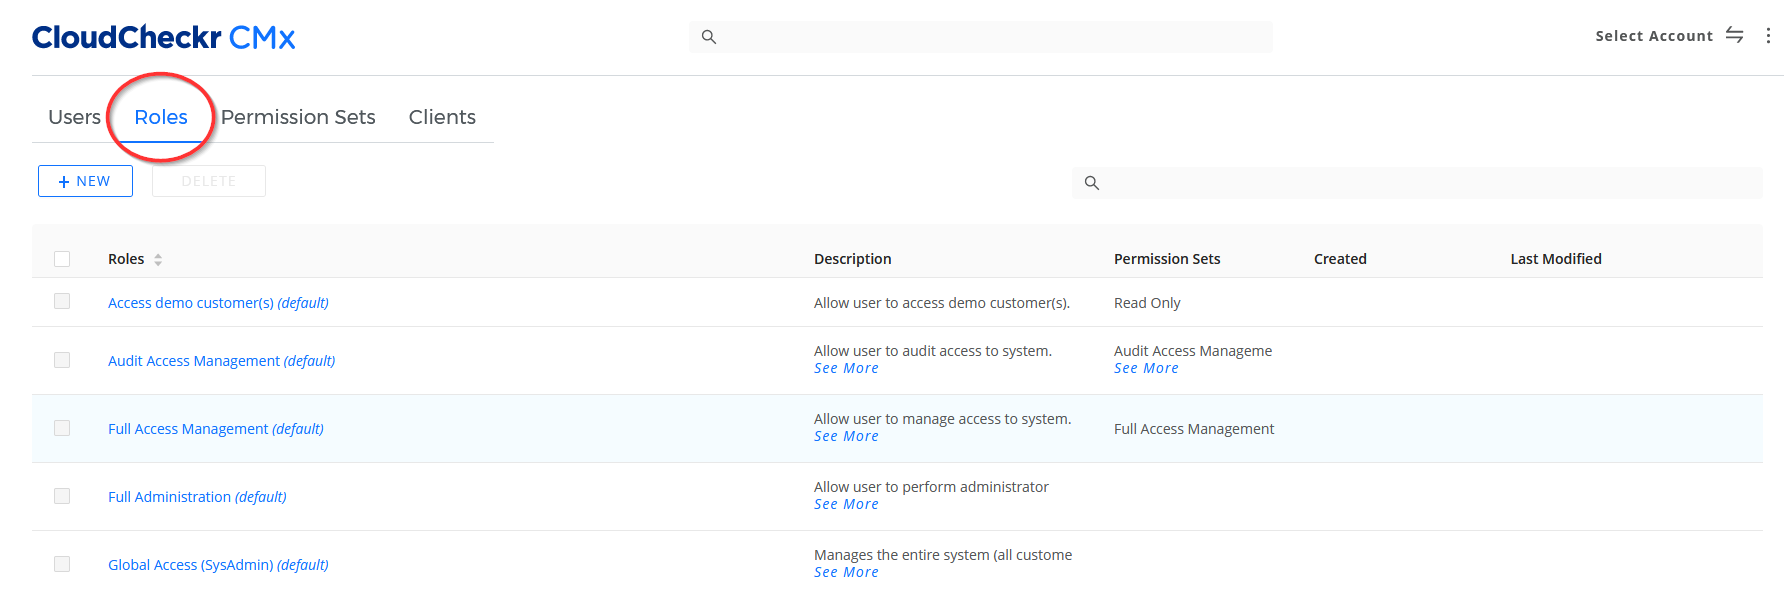
- Click the + NEW button.
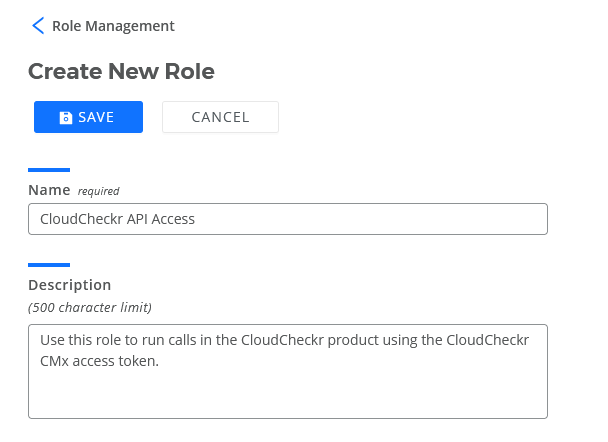
- On the Create New Role page, perform the following actions:
- Type a name for the role.
- Type a description for the role.
Here is an example of what the screen would look like after applying the details of our use case:
- Click SAVE.
You must save the new role before you can define any remaining role characteristics.
- Under Assets, click the Permission Sets tab.
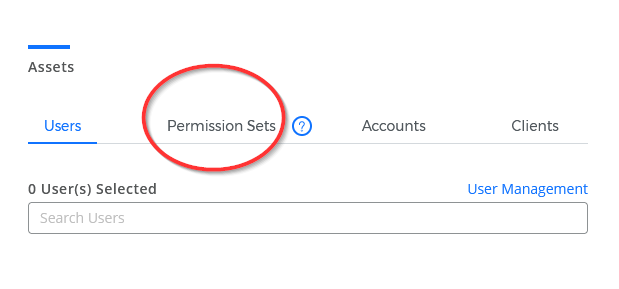
- Select one or more permission sets from the list.
For the purposes of this procedure, we selected our new permission set, Manage CloudCheckr API.
- Click SAVE.
To generate an access token, you need a Client ID, which CloudCheckr CMx creates automatically when you create a client.
A client is a service that queries the CloudCheckr API and returns data based on that request. For example, you can create a client that queries the CloudCheckr API to return cost data from your Production environment.
- Click the Clients tab.
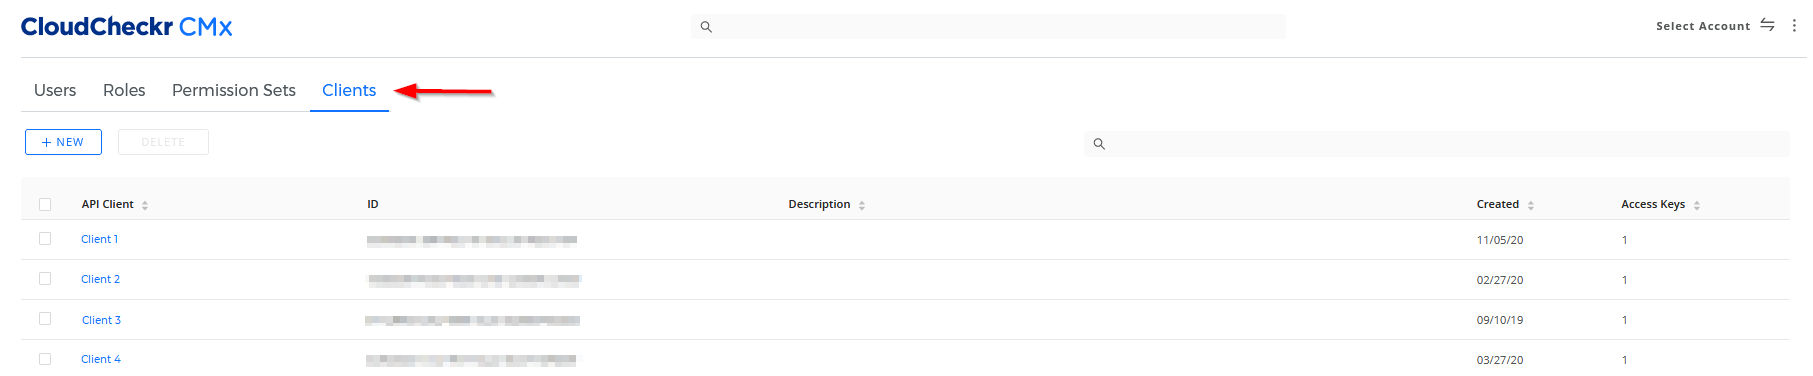
- Click the + NEW button.
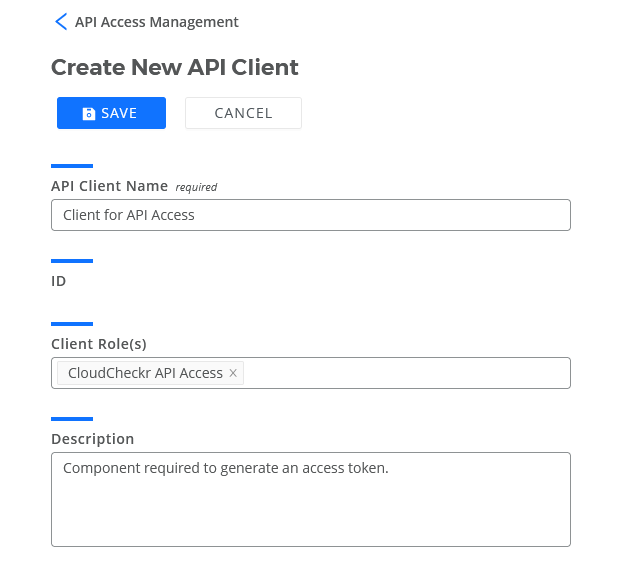
- On the Create New API Client page, perform the following actions:
- Type a name for the client.
- From the Client Role(s) drop-down list, select the role(s) you want to assign to the client.
For the purposes of this procedure, we selected our new role, CloudCheckr API Access.
- Type a description for the client.
Here is an example of what the screen would look like after applying the details of our use case:
- Click SAVE.
CloudCheckr CMx saves the client, generates a unique Client ID for that client, and enables the + NEW button under the Access Keys section:
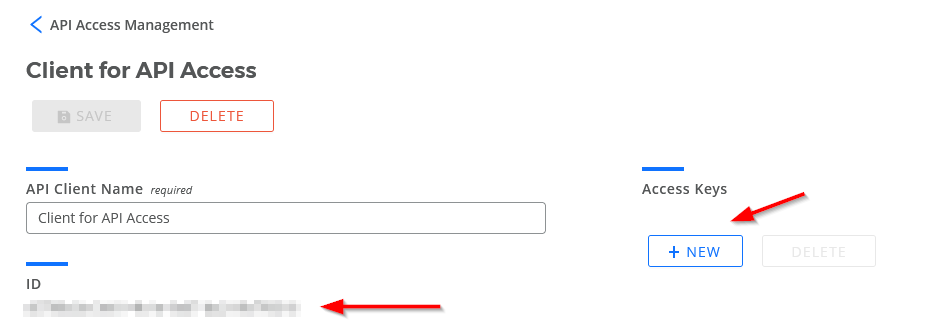
- Copy and save the Client ID to a secure and easily accessible location.
In addition to the Client ID, you will also need an access key—a unique ID that gets passed to the API—before you can generate the access token.
The access key is equivalent to the client secret referenced in many modern, scalable API platforms.
- Under Access Keys, click the + NEW button.
- In the Create New Access Key dialog box, type a name for the access key.
- Click the
 and
and  arrows or type a number that identifies the number of days you can use the access key before it expires.
Here is an example of what the screen would look like after applying the details of our use case:
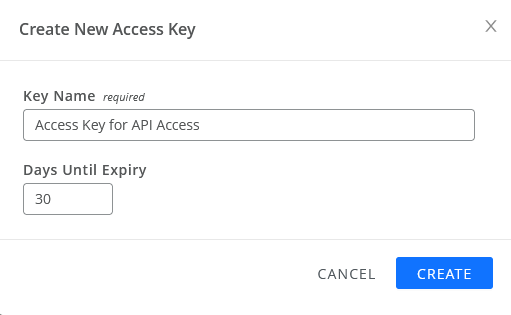
- Click CREATE.
A pop-up indicates that CloudCheckr CMx created your access key.
You must save this access key immediately since you won't be able to access it again. - Click COPY KEY TO CLIPBOARD or copy the access key to a secure location of your choosing.
- Click CLOSE.
Now that you have a Client ID and an access key, you can generate the access token—also known as the bearer token.
The access token is the critical piece of data that all CloudCheckr CMx API calls will use for authentication.
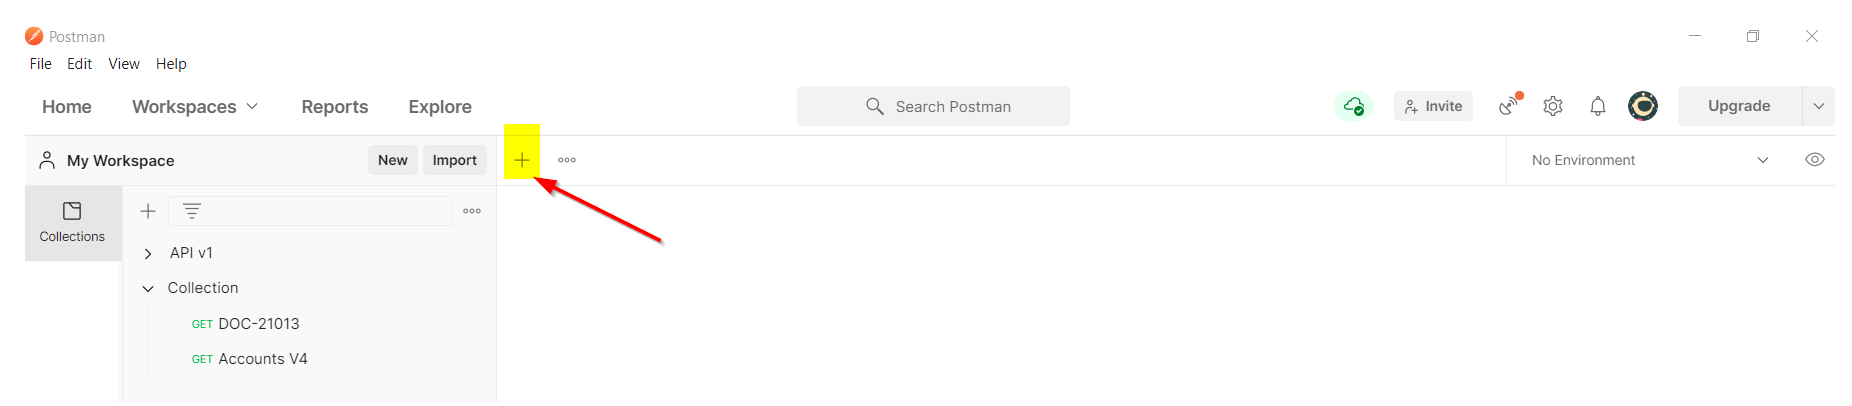
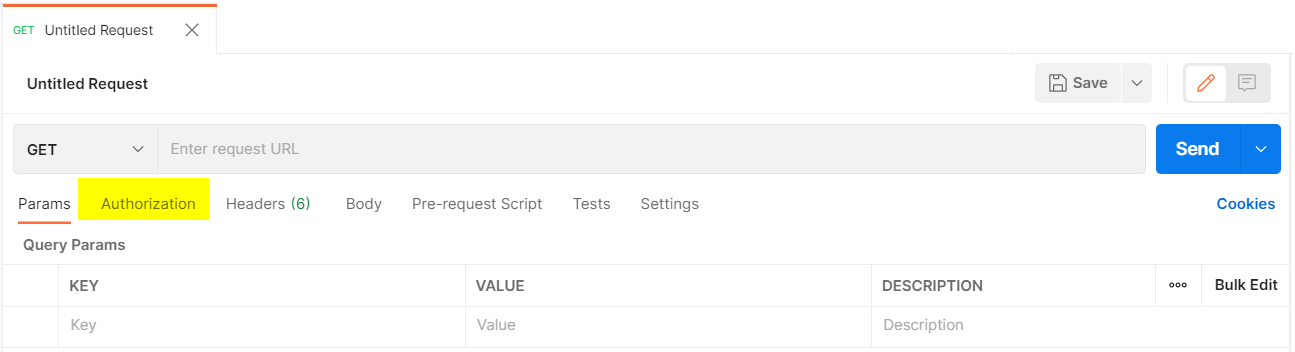
- Launch Postman.
- Click + to create a new request.
- Click the Authorization tab.
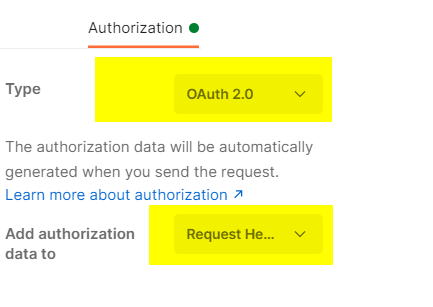
- From the Type drop-down menu, select OAuth 2.0.
Below the Type section, Postman displays the Add Authorization data to drop-down menu.
Leave the default selection, Request Header:
The right pane displays instructions on how to generate a token:
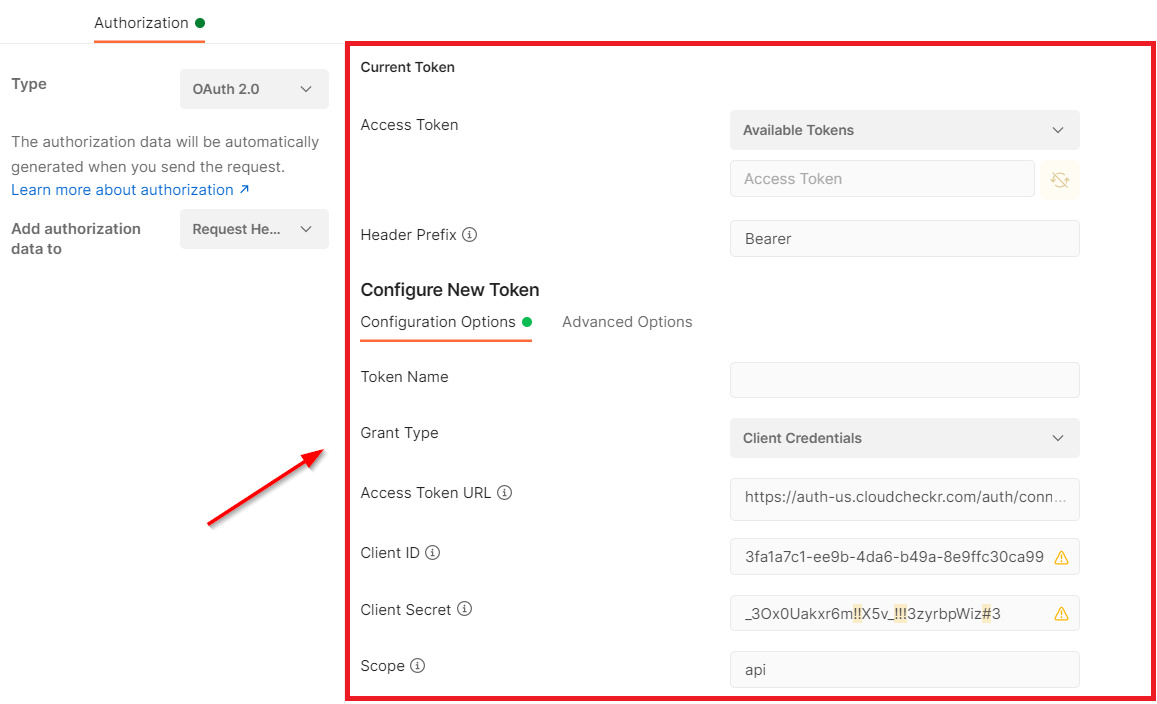
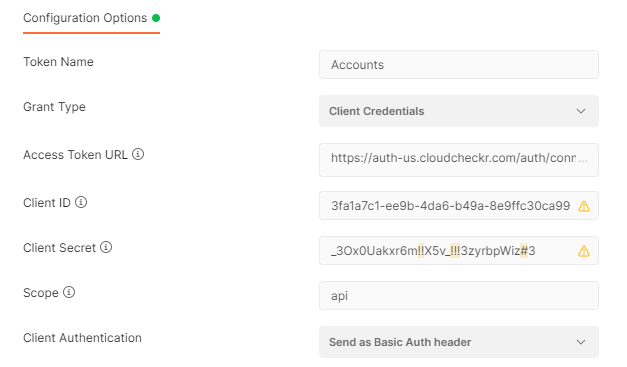
- Under Configuration Options, provide the following information:
Field
VALUE
Token Name
a unique name for your token
Client ID
the unique Client ID you created in Step 3: Create a Client
Client Secret
the unique access key you created in Step 4: Create an Access Key
Scope
the range of access you are requesting; for this procedure, we will use api
Client Authentication
Send as Basic Auth header
Here is an example of what the Postman data looks like using the values from our use case:
- Click Get New Access Token.
- From the MANAGE ACCESS TOKENS dialog box, click Use Token.
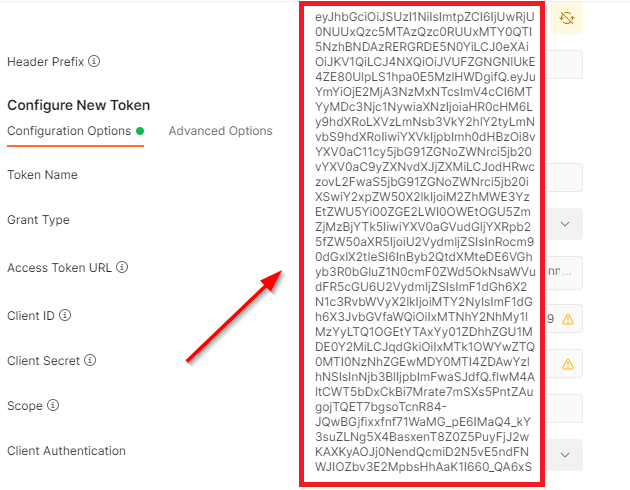
Postman adds the access token to the configuration options:
 For an alternative way to generate the access token, see Step 3: Generate the Bearer Token in the Configure CloudCheckr CMx API topic.If you get an error in your response, see the Troubleshoot a 400 Bad Request section in the Configure CloudCheckr CMx API topic.
Now that you have an access token, you can run as many calls as you want in the existing CloudCheckr API—as long as you keep in mind that the access token will expire. Typically, an access token expires within an hour, so you will have to create a new access token when you go beyond that time limit.
For this procedure, we will show you how to generate a response for the existing CloudCheckr API call, Get Accounts V4, in Postman.
- In the CloudCheckr API documentation, locate the existing request example for your call.
Here is the request example for Get Accounts V4:

- Return to Postman.
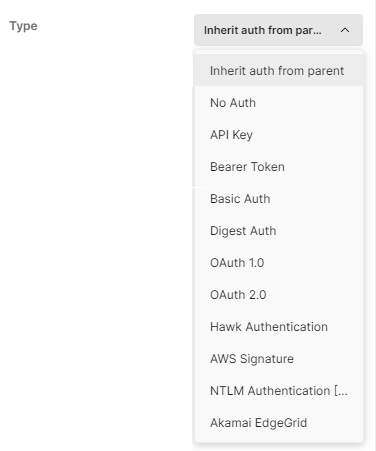
- In the Authorization tab, select Inherit auth from parent or No Auth from the Type drop-down menu.
- Click the Body tab and select the None radio button.
- Click the Params tab.
- Copy and paste the API URL from the API documentation into the top blank field.
In our example, the API URL is line 2 in the Request Example:
https://api.cloudcheckr.com/api/account.[json|xml]/get_accounts_v4?access_key=[access_key] - Under Query Params:
- In the KEY field, type access_key
- In the VALUE field, type bearer, press the Space bar, and paste the access token.
Your screen will look similar to our use case; notice how Postman automatically populates the URL with the access token information:

- Click Send.
Postman will display the response in the bottom pane: