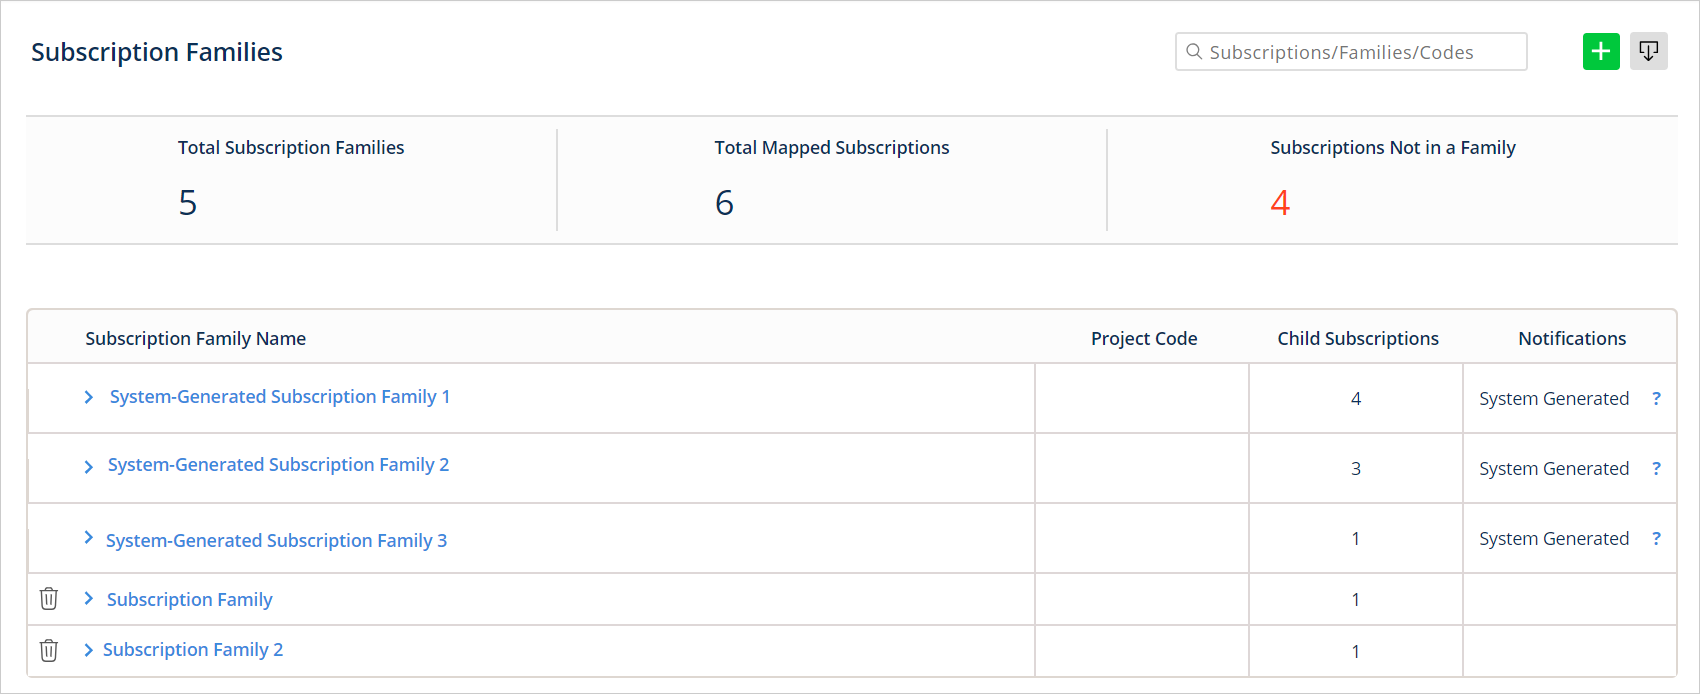
Create a Subscription Family in CloudCheckr
- Go to the left navigation pane, and choose Cost > Azure Partner Tools > Configure > Subscription Families.
The Subscription Families page opens.
 >
>
- Click
 (Create Subscription Family).
- From the fly-out menu, select New Subscription Family.
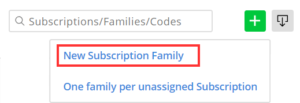
The Create Subscription Family dialog box opens.- Click
(Create Subscription Family).
- From the fly-out menu, select One family per unassigned Subscription.
The application will create a new subscription family for each account that is not already part of an existing subscription.
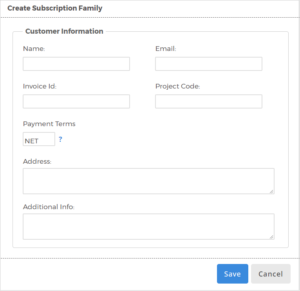
- Click
- Populate the dialog box with the customer information:
Name
Description
Name
The name of the subscription family, which will display anywhere in CloudCheckr that references subscription families (such as the Invoice Generator).
Email
A contact email for the subscription family.
If using the Scheduled Invoice functionality within the Invoice Generator, CloudCheckr will automatically email the invoice to this address.Invoice Id
A user-defined Invoice Id.
The Subscription Families screen allows you to mass-update these IDs, so they can be modified, in bulk, each month. The Invoice Id will show on any generated invoice.Project Code
User-defined number that represents an internal tracking number, project name, or chargeback code.
This code is not related to the cloud provider and is just an internal code that you can use to easily find your project within the application. It is limited to 20 characters and accepts alphanumeric values and symbols.Payment Terms
A two-digit value that represents the payment terms for the account family. The value is used to create invoices to populate the due date.
You must provide a numeric value or leave this field blank. When you provide a value, it will override what you selected in the Invoice Generator.The invoice generator assigns default payment terms, but this field allows you to override those terms and provide payment terms specific to the subscription family.Address
The address for the customer being created within the subscription family, wihich will also display on any generated invoice for this subscription family.
Additional Info
Customer-facing notes or information you would like to display on the generated invoices.
Subscriptions
Allows you to choose which Azure subscriptions you want to map to the subscription family.
This will only display subscriptions that are currently not part of any other subscription family. By default, the application will prevent you from being able to add a single Azure subscription to multiple subscription families.If you need this capability, please contact support@cloudcheckr.com.Create a Multi-Account View to mirror this Subscription Family
Enables the application to automatically create a Multi-Account View (MAV) consisting only of the subscriptions that are part of this subscription family.
If you delete the subscription family, the MAV will also be deleted. - Click Save.
The new subscription family is listed in the table on the Subscription Families page.
- Click the new subscription family name to view the details. Notice that the application auto-populated the fields with your information.
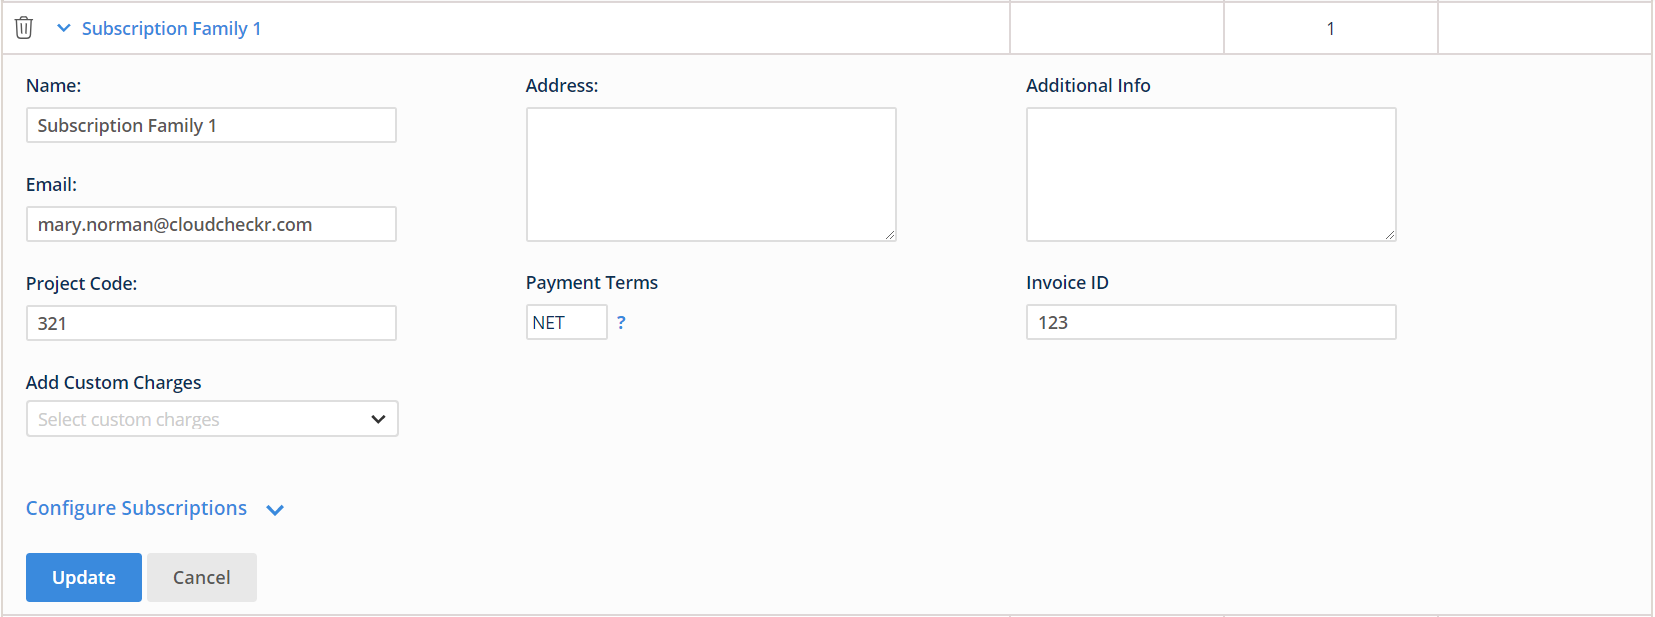
- Click Configure Subscriptions to modify your settings. Review the Configure Subscriptions topic for more information.
- Click Update.