The integration with ServiceNow allows you to configure email notifications that you can receive daily or any time there is a change to a Best Practice Check or alert.
To learn how to configure your integration with ServiceNow, review the procedure.
Procedure
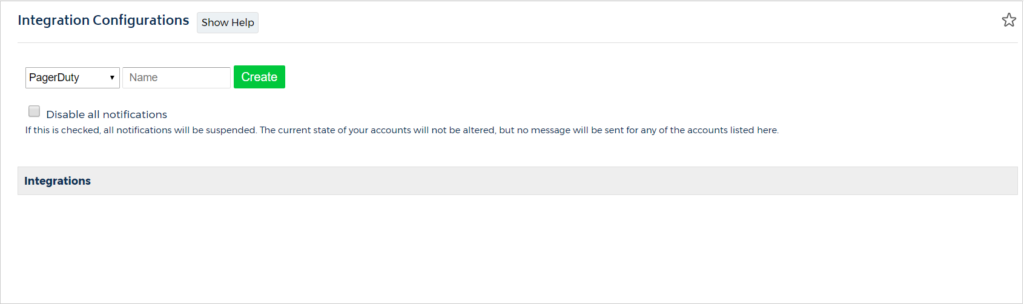
From the left navigation bar, choose Account Settings > Integrations > Configurations.
The Integration Configurations page opens.
From the drop-down menu, select ServiceNow.
In the blank text field, type the name of the ServiceNow account.
Click Create.
A message indicates that your integration was created successfully.
Click OK.
The page displays the new integration.
Click
(green plus sign) to display the details of the ServiceNow integration.
The ServiceNow integration expands.
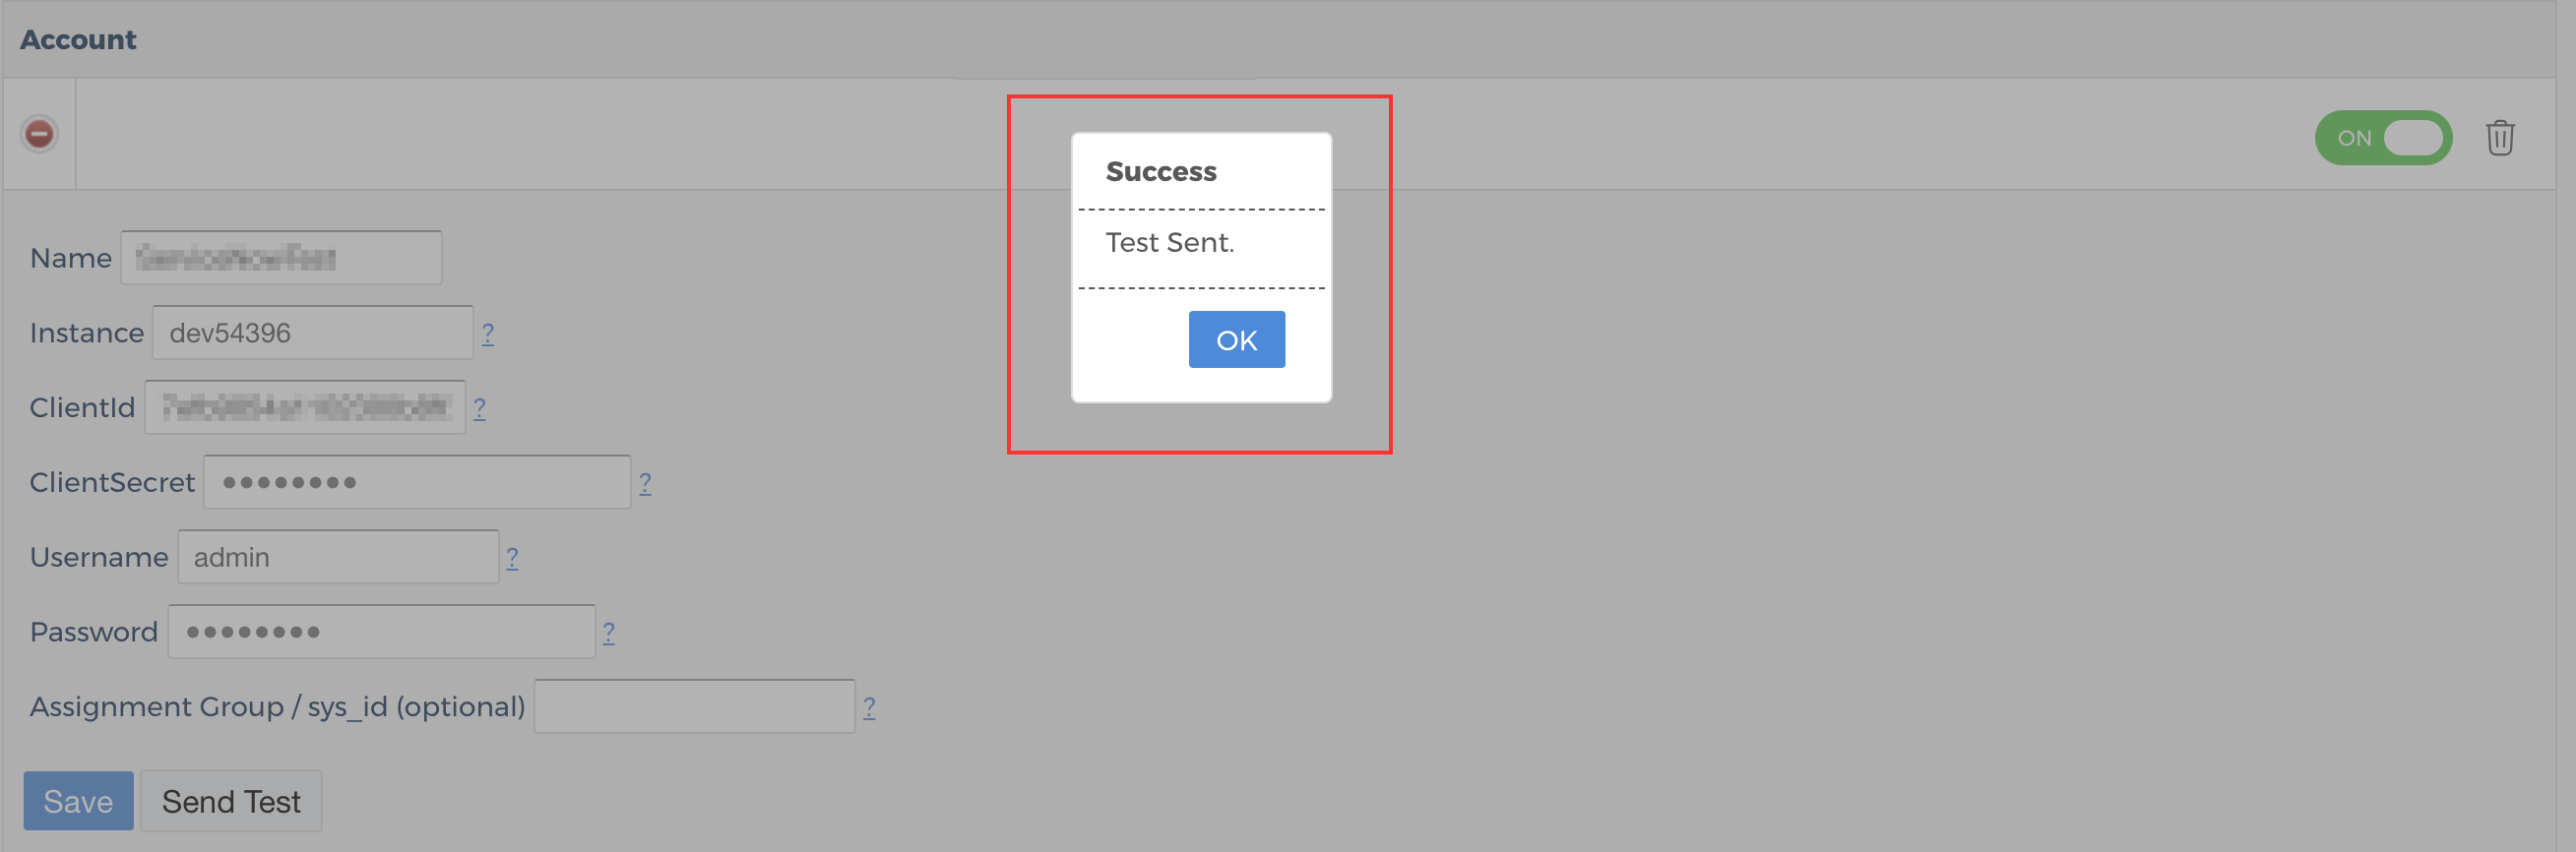
Notice the Account section. Here is an explanation of each data field:
Parameter
Description
Name
Name of the integration
Instance
Your company's ServiceNow instance; Corresponds to subdomain in the URL
For example, if the full URL is https://dev54396.service-now.com, the subdomain is dev54396.
ClientId
Unique ID that the application uses when requesting an access token
ClientSecret
Secret string shared by the application and the instance to authorize communication
Username
Username of the ServiceNow instance
Password
Password of the ServiceNow instance
Assignment Group/sys_id (optional)
A pool of agents or vendors from which you can choose one to complete a work order task.
To use an assignment group, you must get the sys_id from ServiceNow.
Navigate to the group record and right-click the header.
From the fly-out menu, select Copy sys_id to copy it to the clipboard.
Type a name for the application in the first field.
The next steps will show you how to retrieve the account data from ServiceNow.
Launch ServiceNow.
You may need to reset the password when you first log in to ServiceNow.
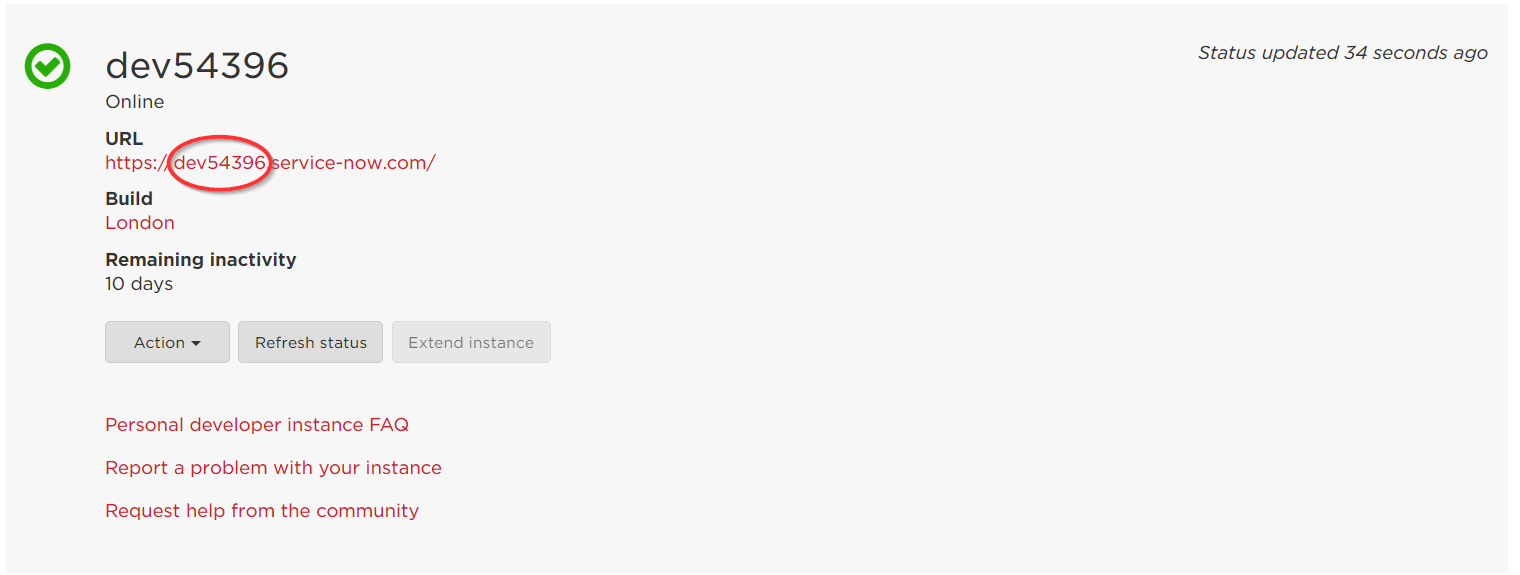
Navigate to your instance in ServiceNow and copy the subdomain and not the full URL.
In this example, the subdomain is dev54396.
Return to CloudCheckr, and paste the subdomain into the Instance field.
Return to your instance in ServiceNow, scroll down the page, and copy the username and password.
Return to CloudCheckr, and paste the username and password into the corresponding fields.
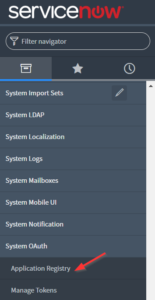
From the left navigation in ServiceNow, choose SystemOAuth > Application Registry.
From the menu bar at the top of the page, click New.
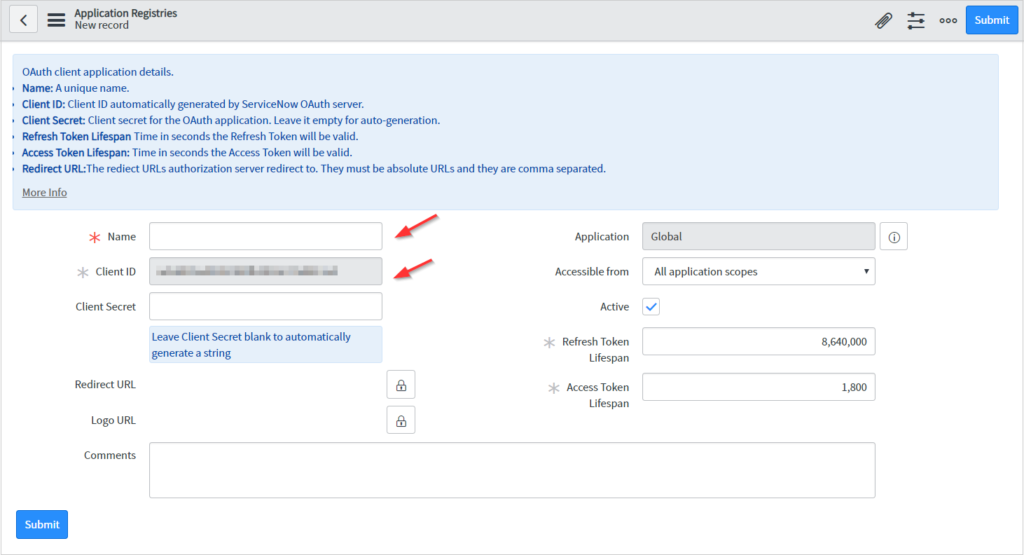
The right pane displays information on the OAuth application.
Select Create an OAuth API endpoint for external clients.
In the right pane, type a name and copy the client ID.
Click Submit.
ServiceNow will autogenerate a client secret ID.
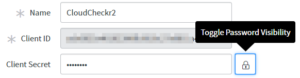
Unhide the ID and copy it.
Return to CloudCheckr.
Copy the client ID and the client secret ID to the appropriate fields and type a name for the application.
Click Save.
Click Send Test.
If the test is successful, CloudCheckr will display a message.
If the test fails, make sure that:
The information in the fields, including ClientSecret and Password fields, is correct
 (green plus sign) to display the details of the ServiceNow integration.