Click each text box and follow the steps to complete this workflow:
Launch CloudCheckr.
From the Projects page, select an Azure partner.
From the Accounts page, click NEW ACCOUNT.
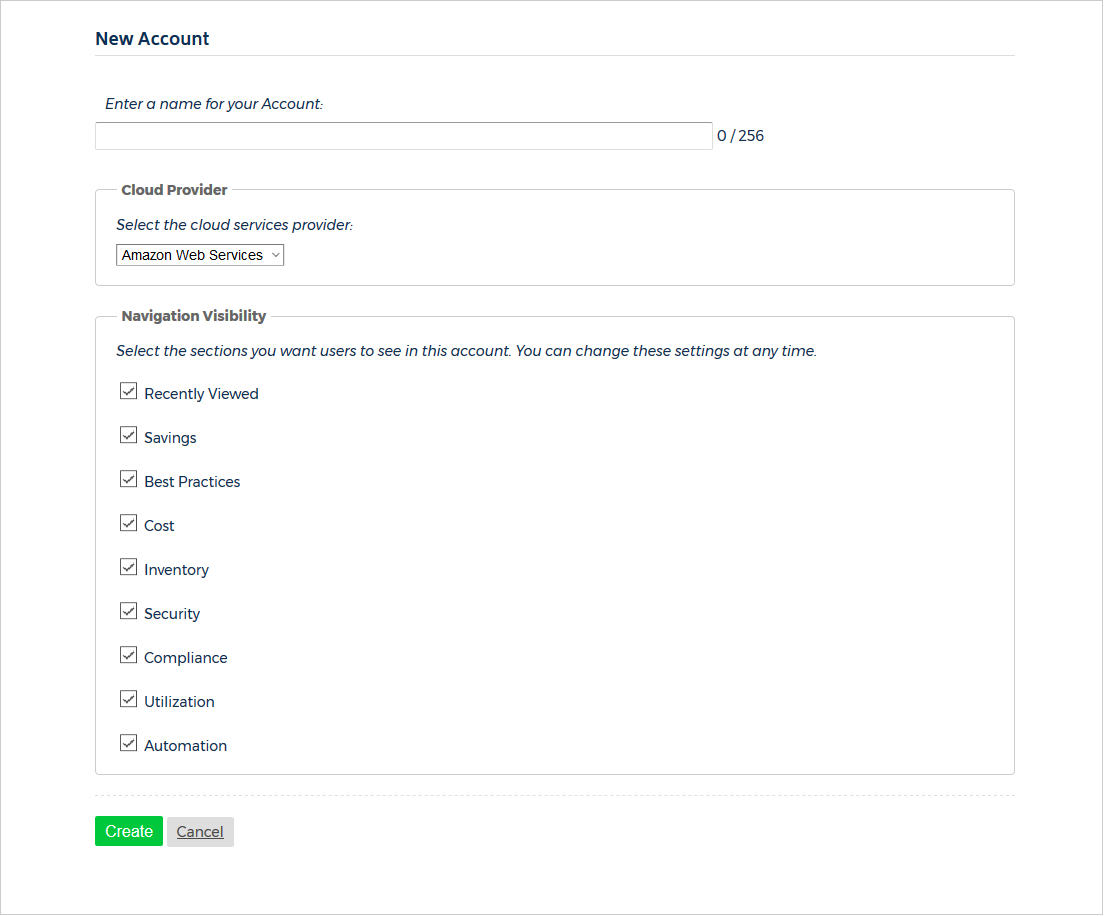
The New Account page opens.
Type a unique name for your account.
From the Cloud Provider section, select Microsoft Azure from the drop-down menu.
In the Navigation Visibility section, select the checkboxes next to the sections or modules that you want to be visible in the Azure account.
At the bottom of the page, click Create. The Configure Account page opens.
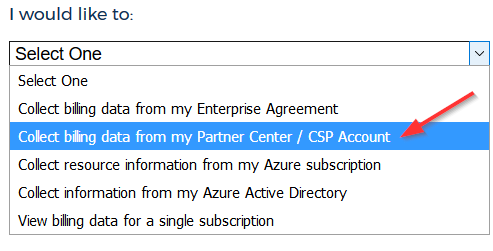
On the Configure Account page, select Collect billing data from my Partner Center / CSP Account from the drop-down menu.
The Control panel vendors (CPV) tab displays.
From the Azure Account Type drop-down menu, select Commercial, Azure Government, or Azure Germany.
From the Partner Center Billing Version drop-down menu, select Azure Plan or Classic CSP.
Click Init Consent.
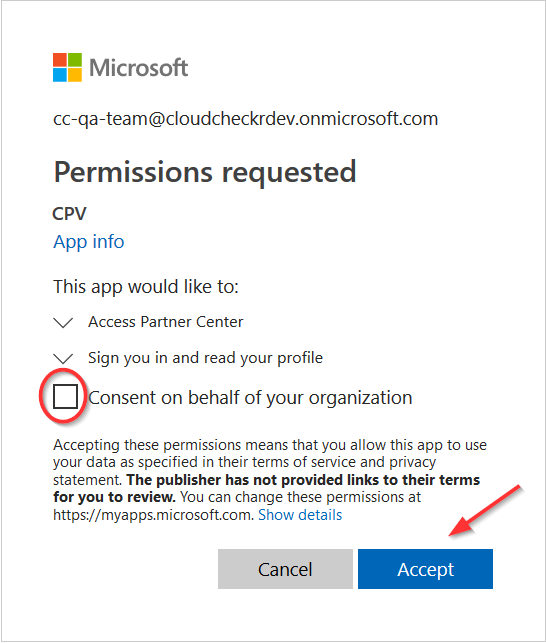
The Microsoft Login page opens. Use your Microsoft Partner Center credentials to login. You must have Billing Admin and Admin Agent permissions and have MFA enabled.
Click Accept.
The Consent on behalf of your organization checkbox is optional. If you select this option and try to re-consent to the CPV application in the future, Microsoft will bypass the Accept screen and automatically accept the application.
CloudCheckr returns you to the Credentials page and a message indicates that the application has saved your new CSP credentials.
Click OK.
The Edit Billing Configuration page opens.
In this procedure, we will configure the billing settings for the new CSP account.
Review and Modify Billing Options
Section
Description
How Do I Enable?
Automatic Customer Account Generation
Allows CloudCheckr to create a billing-only subscription any time a new subscription is added to your CSP.
Keep in mind:
This option will not convert currency.
You cannot change the currency code once selected.
You can convert these billing-only subscriptions to subscriptions with resources.
By default, this option is Disabled. To enable, toggle the switch.
Currency
Allows you to select the currency manually.
You cannot change your currency code once you make a selection.
CloudCheckr will attempt to detect the currency that Microsoft writes your Azure cost to. If it cannot, select a currency code.
Code
Country
Currency
ARS
Argentina
Peso
AUD
Australia
Dollar
BRL
Brazil
Real
CAD
Canada
Dollar
CHF
Switzerland
Franc
DKK
Denmark
Krone
EUR
Euro Member Countries
Euro
GBP
United Kingdom
Pound
HKD
Hong Kong
Dollar
IDR
Indonesia
Rupiah
INR
India
Rupee
JPY
Japan
Yen
KRW
South Korean
Won
MXN
Mexico
Peso
MYR
Malaysia
Ringgit
NOK
Norway
Krone
NZD
New Zealand
Dollar
RUB
Russia
Ruble
SAR
Saudi Arabia
Riyal
SEK
Sweden
Krona
TRY
Turkey
Lira
TWD
Taiwan
New Dollar
USD
United States
Dollar
ZAR
South Africa
Rand
Billing Region
Allows you to select the billing region manually.
Keep in mind:
You cannot change the currency code once selected.
CloudCheckr will attempt to detect the billing region that Microsoft writes your Azure cost to. If it cannot, select a billing region code.
Effective April 21, 2025, Microsoft will be deprecating an API that we use to pull Azure Plan/NCE cost data. CloudCheckr has updated its CPV (control panel vendor) applications to use the new Microsoft Graph API. Our CPV application includes the PartnerBilling.ReadAll permission, which will allow CloudCheckr to continue receiving cost data. This permission requires an organizational administrator to approve. The steps below will allow an organizational administrator to grant consent to our CPV application to use this permission.
You may need to work with your Organizations Administrator(s) to grant admin consent.
This change only applies to Azure Plan/NCE CSPs using Azure Commercial regions. Azure Government CSPs are not impacted.
Follow these Steps
Navigate to Entra ID > Enterprise Applications.
Search for, and click on CloudCheckr's CPV application. Use the table below for a list of CloudCheckr's CPV Application GUIDs:
CloudCheckr Region
App Name
Azure CPV App GUID
US Region
CC_US_CPV
83d5f7fc-3427-4b52-8b40-a5baa1c4b1a9
EU Region
CC_EU_CPV
2f85092f-7ff5-485c-87e6-e22d52df6799
AU Region
CC_AU_CPV
17ff0065-8203-444b-b648-580ba0851b65
GOV Region
CC_Gov_CPV
39e1892e-796a-4fd8-bd01-2f803bb2d5b6
FED Region
CC_HSE_CPV
27cd760f-dac7-4814-a4c1-9985877fb603
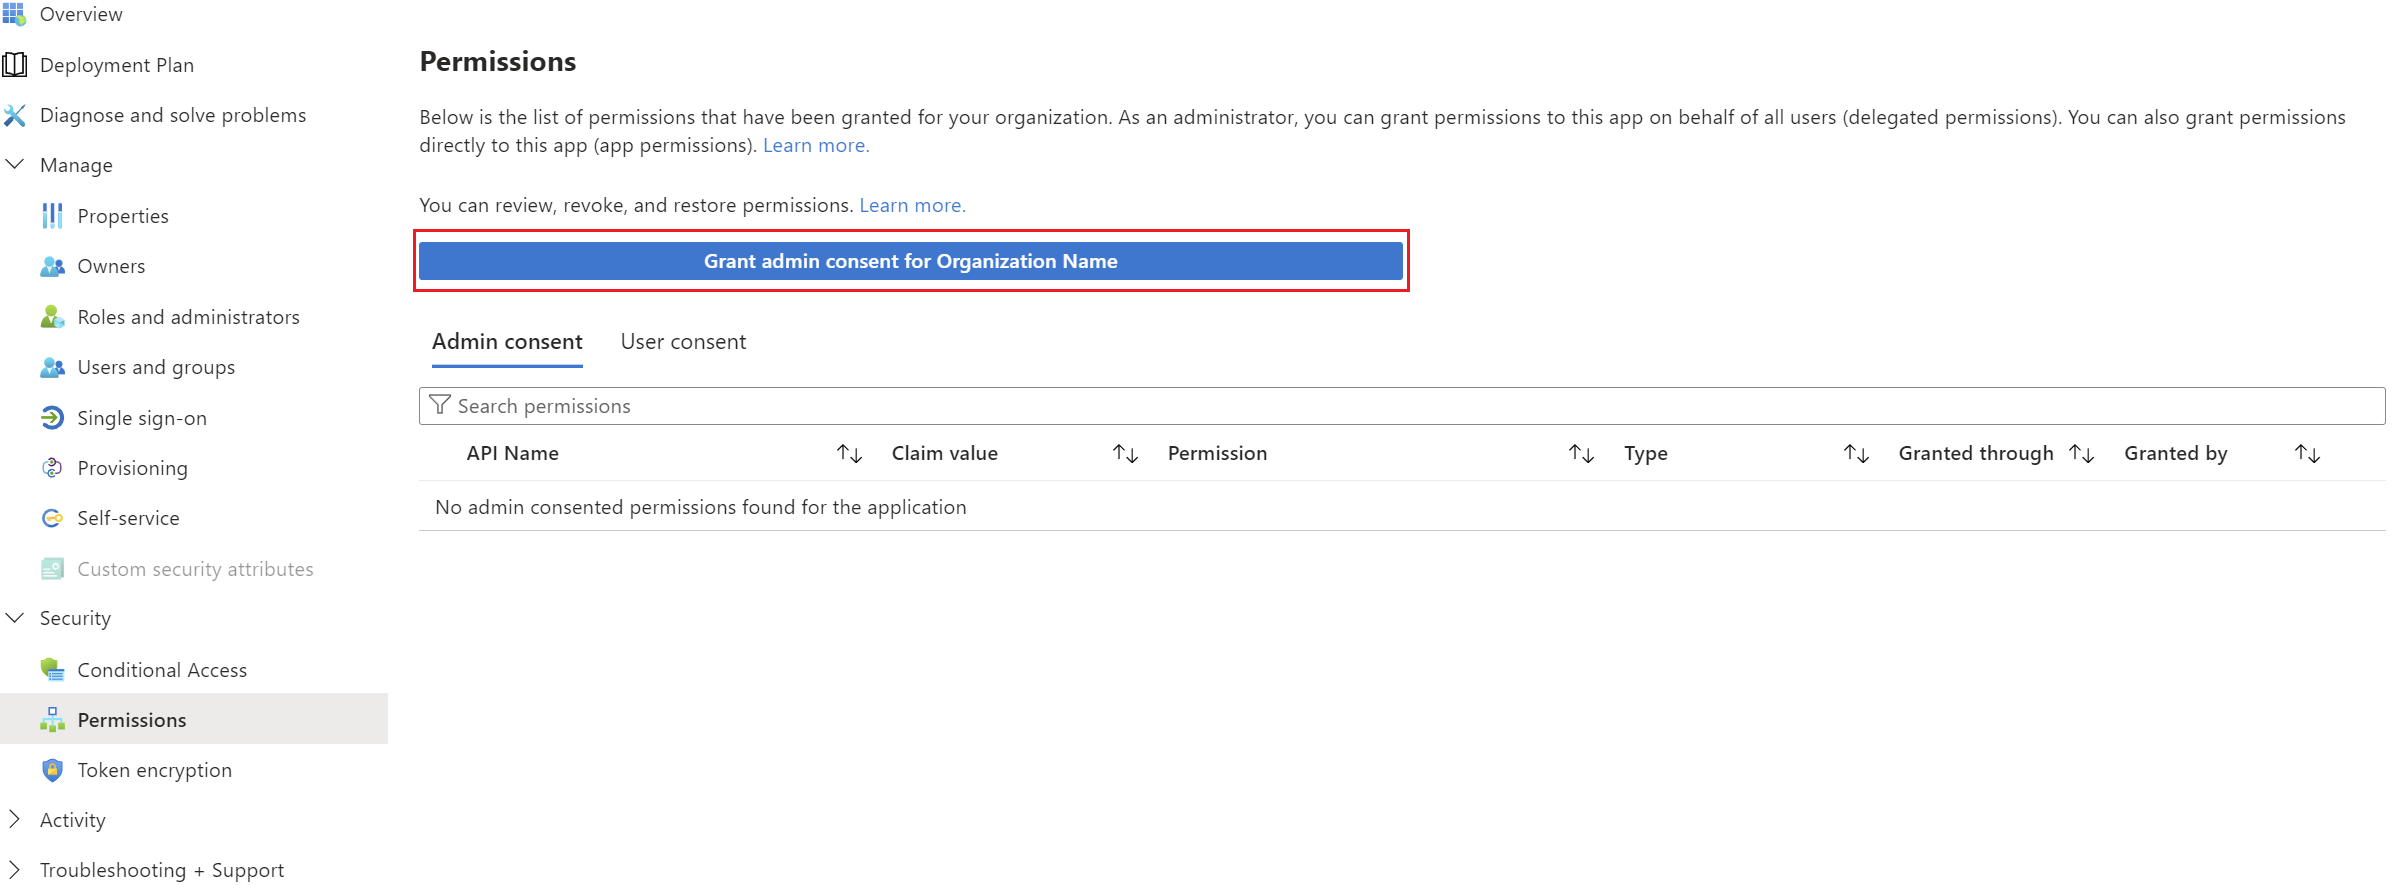
On the left-hand side, under Security, select Permissions. This will display a list of permissions that have been granted for your organization.
Click the Grant admin consent button for your organization.

 The Consent on behalf of your organization checkbox is optional. If you select this option and try to re-consent to the CPV application in the future, Microsoft will bypass the Accept screen and automatically accept the application.