Configure a Subscription Account in Azure
To manage the resources of any type of subscription and gain access to CloudCheckr's best practices, inventory, security, and utilization modules, follow this workflow.
Workflow
Click each text box to reveal each step in this workflow to see how to set up your Azure subscription account:
In this step, you will create an application in Azure.
- Log in to the Azure management portal associated with your subscription type:
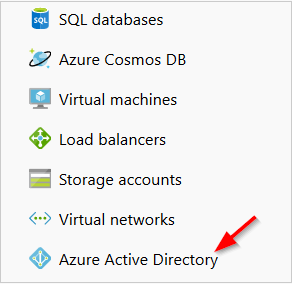
- From the left navbar, click Azure Active Directory.
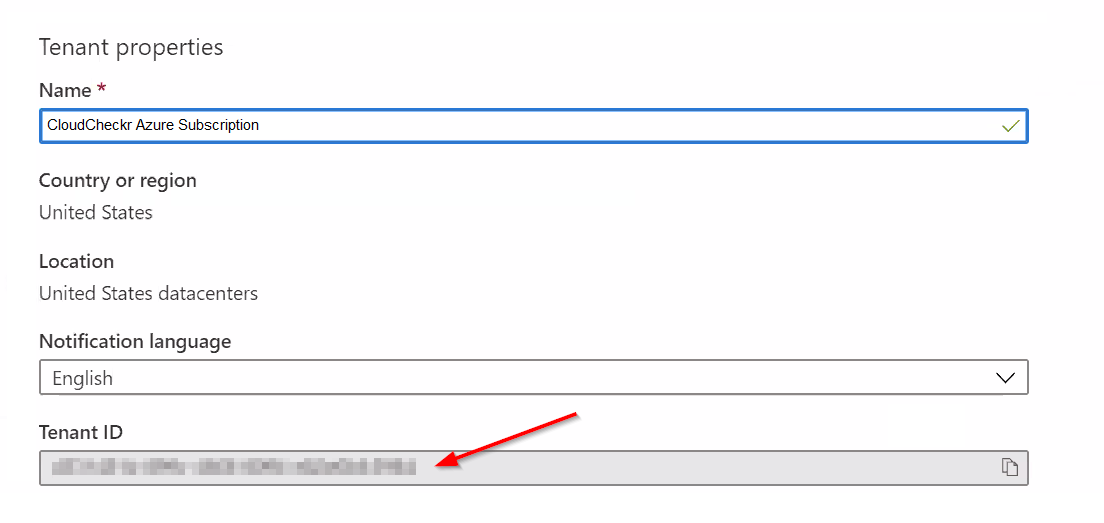
- Select Properties from the list.
- Copy the Tenant ID.
- In the Manage section of the Azure Active Directory blade, click App registrations.
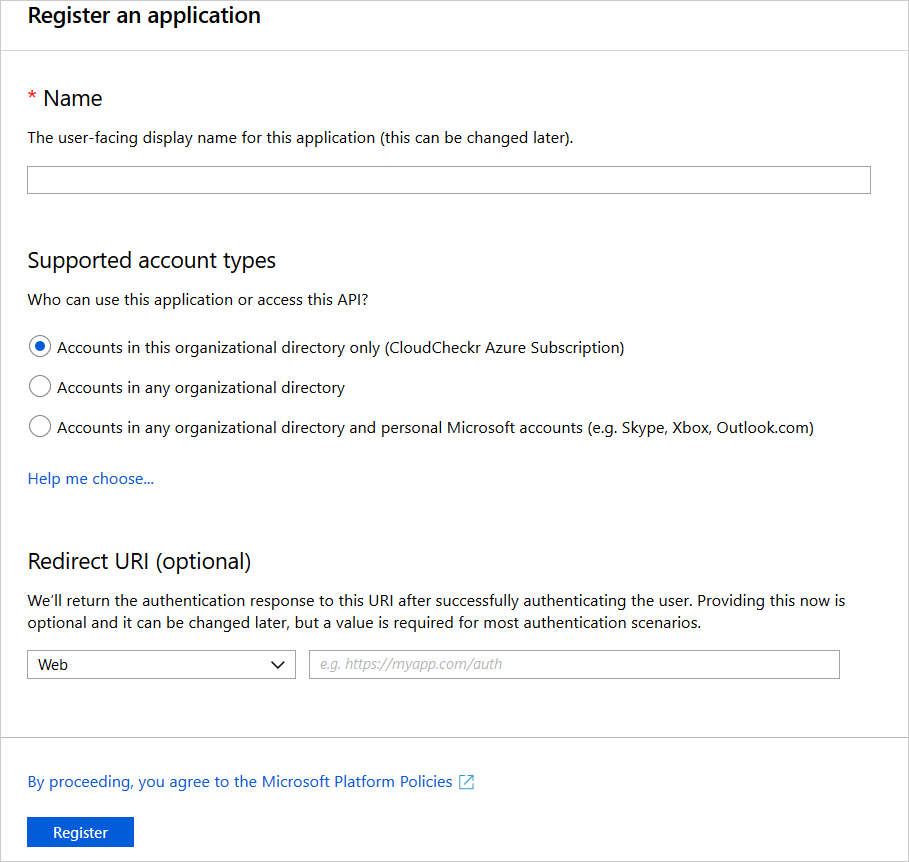
- Click + New registration.
- Create your application:
- Type a name for your application.
- Under Supported account types, leave the default setting: accounts in this organizational directory only
- Under Redirect URI (optional), leave the default drop-down option, Web, and in the blank text field, type https://localhost
- Click Register.
- Copy the Application ID.
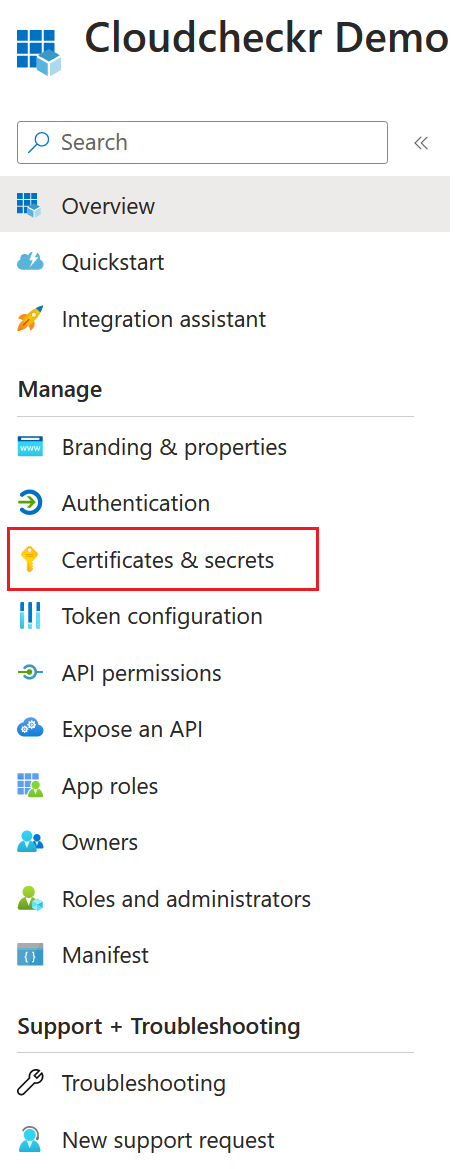
- In the Manage section of the application blade, click Certificates & secrets.
- Under Certificates & secrets, click + New client secret.
- Type a name for the client secret, select a timeframe when you want it to expire, and click Add.
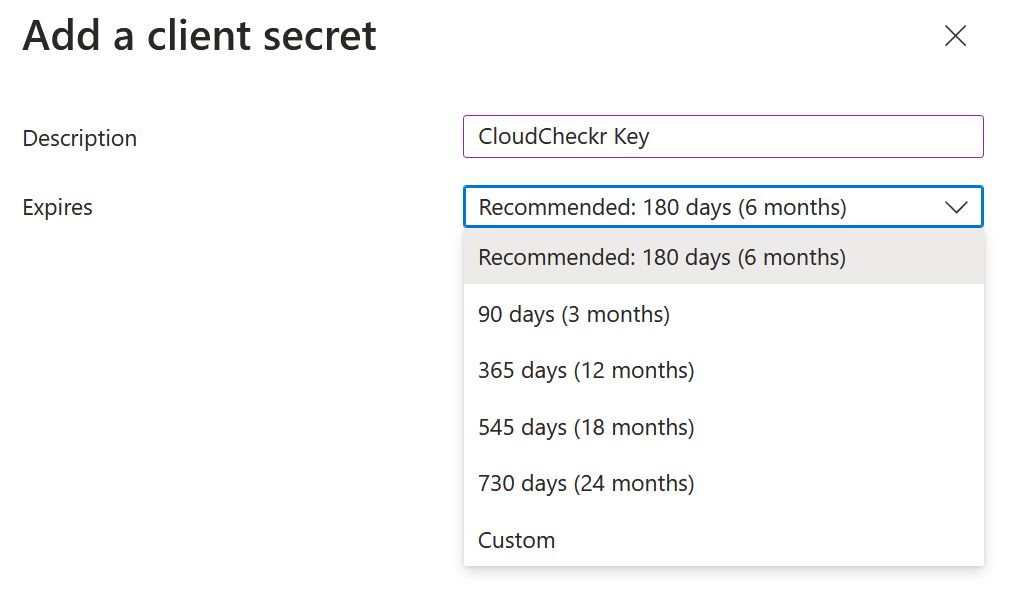
- Copy the client secret and save it immediately since you will not be able to view it again.
- From the left navbar, click All Services.
- From the list, select Subscriptions.

- Click your subscription.
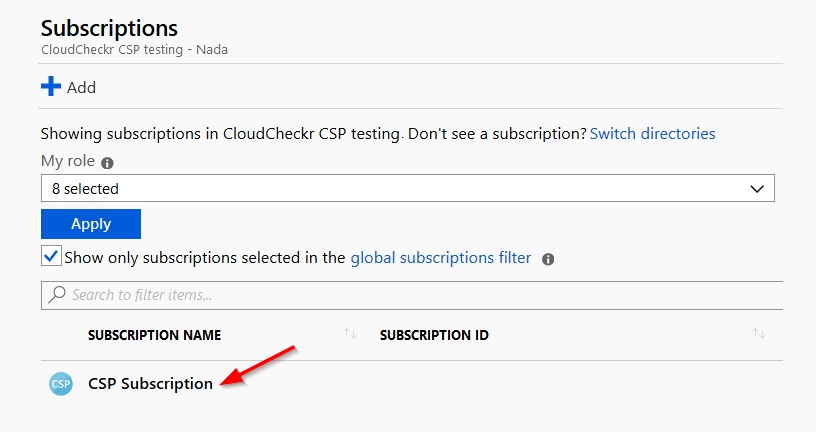
- Copy the Subscription ID.
Rather than assign a role to a subscription, you can assign the role to a resource group or specific resource:
- From the left navbar, click All Resources.
- Select the resource that you want CloudCheckr to monitor.
- Complete Step 2: Add a Role Assignment and the remaining steps in this topic.

This will need to be done for every subscription that will be added to CloudCheckr.
In this step, you will associate a role with your new application.
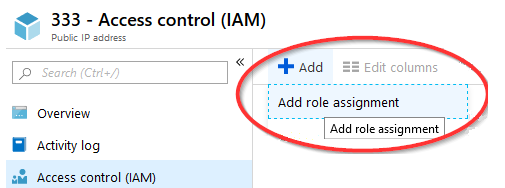
- From the blade of the selected subscription, click Access control (IAM).
- Select Add > Add Role Assignment.
- Create a role assignment:
- From the Role drop-down list, select Reader.
- In the Assign access to drop-down list, leave the default option, Azure AD user, group, or service principal.
- In the Select text field, type the name of the application that you created.
- Click Save.
In this step, you will access CloudCheckr and create an account.
- Launch CloudCheckr.
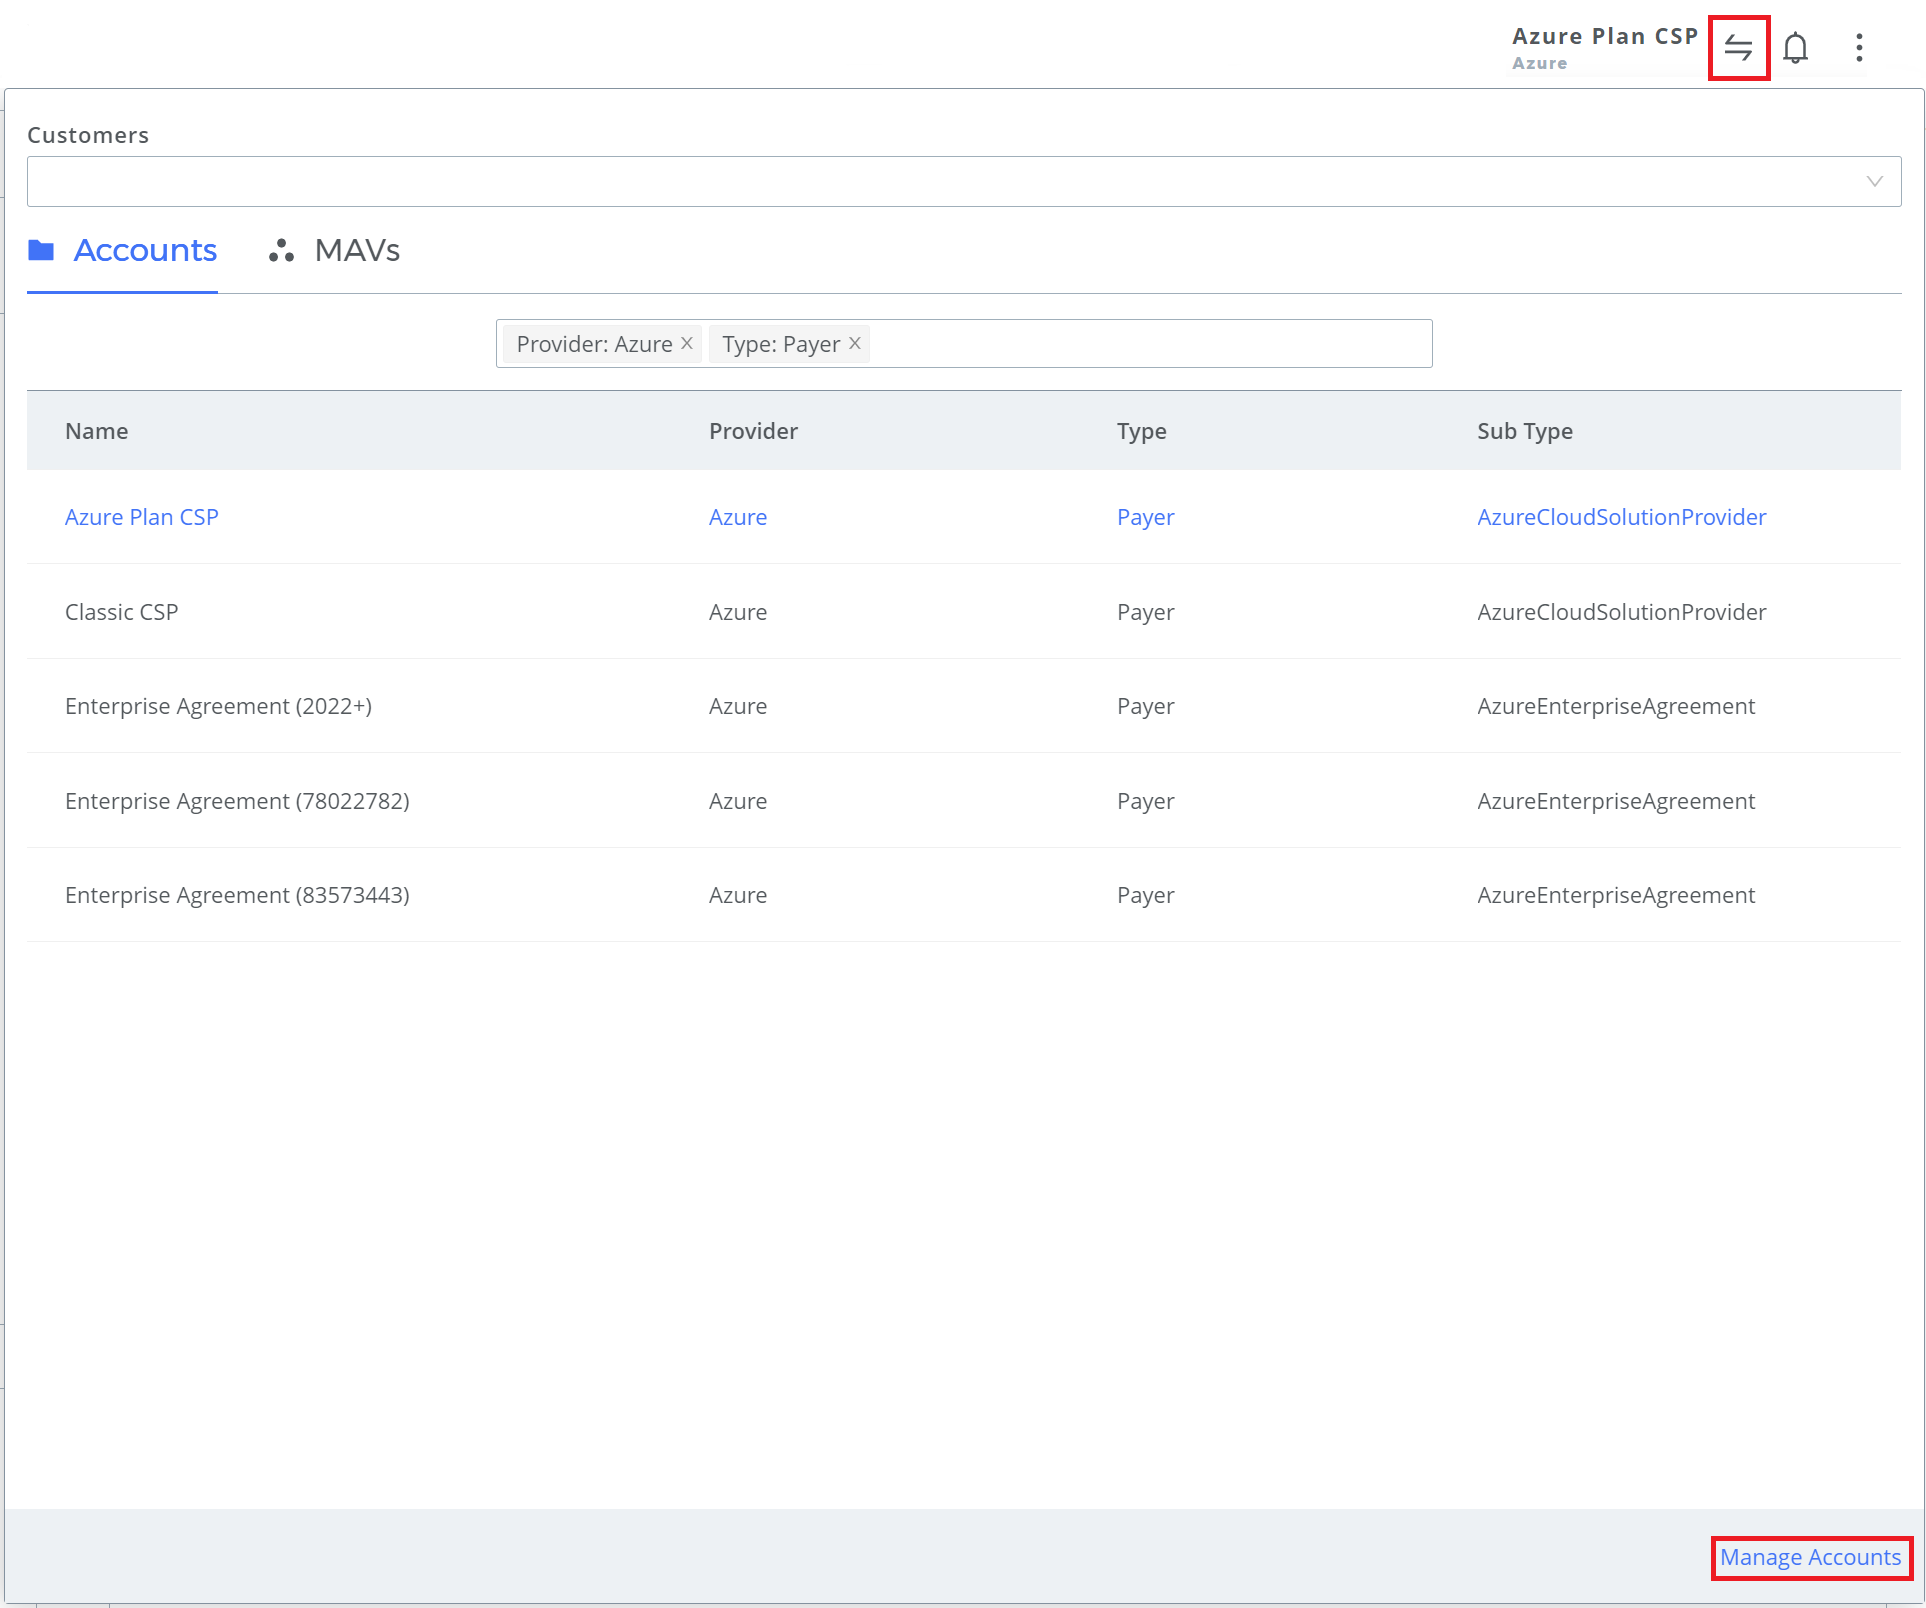
- Click the Account Switcher in the upper right-hand corner. In the lower right hand corner, click Manage Accounts.
- Click + NEW to add an account.

- Create an account and click SAVE.

- Name: Enter the name of the account.
- Cloud Provider: Select Azure.
- Location: This defines where you would like to place the account within your Account Hierarchy. You can choose a position if you already setup an organizational structure in CloudCheckr. If not, you can skip this step and configure it later. When left blank, the new account is created under root by default.
- Payee Organization: This is only applicable if you are configuring a payer account. It defines how subsequent payees under this payer will be placed. Click on the speaker icon to learn more details.
- Attributes: Type in an attribute here that you would like to associate this account with. For example, Dev, Prod, and Test.
- A new account is created.
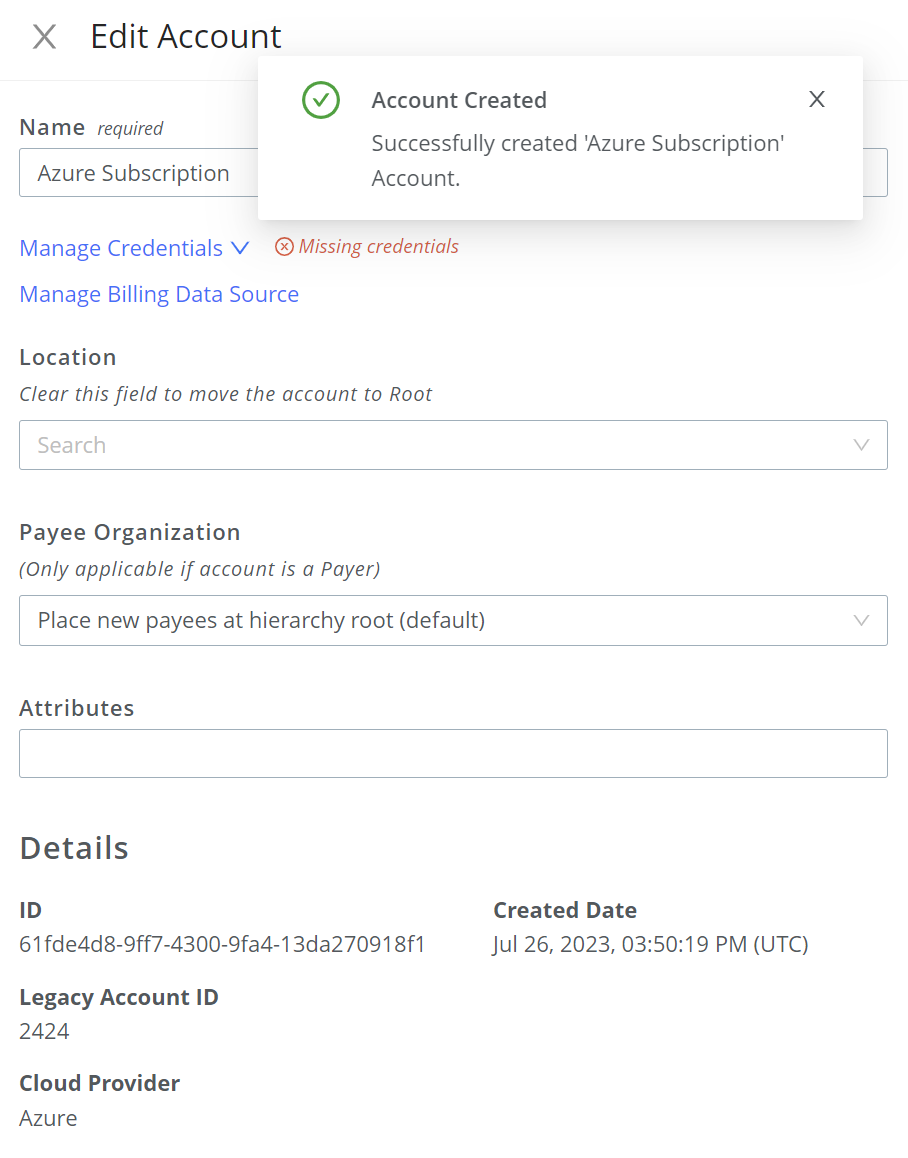
- Once the account is created, you will need to credential the account.
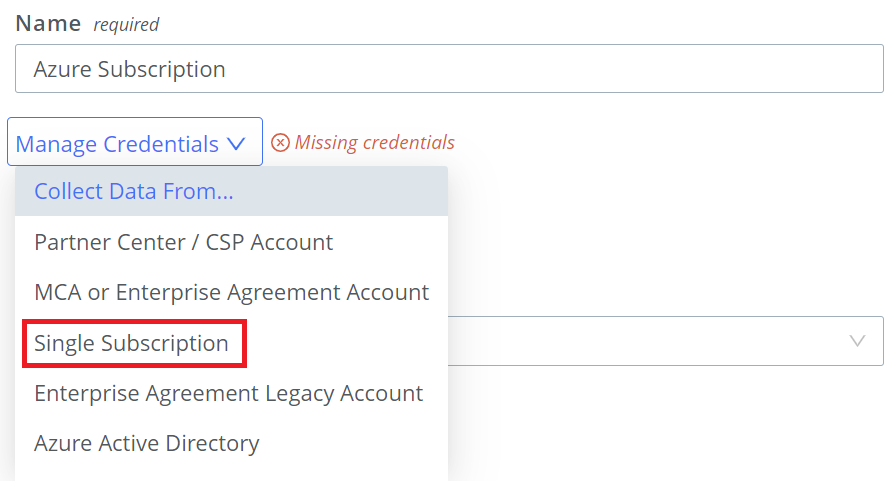
In this step, you will continue the configuration process in CloudCheckr.
- From the Edit Account pane, select Single Subscription from the Manage Accounts menu.
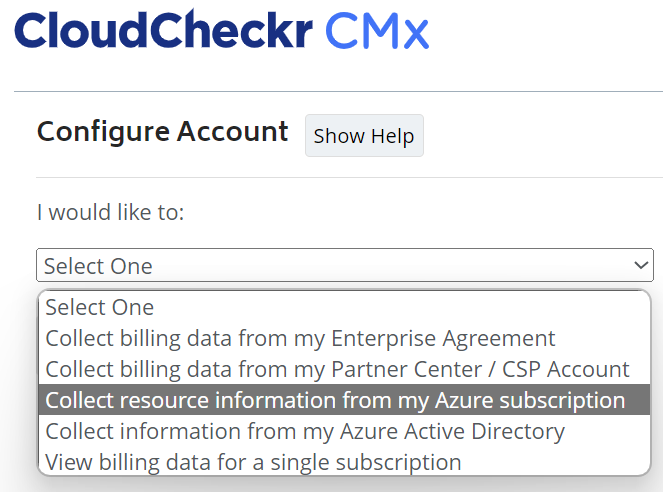
- On the following page, select Collect resource information from my Azure subscription.
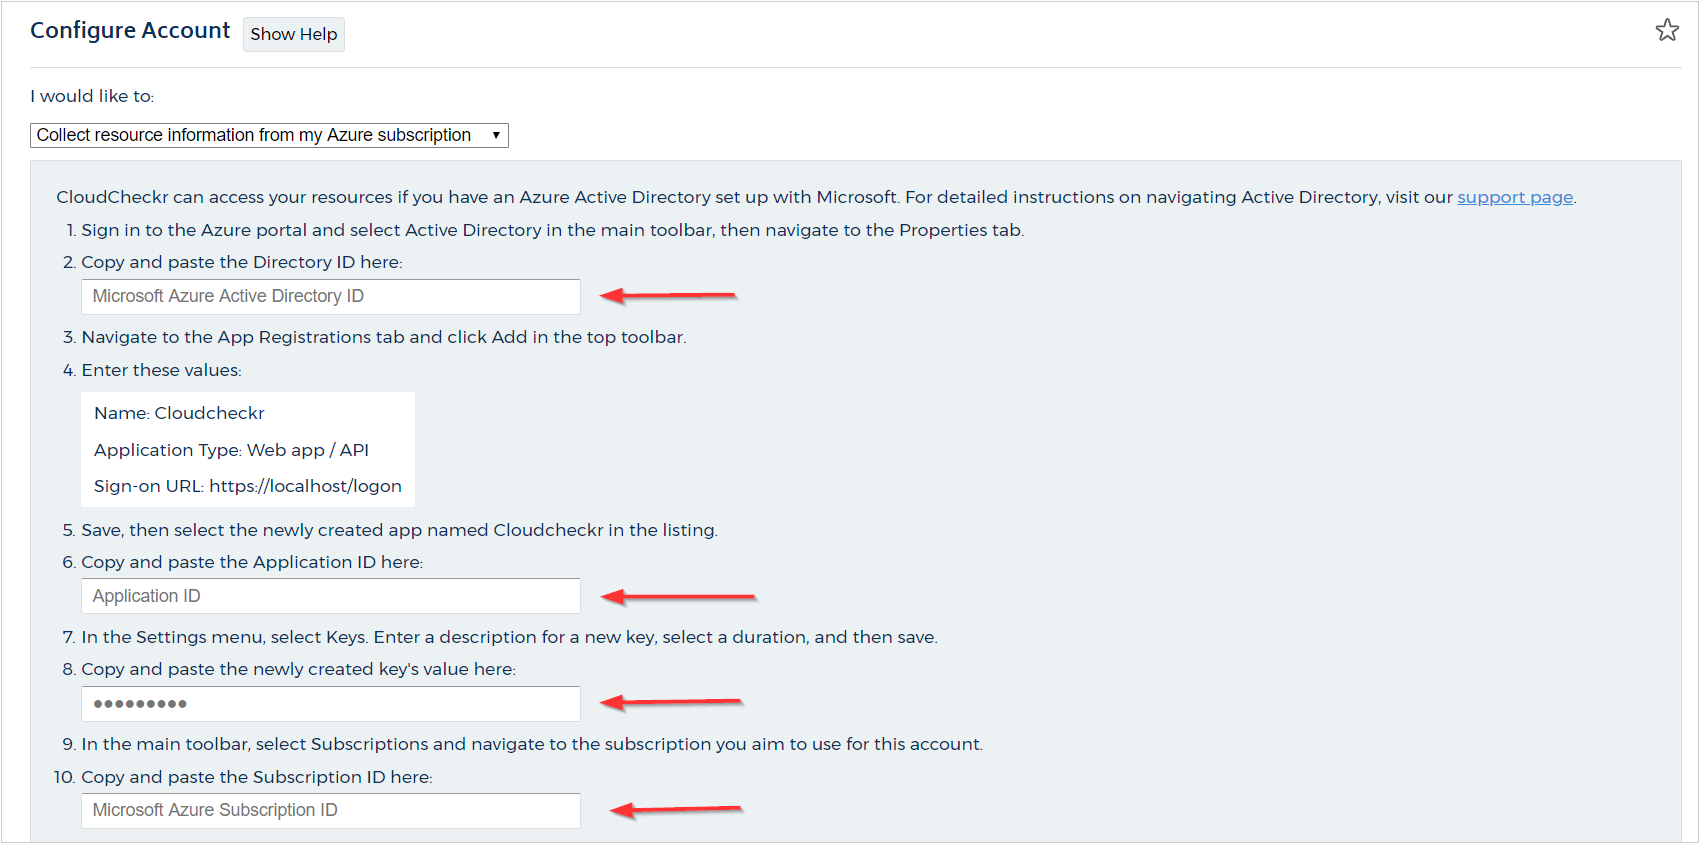
- Paste the Directory ID , Application ID, Secret Key, and Subscription ID into the associated fields.
- From the Azure Account Type drop-down menu, select Commercial, Government, or Germany.
- Click Update.
If you have a Pay-as-You-Go subscription, CloudCheckr will automatically display the Edit Billing Configuration page. The options will be pertinent to cost collection.