Configure Custom Cost in Azure
The Configure Custom Cost page lets you modify default Azure costs to create a pricing structure for your customers that will increase your overall profitability. For example, you can:
- charge Virtual Machine (VM) usage at the regular rate even if covered by a Reserved Instance (RI)
- create bills for one or more subscriptions that reflect the agreed rate—regardless of the amount charged by Microsoft
- base your Custom cost on Pay As You Go pricing during billing collection
- Launch CloudCheckr and select an EA or CSP account from the Accounts List page.
Because the Configure Custom Cost page require you to have access to Azure billing, you must log in to a Cloud Solution Provider (CSP) or Enterprise Agreement (EA) account in CloudCheckr to use this feature.
- From the left navigation pane, choose Cost > Azure Partner Tools > Configure > Configure Custom Cost.
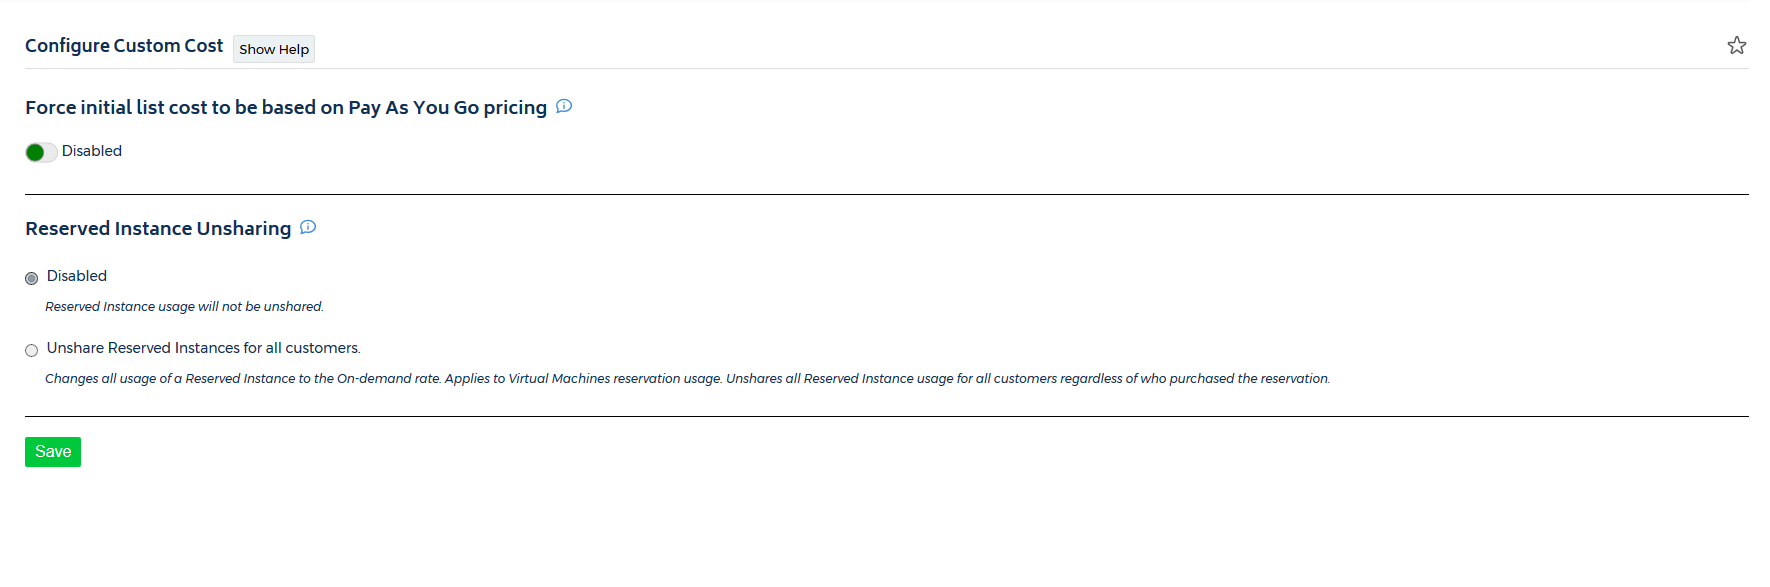
This is what the page looks like if you select a CSP account:
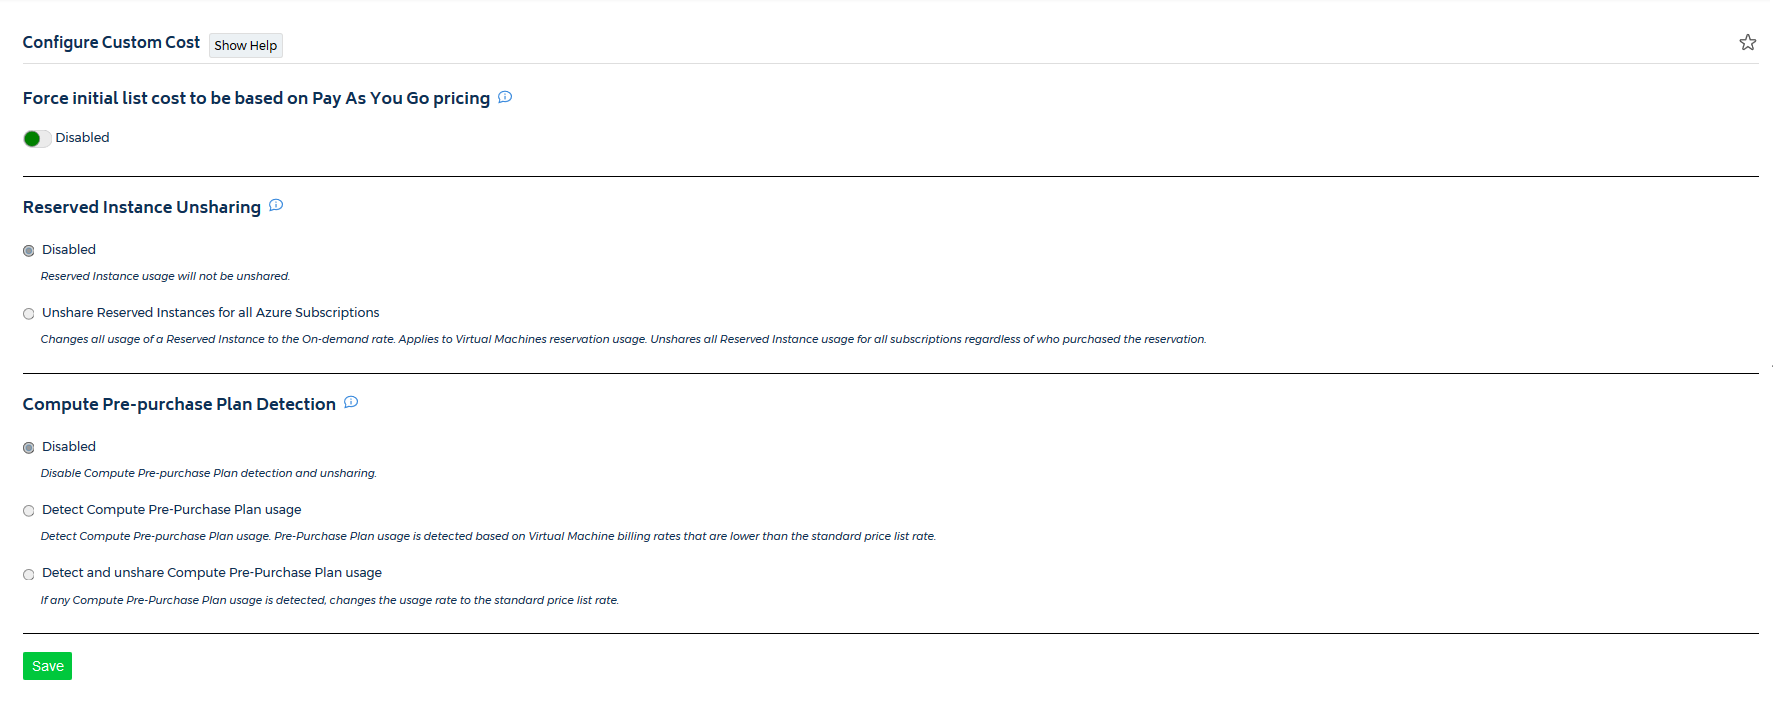
This is what the page looks like if you select an EA account:
- Modify your custom costs.
- Click Save.
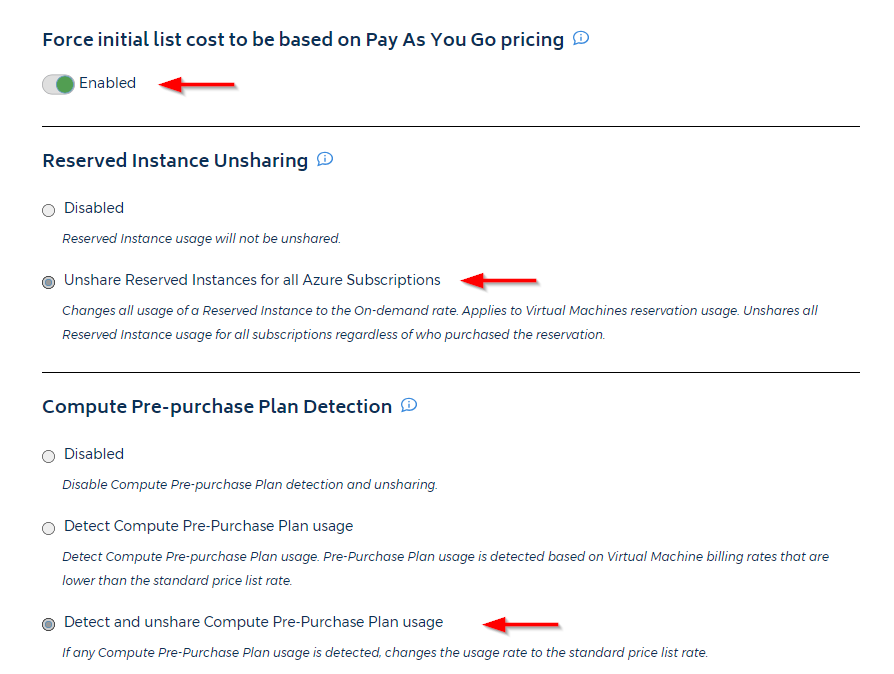
Force Initial List Cost To Be Based On Pay As You Go Pricing
Move the toggle button to enable or disable this option.
| Option | Description |
|---|---|
| Enabled |
The application will calculate Custom cost to reflect what the costs would be if you purchased directly from the CSP or EA partner. |
| Disabled |
The application will retain any of the discounts that you allocated to your customer(s). |
Reserved Instance Unsharing
Azure allows you to share RIs shared across multiple subscriptions. With our application, however, you can unshare these RIs to create a Custom cost so you can bill each subscription for its exact usage, cost, and spend.
Select one of the following options:
| Option | Description |
|---|---|
| Disabled |
Allows you to share RI usage, cost, and spend across subscription families. |
| Unshare Reserved Instances for all Azure Subscriptions |
Changes RI usage, cost, and spend to the On-demand rate. Applies to VM reservation usage. Unshares all RI usage for all subscriptions regardless of who purchased the reservation. |
Compute Pre-purchase Plan Detection
Before RIs, Microsoft offered Azure Compute Pre-Purchase Plan (CPP) that allowed you to purchase VM compute hours at a discounted rate for a 12-month period.
However, Azure billing data does not explicitly indicate if a CPP covers VM usage. To determine if a CPP covered a VM's usage, you need to analyze the VM's extended hourly rate.
- If the extended hourly rate is lower than the regular rate for that VM, then the CPP covers the VM usage.
- If the extended rate is 0, then the CPP fully overs the VM usage.
- If the extended rate is greater than zero, but less than the regular rate, then the CPP only partially covers the VM usage.
CloudCheckr has back-end logic that can analyze the presence and amount of CPP and apply your VM usage accurately and ensure a complete separation between RI and CPP offerings.
Select one of the following options:
| Option | Description |
|---|---|
| Disabled |
Prevents CloudCheckr from detecting and unsharing CPPs. |
| Detect Compute Pre-Purchase Plan Usage |
Detects CPP usage, which is based on VM billing rates that are lower than the standard price list rate. |
| Detect and Unshare Compute Pre-Purchase Plan Usage |
Detects CPP usage and changes the usage rate to the standard price list rate. |
As a reseller, you want to strip away any default discounts and any unintentionally shared RIs and CPPs.
Here is an example of what a resller configuration could look like: