CloudTrail Alerts
CloudTrail alerts are notifications that will help you to secure your your cloud deployment. You can use these alerts to get notified about any of our out-of-the-box security issues, or you can create your own customized alerts. The results of the alerts are communicated to you and are also saved within CloudCheckr, providing you with a starting point to conduct audits and perform forensics on your deployment.
How Do I Use CloudTrail Alerts?
A good starting point is the built-in alerts. CloudCheckr has developed ready-to-use alerts to help you stay on top of security-related issues in your deployment. This topic will show how to configure a built-in alert.
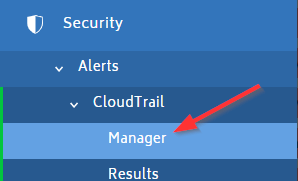
From the left navigation pane, choose Security > Alerts > CloudTrail > Manager.
Built-In Alerts
The Alert Manager has two tabs: Built-In Alerts and Custom Alerts. For this exercise, let's start with the default setting, Built-in Alerts.
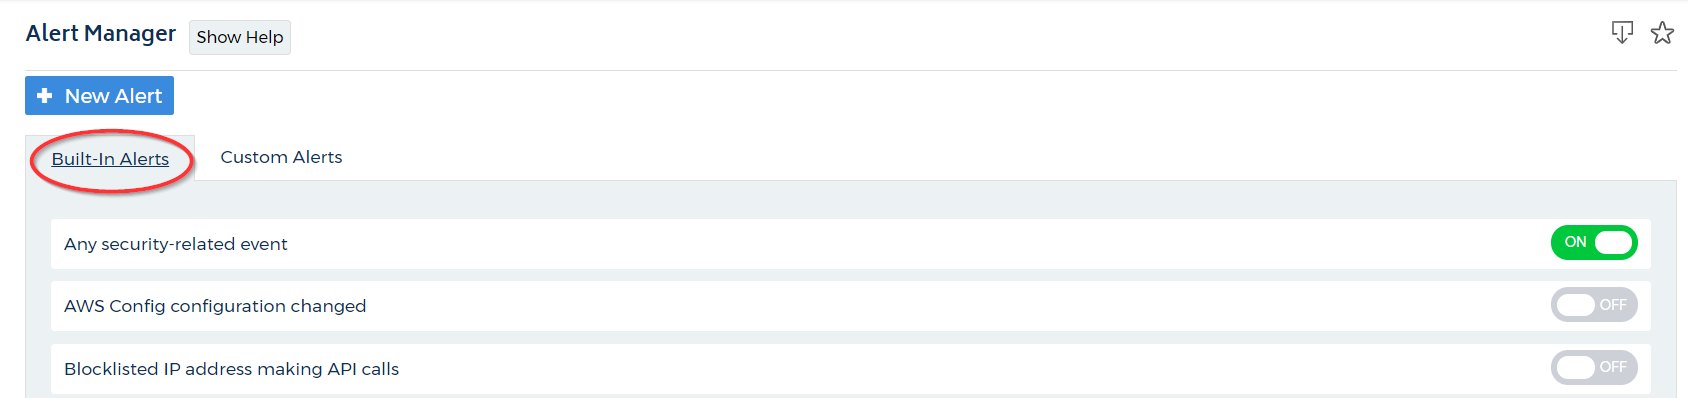
Click the title of any built-in alert to review the details. In this example, we clicked Any security-related event.

The first section shows in the alert name, risk level, and custom description field.

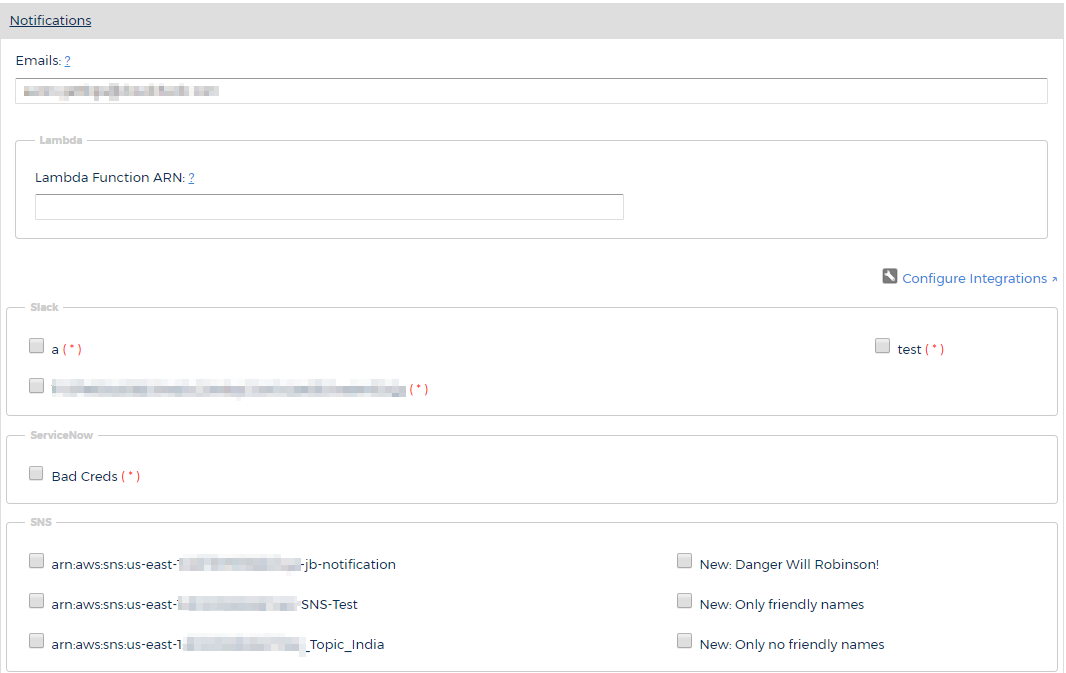
Notifications
Click Notifications to expand this section.
The Notifications section allows you to configure how you want CloudCheckr to notify you about alerts. You can select one or more of the following notification options:
- Email: email address(es) where you want CloudCheckr to send the alert email
- Lambda: AWS Lambda function that you want CloudCheckr to call to perform a specified action
- Slack: prompts CloudCheckr to push the alerts to a Slack channel via a webhook
- SNS: prompts CloudCheckr to push the alerts to SNS
- PagerDuty: prompts CloudCheckr to push alerts via the PagerDuty API
- Syslog: communicates information, such as Security Information and Event Management systems (SIEM), and other information
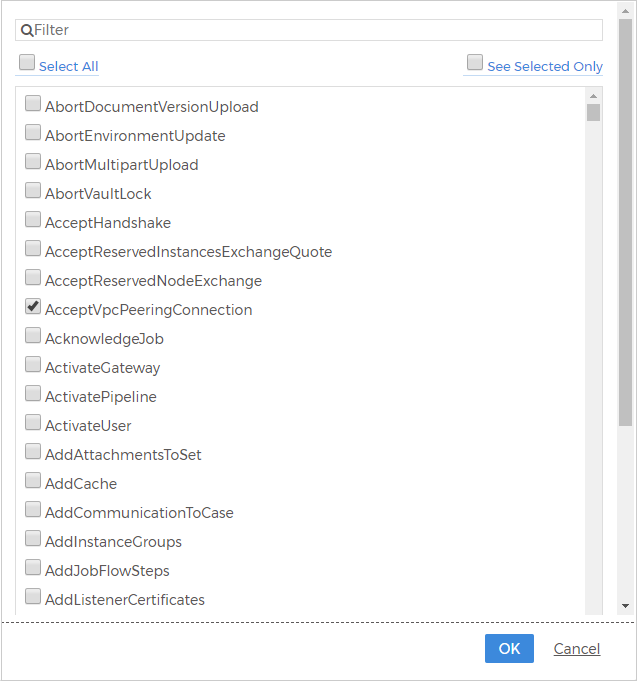
Filters
Click Filters to expand this section.
The Filters section allow you to refine your search by the following parameters: region, service, event, and user.

Each drop-down menu is populated with search criteria for the selected parameter.
To get more information on the search criteria, click
 (Binoculars) next to the associated parameter.
The screenshot shows the filters you can select for the Events parameter for the built-in alert, Any security-related alert.
Advanced Options
Click Advanced Options to expand this section.
The Advanced Options section allows you to determine how CloudCheckr responds to CloudTrail events.
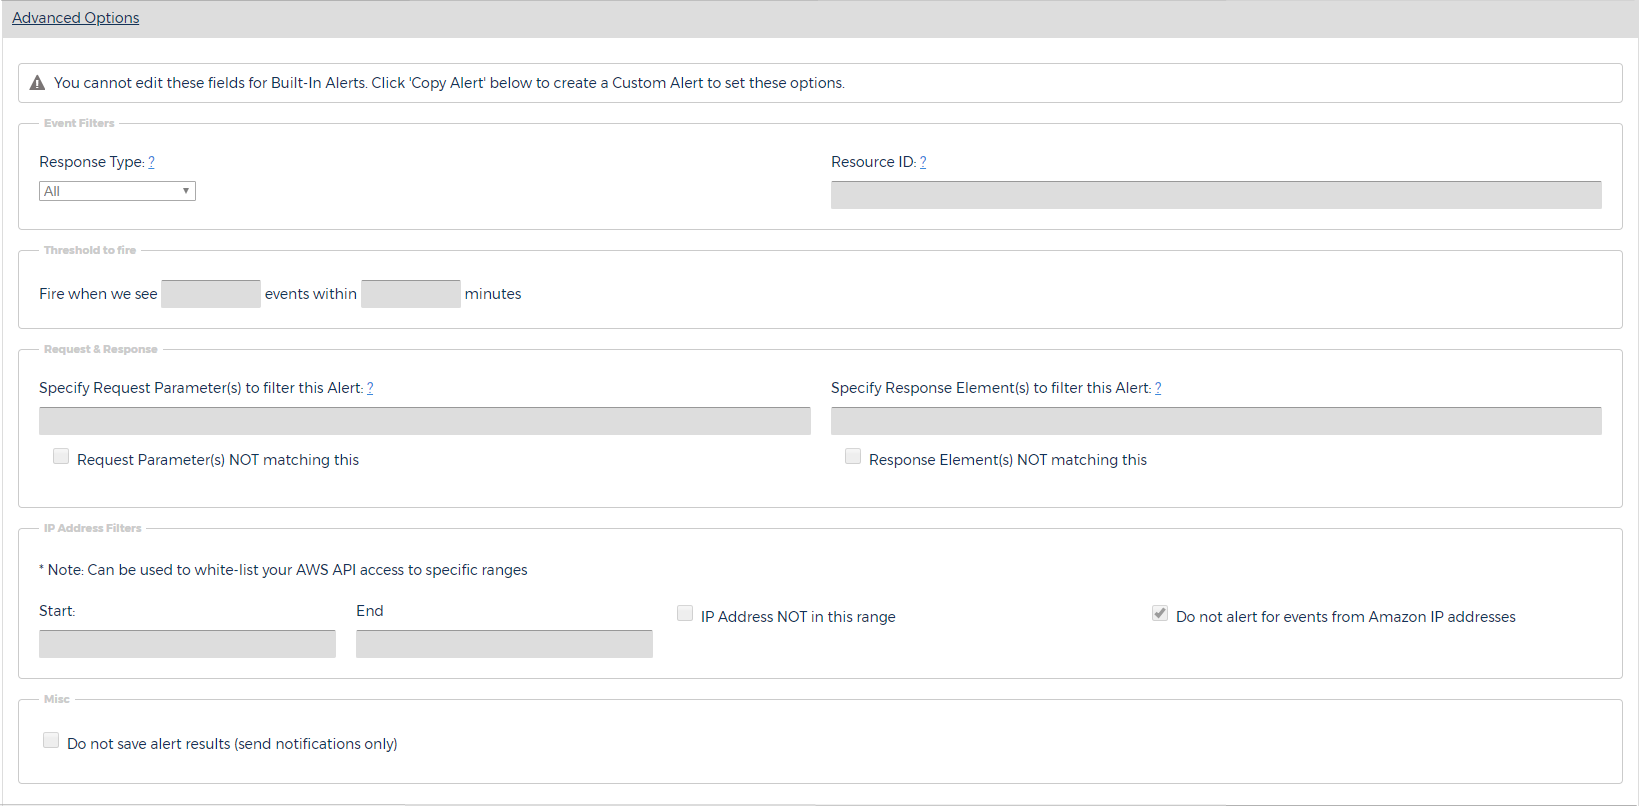
Event Filters
- Response Type: the type of event that the alert will respond to. For built-in alerts, the default response type is All and you cannot change it. For custom alerts, however, the alert can look for Success, Failure, or Unauthorized Access.
- Resource ID: the type of resource that you want the alert to respond to. For built-in alerts, you cannot edit this field.
By default, this section is blank, so the alert will trigger or fire every single time that CloudTrail encounters a matching event. Since a cloud deployment often contains many AWS API calls, this default setting could result in in a large number of alerts. To reduce the number alerts, you can customize the threshold. For example, you might tell CloudTrail to only fire when 20 matching events occur within a one-minute time period.
Request & ResponseA CloudTrail event is going to have a Request parameter and a Response parameter. You can customize the alert so that it only fires if the selected parameters are or are not present in the event data.
IP Address FiltersYou can restrict the IP address range that the alerts monitor—effectively doing things such as white-listing your own address range or making sure that the alerts do not alert on IP addresses originating from AWS.
MiscBy default, CloudCheckr saves the results of your CloudTrail alerts, but you can turn off this functionality and just use the selected notification method (email, Slack, etc.).
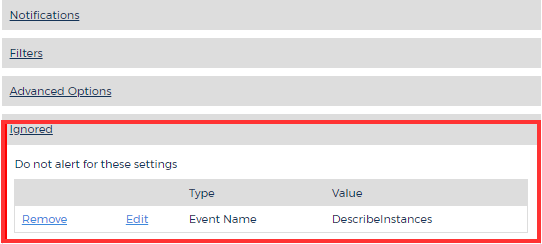
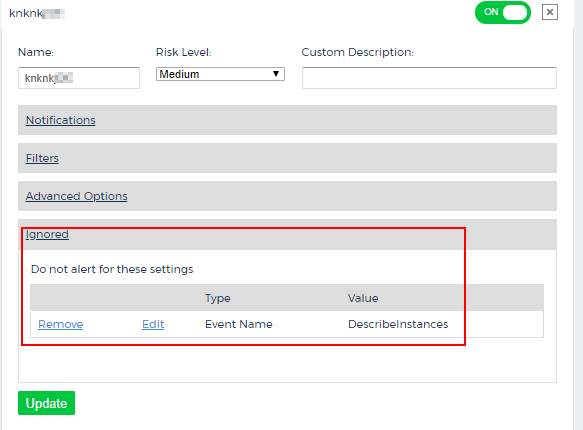
Ignored
Click Ignored to expand this section.
The Ignored section displays all the alert results that you have ignored.

If you want to ignore selected CloudTrail Alert results, go to the left navigation pane and choose Security > Alerts > CloudTrail > Results. On this page, you will see all of your results and can select which results you want to ignore.
To see the configuration of an alert you have chosen to ignore, select the Ignore Configuration link for the selected result.

The Ignore Configuration dialog box for the selected alert will display.
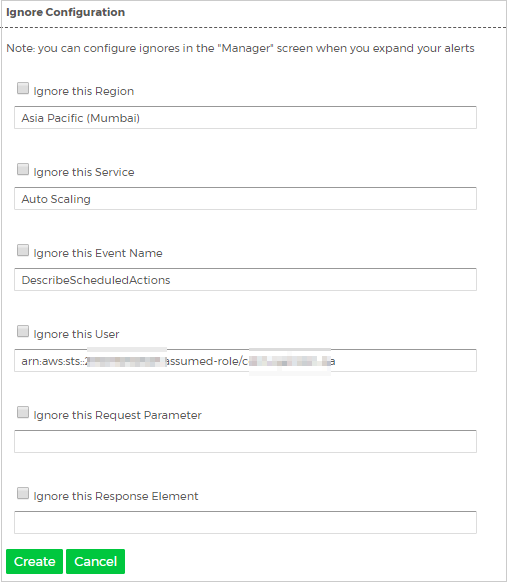
Your configuration shows you the parameters that you can select to ignore for the selected alert.
You can also choose to ignore an alert from the alert notification email.
After you have configured the alert results that you want to ignore, CloudCheckr will list them in the Ignored section.
Custom Alerts
Custom alerts function in the same way as the Built-In alerts.
To create a custom alert, go to the Alert Manager page of CloudTrail and click + New Alert or click Copy Alert in a selected built-in alert.
The Create New Alert dialog box opens.
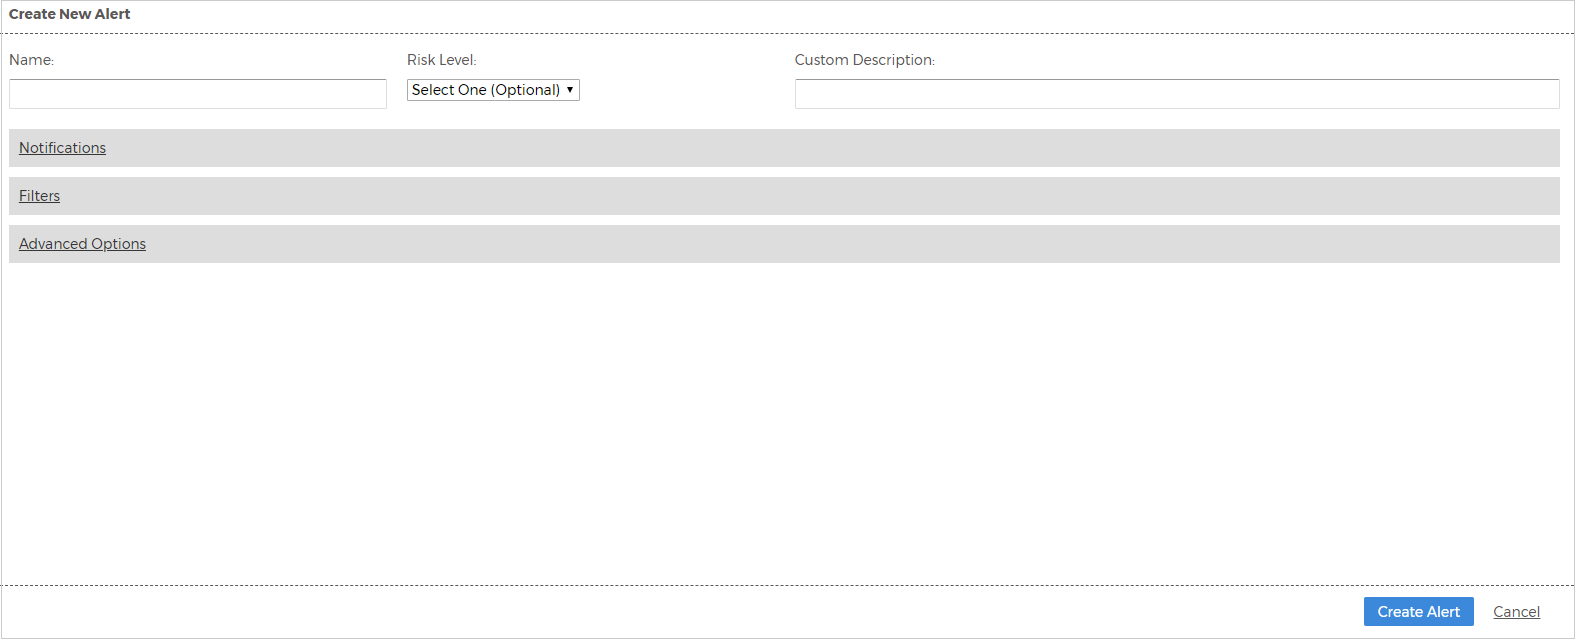
Type a name for your custom alert and configure the other parameters identified in the Built-In Alert section.
If you copied an existing built-in alert, CloudCheckr will pre-populate the search criteria. If your custom alert is not based on a built-in alert, you will need to select your search criteria. Click the Alert me when I see... drop-down menu to use the options from the built-in alert as template for your custom alert.
Once you have configured your custom alert, save it and make sure that you turn on the alert by moving the slider ON.

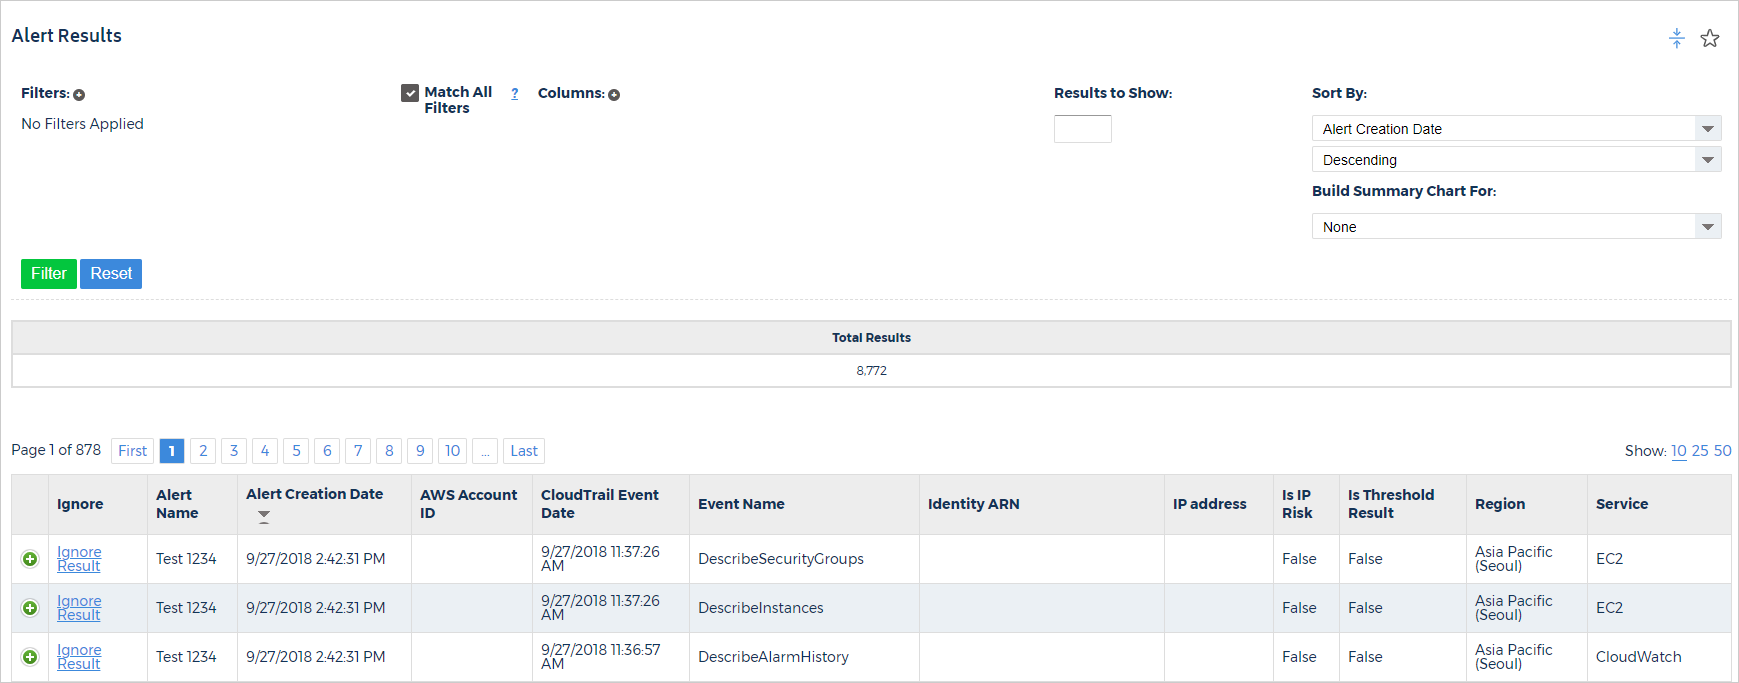
Alert Results
CloudCheckr will send your CloudTrail alerts in the notification format and parameters that you configured in the Built-in and Custom Alerts tab, such as email, Slack, or SNS. CloudCheckr also provides you with a comprehensive and searchable list of all your alert results. To get your results, go to the left navigation pane, and choose Security > Alerts > CloudTrail > Results.
The Alert Results page contains the details about your alerts: what event triggered the alert, when the alert occured, where the alert occurred geographically, and who triggered the alert.
Click the
![]() (green plus icon) to expand the results of the alert including the raw JSON content for the event that triggered the alert.
(green plus icon) to expand the results of the alert including the raw JSON content for the event that triggered the alert.
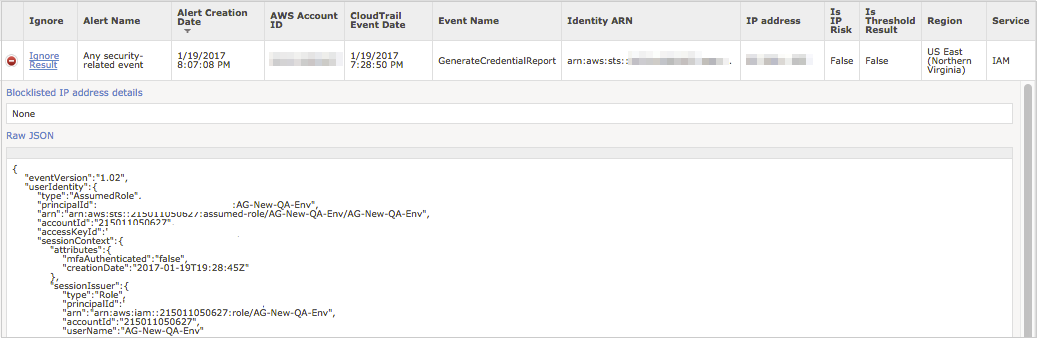
You can also ignore an event from this screen like you did in the Ignore section of the Alert Manager screen.
