Enabling CloudTrail Reports
You will need to make sure that the access key and secret key used when configuring your project provide permissions to access CloudTrail. You can do that by following these steps:
- Log into your Amazon Web Services Management Console.
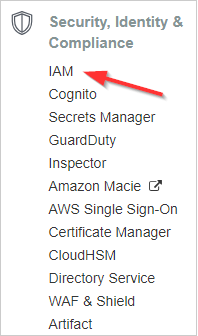
- From the AWS Services screen, select Security, Identity & Compliance > IAM .
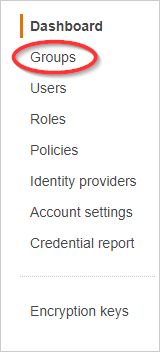
- From the dashboard, click Groups.
- Select the group that contains the user whose access and secret keys were added to CloudCheckr.

- Click the Permissions tab.

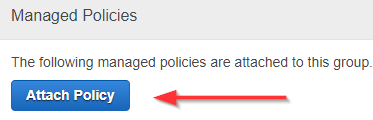
- Click the Attach Another Policy button.
- Select AWS CloudTrail Read Only Access from the list.
- Click Apply Policy.
CloudCheckr will now be able to report using your CloudTrail data.You can also use the AWS CLI to add trails for all regions in an account. Click AWS CLI for details.To enable CloudTrail for all regions within an account, use this script, which will create the CloudTrails with the name "awscloudtrail" and log into a single bucket called "mycompany-cloudtrail". You will need to use the AWS Command Line Interface (CLI) tool to run these scripts.For information on getting set up with and using the AWS CLI, review the AWS CLI documentation.
Begin by inputting the following command in the CLI:
$ aws configure
After running the above command, you will be prompted for a secret key, access key, and region. When you are done, input the following:
  $ aws cloudtrail create-subscription --name=awscloudtrail --s3-new-bucket=mycompany-cloudtrail --region ap-northeast-1

          $ aws cloudtrail create-subscription --name=awscloudtrail --s3-use-bucket=mycompany-cloudtrail --region ap-southeast-1

          $ aws cloudtrail create-subscription --name=awscloudtrail --s3-use-bucket=mycompany-cloudtrail --region ap-southeast-2

          $ aws cloudtrail create-subscription --name=awscloudtrail --s3-use-bucket=mycompany-cloudtrail --region eu-central-1

          $ aws cloudtrail create-subscription --name=awscloudtrail --s3-use-bucket=mycompany-cloudtrail --region eu-west-1

          $ aws cloudtrail create-subscription --name=awscloudtrail --s3-use-bucket=mycompany-cloudtrail --region sa-east-1

          $ aws cloudtrail create-subscription --name=awscloudtrail --s3-use-bucket=mycompany-cloudtrail --region us-east-1

          $ aws cloudtrail create-subscription --name=awscloudtrail --s3-use-bucket=mycompany-cloudtrail --region us-west-1

          $ aws cloudtrail create-subscription --name=awscloudtrail --s3-use-bucket=mycompany-cloudtrail --region us-west-2
The bucket name should be something unique. If you use a bucket name that is already in use, you will get an error. We have suggested using the format of mycompany-cloudtrail (ex. Cloudcheckr-cloudtrail). However, this can be anything you choose. If you are attempting to do this in GovCloud or China Region, reconfigure the previously-mentioned commands to use the proper region below:
$ aws cloudtrail create-subscription --name=awscloudtrail --s3-use-bucket=cloudtrail --region us-gov-west-1
$ aws cloudtrail create-subscription --name=awscloudtrail --s3-use-bucket=cloudtrail --region
You may want to create a single S3 bucket to aggregate all your CloudTrail logs from multiple AWS accounts. To do that, you can use the above script, but you will have to set the parameter "--s3-use-bucket=cloudtrail" to the name of the aggregated S3 bucket you want to use. After you configure an AWS account to write to the aggregated S3 bucket, you will need to update the bucket policy to allow CloudTrail to write into the appropriate directories in the bucket. You will need to create an entry in the policy for each of the accounts writing to the bucket. Create your complete bucket policy as shown here. Save into a file such as BucketPolicy.json.
  {

            "Version": "2012-10-17",

            "Statement": [

              {

                "Sid": "AWSCloudTrailAclCheck20131101",

                "Effect": "Allow",

                "Principal": {

                  "AWS": [

                    "arn:aws:iam::903692715234:root",

                    "arn:aws:iam::859597730677:root",

                    "arn:aws:iam::814480443879:root",

                    "arn:aws:iam::216624486486:root",

                    "arn:aws:iam::086441151436:root",

                    "arn:aws:iam::388731089494:root",

                    "arn:aws:iam::284668455005:root",

                    "arn:aws:iam::113285607260:root",

                    "arn:aws:iam::035351147821:root"

                  ]

                },

                "Action": "s3:GetBucketAcl",

                "Resource": "arn:aws:s3:::myBucketName"

              },

              {

                "Sid": "AWSCloudTrailWrite20131101",

                "Effect": "Allow",

                "Principal": {

                  "AWS": [

                    "arn:aws:iam::903692715234:root",

                    "arn:aws:iam::859597730677:root",

                    "arn:aws:iam::814480443879:root",

                    "arn:aws:iam::216624486486:root",

                    "arn:aws:iam::086441151436:root",

                    "arn:aws:iam::388731089494:root",

                    "arn:aws:iam::284668455005:root",

                    "arn:aws:iam::113285607260:root",

                    "arn:aws:iam::035351147821:root"

                  ]

                },

                "Action": "s3:PutObject",

                "Resource": [

                  "arn:aws:s3:::myBucketName/[optional]myLogFilePrefix/AWSLogs/111111111111/*",

                  "arn:aws:s3:::myBucketName/[optional]myLogFilePrefix/AWSLogs/222222222222/*"

                ],

                "Condition": {

                  "StringEquals": {

                    "s3:x-amz-acl": "bucket-owner-full-control"

                  }

                }

              }

            ]

          }
The section in bold red needs to be edited to reflect the correct bucket names.The section in bold green will need to be changed to reflect each AWS account you are setting up to write to this S3 bucket. Once that is complete, you then need to apply the policy to the bucket. To accomplish that, you need to access the AWS account that owns the S3 bucket and run the script below. Enter the following command in the CLI:
$ aws configure
After running the above command, you will be prompted for a secret key and access key. This access key should be for the AWS account that owns the aggregated S3 bucket. You then need to run the following script. In the script, you need to point the - -bucket section to your S3 bucket and - - policy file section to the local copy of the policy file you created.
$ aws s3api put-bucket-policy --bucket awscloudtrailaggregatedbucket --policy file://C:BucketPolicy.json