Customize Your App in CloudCheckr CMx
CloudCheckr CMx offers several customization options that allow you to tailor the look-and-feel of the application to fit your organization's needs. When you apply these changes, CloudCheckr CMx will propagate them across the entire application for all users in your project.
This topic focuses on the In-App Customization in CloudCheckr CMx available to our partners at no additional cost.
Here is a quick summary of the levels of customization we offer in CloudCheckr CMx where:
 = fully customizable
 = partially customizable
NA = not available
|
Feature |
In-App Customization |
Standard |
Premium |
|
Header Logo |
|
|
|
|
Browser Tab Favicon |
|
|
|
|
Color and Theme |
|
|
|
|
Landing Page Text | NA |
|
|
|
Customer Signup/Login Pages |
NA |
|
|
|
Email Domains | NA |
|
|
|
URL | NA |
CloudCheckr subdomain |
|
Procedure
- Launch CloudCheckr CMx.
- From the header menu, click the Settings icon and choose System Management > Customization.
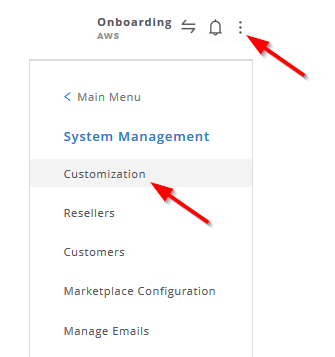
The Customization page opens.
- Click the button to learn how to customize each of the following features:
- Go to the Icon & Title section and type a name for the tab.
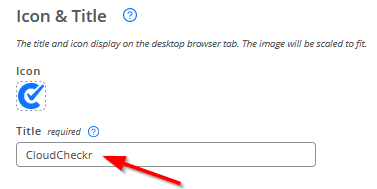
- Click the favicon, labeled Icon in the UI, navigate to the location where you store your tab logo, and click Open.
You can also drag the file from your computer and drop it into the Icon box.
CloudCheckr CMx will update the image on the right to give you a preview of your changes.

- Go to the Appearance section.
- Click the logo:
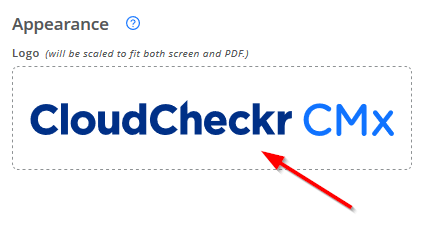
- Navigate to the location where you store your logo and click Open.
You can also drag the file from your computer and drop it into the Logo box.
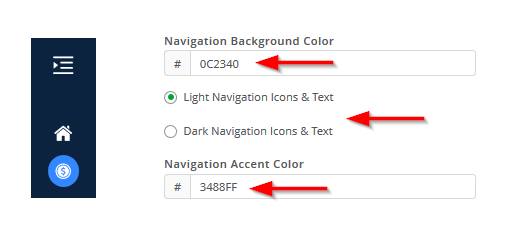
- Type the HEX color code for your navigation background color.
- Select one of the radio buttons to indicate if you want your icons to be light or dark.
- Type the HEX color code for your navigation accent color.
CloudCheckr CMx will update the image on the left will to give you a preview of your changes.
- Go to the Support Link section.
- Type the text that you want displayed in the Settings menu. This text will replace the default label, Support Site, which identifies our public knowledgebase.
- Type the URL you want to redirect the user to if they choose Settings > User > Support Site.

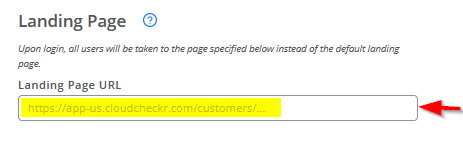
By default, CloudCheckr CMx will display your Home page after you log in to the application. Follow these instructions to change your default settings:
- Go to the Landing Page section.
- Type the URL of the page that you want users to see when they first log in to the application.
If you leave this field blank, CloudCheckr CMx will display the Home page after you log in to the application.
- Go to the Icon & Title section and type a name for the tab.
- Click APPLY CHANGES to save all your customization changes.