Set Up Reseller Links for AWS in CloudCheckr
In the cloud world, many AWS partners have embraced the role of reseller, which allows them to easily spin up or down the cloud resources and infrastructure for their clients. In the past, these partners would have to buy hardware or rent servers under long-term contracts; in the reseller business model, clients can use and get billed for resources by the hour.
CloudCheckr makes it easy for its AWS partners to set up a reseller, so that they can optimize their profits and expand their foothold in the cloud.
In this topic, you will learn how to configure a reseller in CloudCheckr.
Prerequisite
To use the Reseller feature, you must have a user with the Partner Sys Admin role, so that you can properly set up a Partner Sys Admin configuration.
A Partner Sys Admin configuration includes:
- a Parent partner (L1) account that retrieves the AWS billing data
- any number of Child partner (L2) accounts contained in the Parent partner that can receive billing data and any customizations, premiums, or discounts associated with that Parent partner
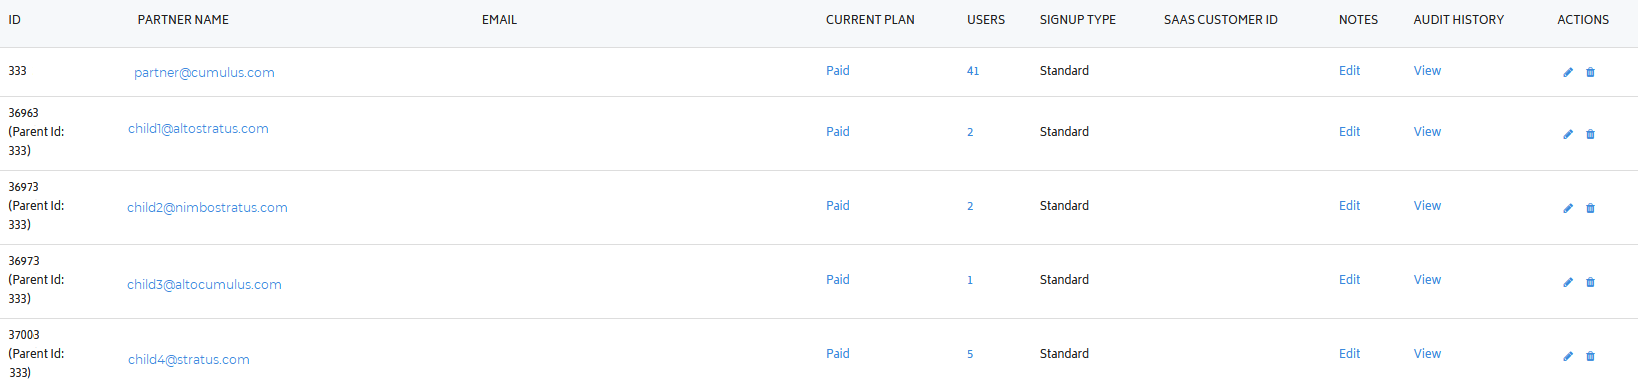
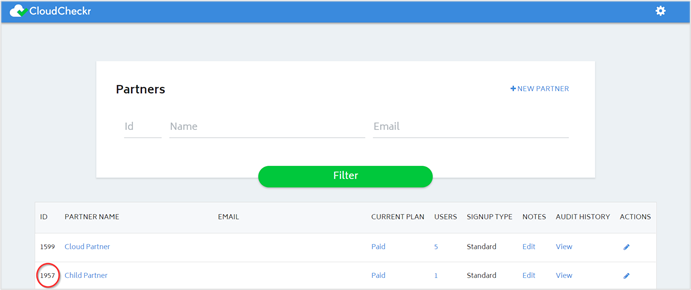
A Partner Sys Admin can only see their Child partners on the Partners page:
Workflow
Click each text box to learn how to setup a reseller in CloudCheckr:
You need to create a Child partner in CloudCheckr because you need the ID of a Child partner as part of the Reseller configuration.
Your CloudCheckr contact will first create a Partner Sys Admin user in your Parent partner. You will need those credentials to create the Child partner.
- Log in to CloudCheckr using your Partner Sys Admin credentials.
The Accounts List page for the Parent partner opens.
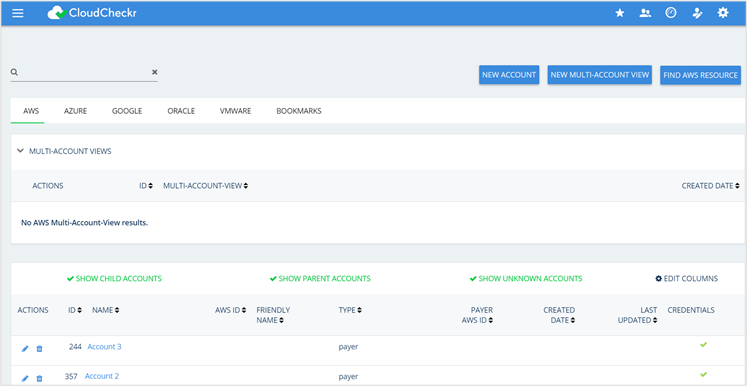
- From the header menu, click the Partners icon.

The Partners page opens.
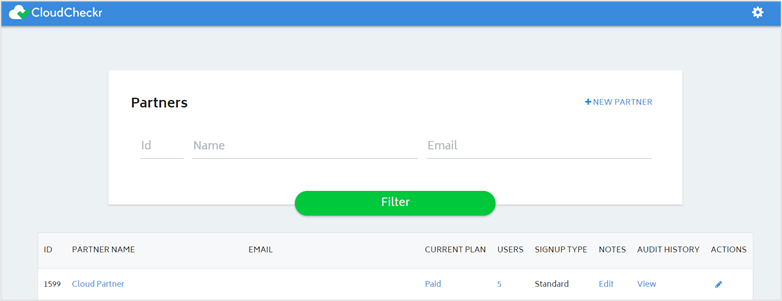
- Write down the ID of the Parent partner. You will need to reference this ID later in the procedure.

- Click + NEW PARTNER.
The Add Partner page opens.
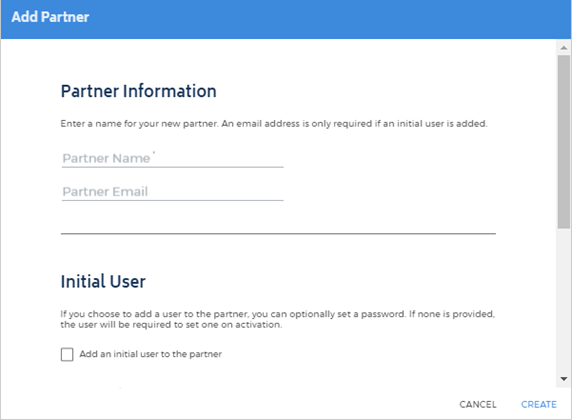
- In the Partner Information section:
- Type a name for the Child partner.
- In the Partner Email text field, type the email address of the Child partner.
- In the Initial User section:
- Select the Add an initial user to the partner check box.
- Leave the password section blank to force the new user to activate their account and set a password.
- In the Resellers section:
- Select the This partner is a reseller check box.
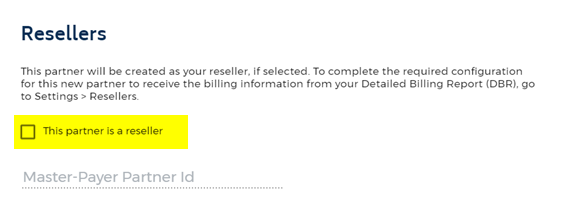
- Provide the ID of the Parent partner you identified earlier in the procedure.
- Click Create.
A message will indicate that the new Child partner was created successfully.
- Click OK to close the message.
- Select the This partner is a reseller check box.
- Refresh the page.
The Child partner is now listed on the Parent partner page.
- Write down the ID of the Child partner. You will need to reference this ID in Step 2: Create a Reseller Link.
To enable CloudCheckr's billing collector to retrieve the cost data from the Child partner, you must link the Parent partner and Child partner accounts.
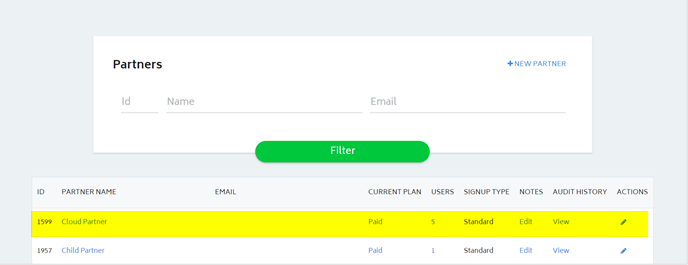
- From the Partner's page, click the name of the Parent partner.
The Accounts List page for the Parent partner opens.
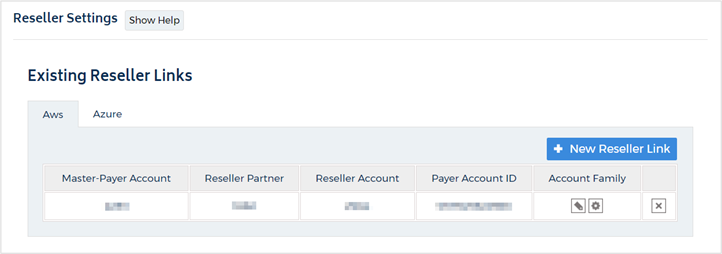
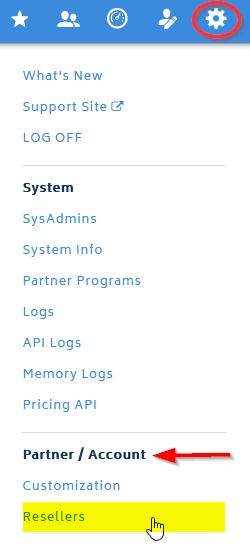
- From the header menu, click the Settings icon and select Partner / Account > Resellers.
The Reseller Settings page opens.
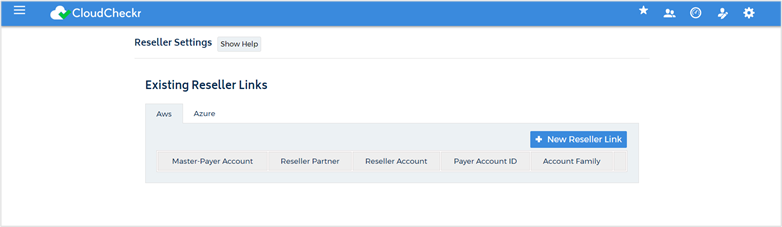
- Click the + New Reseller Link button.
The New Reseller Link dialog box opens.

- In the Master-Payer section, type the Project ID for the Parent partner in the Account ID field.
- In the Reseller section:
- type the Project ID of the Child partner.
- leave the default value of 0 in the Account ID field.
- In the Reseller Accounts section:
- type the Payer ID, provided by the Child partner, in the AWS Payer Account ID field.
- type the Payee account ID(s), provided by the Child partner, in the AWS Payee Account IDs field.
- In the Reseller Payer-Payee History section, leave the default setting, Reset all history.
- Click Link Accounts.
The reseller information is now linked to the account information provided by the Child partner.