Clients in CloudCheckr CMx
Clients are services that query the CloudCheckr API and return data based on that request. For example, you can create a client that queries the CloudCheckr API to return cost data from your Production environment.
To query the CloudCheckr API, you need an access key—a unique ID that gets passed to the API as a way to validate, track, and control how the API is used.
Clients are a component of CloudCheckr's Role Based Access Control (RBAC), which is a method for managing access based on the roles assigned to users.
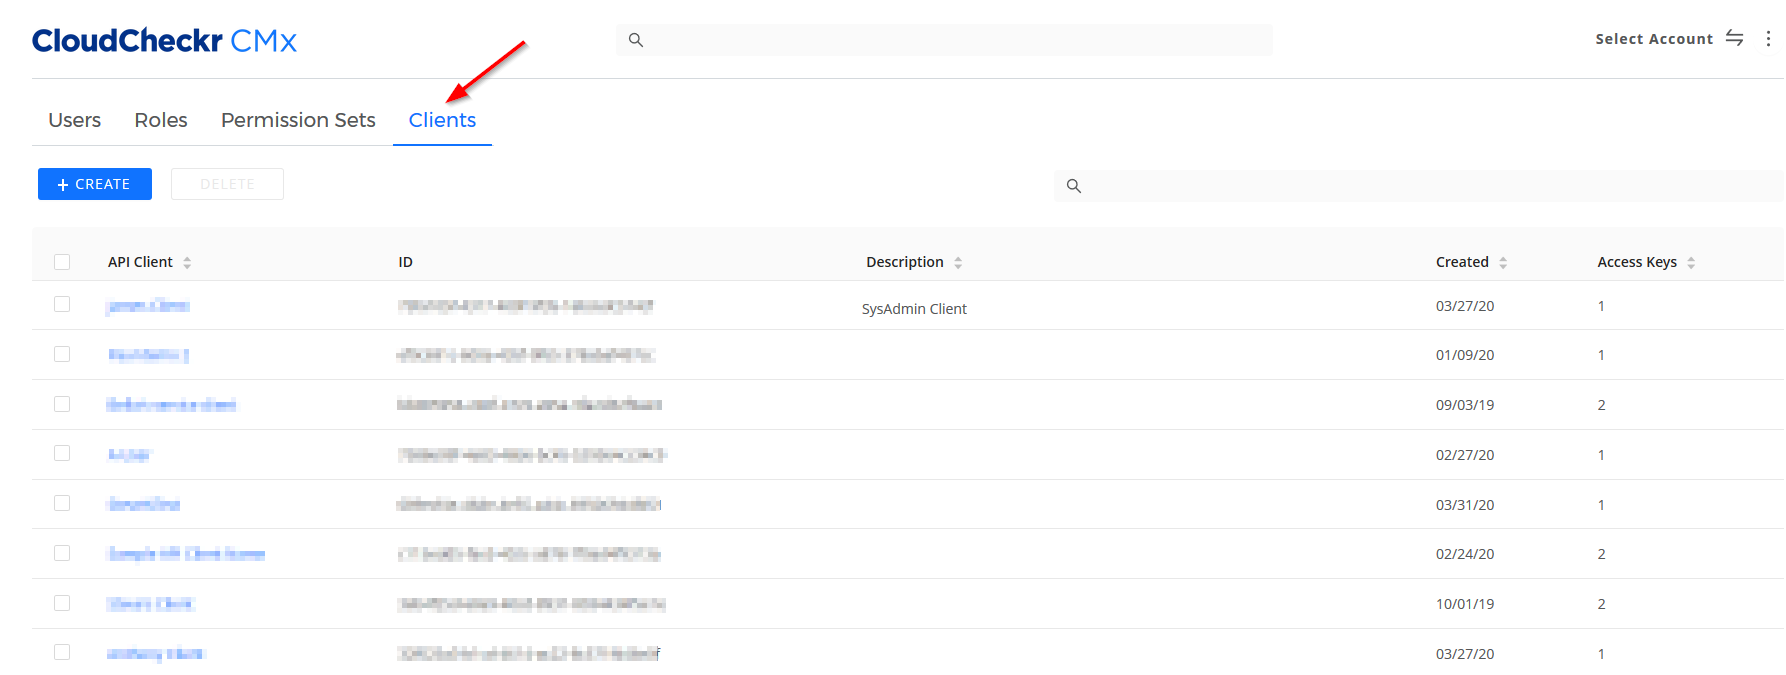
The Clients tab in Access Management is where you can view, search for, modify, or create a client.
Procedures
Click a button to learn more about the actions you can perform in the Clients tab:
This procedure shows you how to create a new client that you can use to query the CloudCheckr API.
- Click the Settings icon and select Access Management > API Management.
CloudCheckr CMx displays the Access Management page. The Clients tab is selected by default.
- Click the + CREATE button.
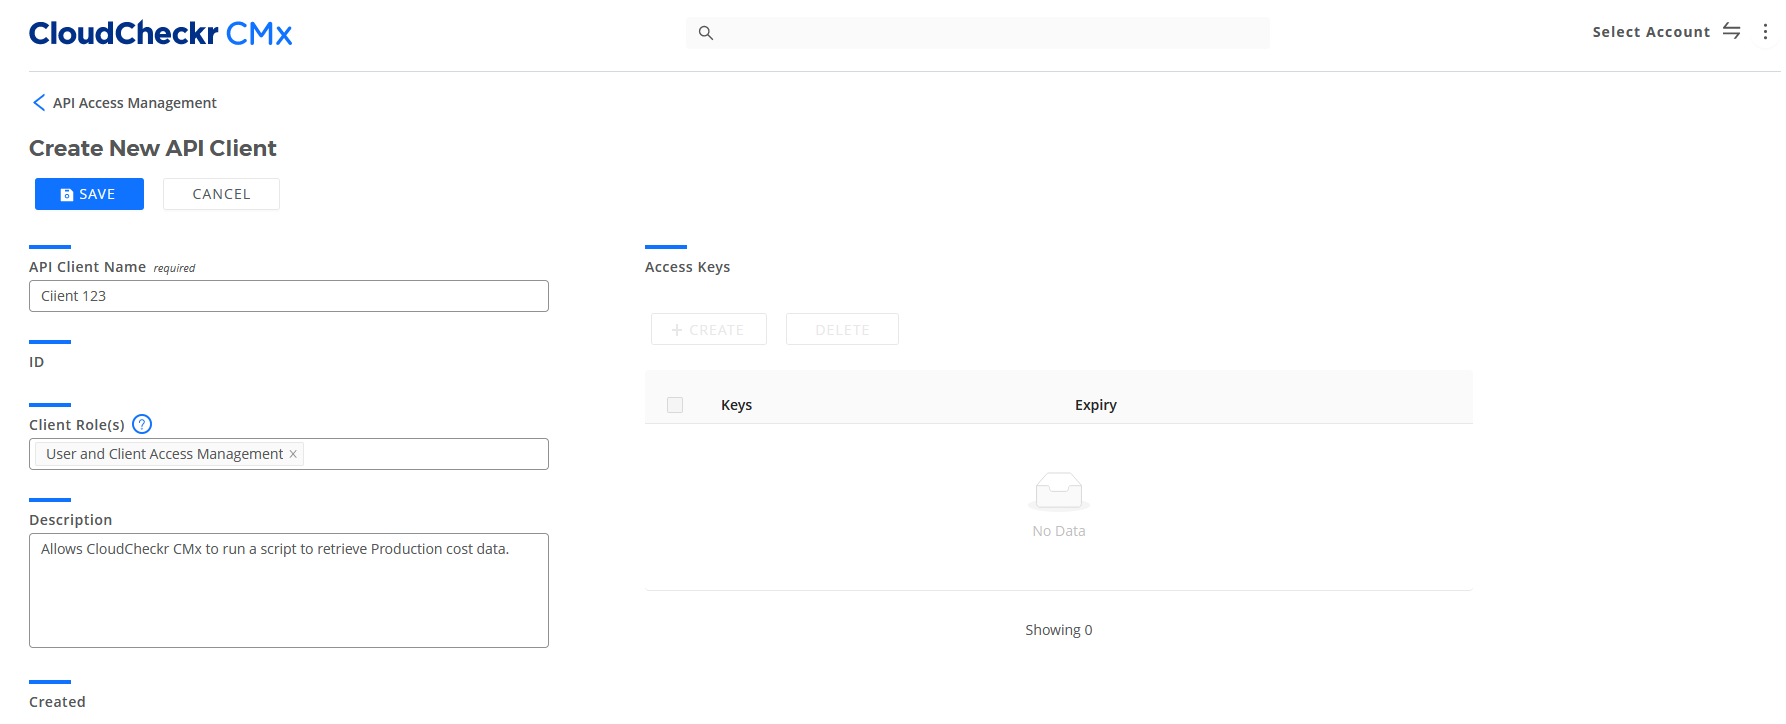
- Type a name for the client.
- From the Client Role(s) drop-down list, select the roles you want to assign to the client.You can only assign up to 10 roles to each client.
- Type any helpful personal and/or organizational notes if applicable.
Here is an example of what the screen would look like if you created a client with the User and Client Access Management role that that will allow you to query the CloudCheckr API to retrieve Production cost data:
- Click SAVE.
CloudCheckr CMx saves the client to the Clients list, and enables the + CREATE button under the Access Keys section:

This procedure shows you how to create an access key, which is required to make a call to the CloudCheckr API.
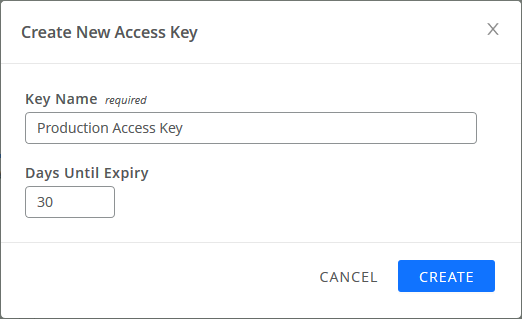
- Under the Access Keys section, click + CREATE button.
- In the Create New Access Key dialog box, type a name for the access key.
- Click the
 and
and  arrows or type a numerical value to identify the number of days before the access key will expire.
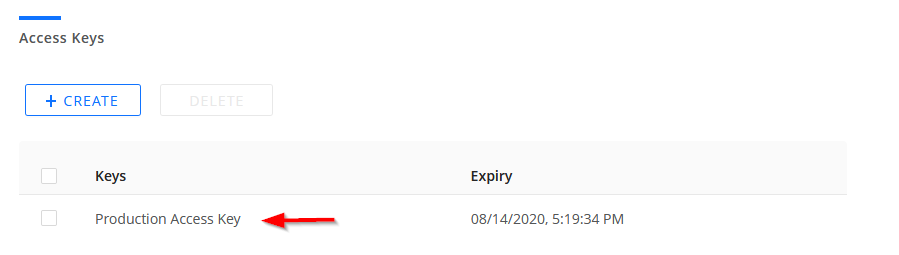
Here is an example of what the screen would look like if you created an access key for the Production environment with a 30-day expiration date:
- Click CREATE.
A pop-up indicates that CloudCheckr successfully created your access key.
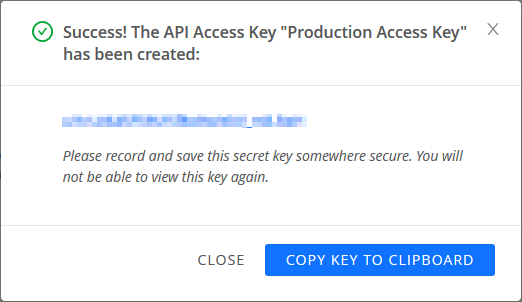 Since this is the only time you can copy this key, we recommend that you save it to a secure and easily accesible location.
 - Click COPY KEY TO CLIPBOARD.
CloudCheckr CMx displays the new access key in the Keys list:
- Click CLOSE.