Account Switcher in CloudCheckr CMx
The Account Switcher allows you to quickly switch to another account or a Multi-Account View (MAV) in your project.
You will find the Account Switcher in the Header bar on every page in the application, so you can change accounts or MAVs regardless of what report or feature you are using:

Procedures
Click a text box to see the instructions on how to use the Account Switcher to change your account or MAV:
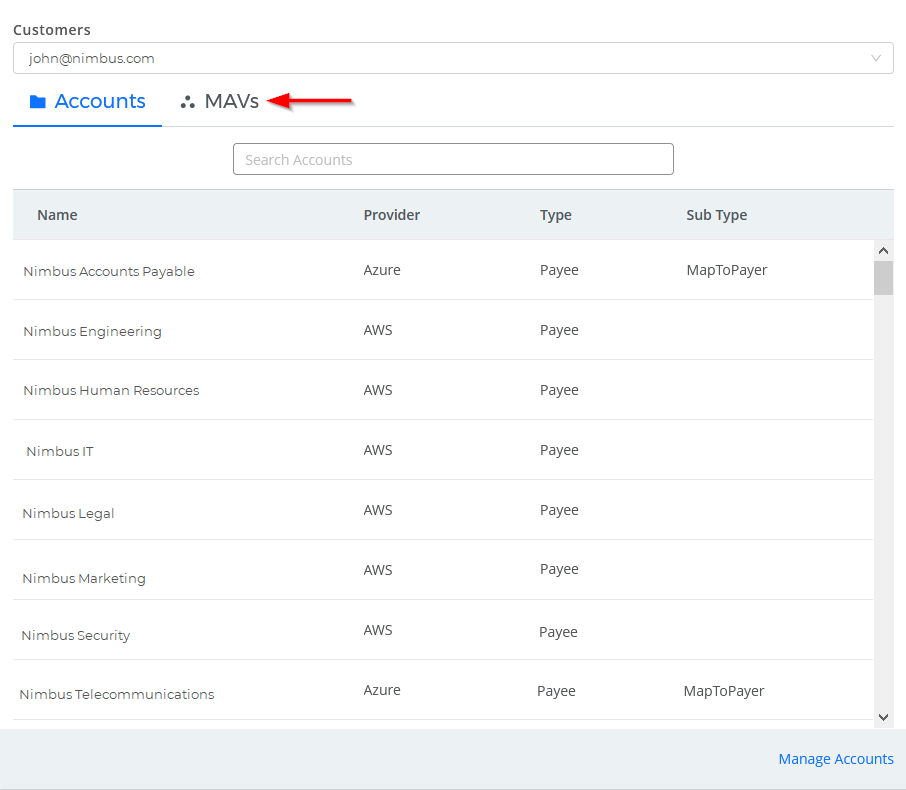
In this example, our current account is Onboarding, but our customer, John, wants to switch to the Nimbus IT account.
- In the Header bar, click
 .
.
A modal window opens.
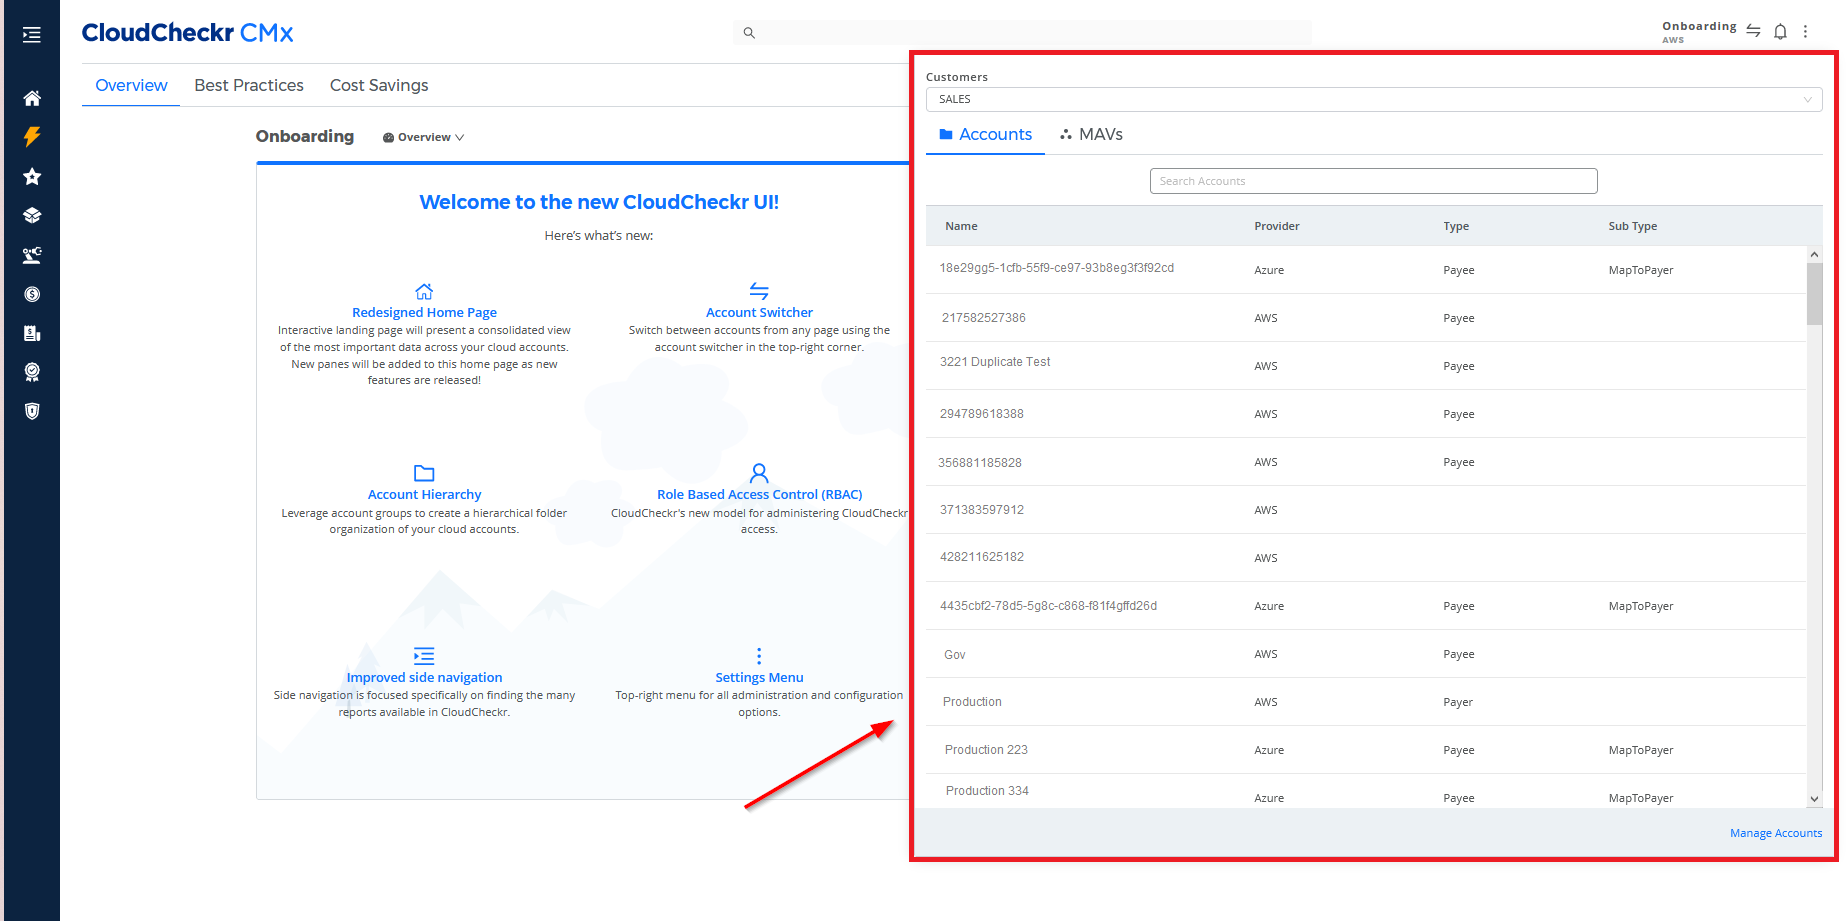
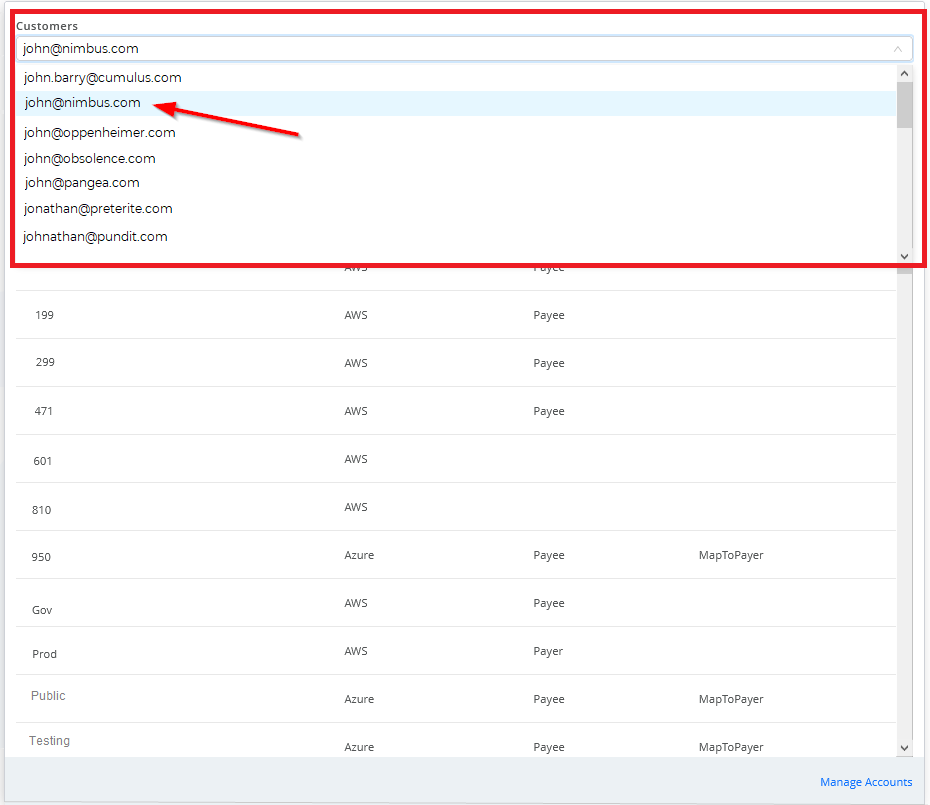
- Under Customers, type john@nimbus.com so that only John's accounts are visible.
 Your customer selection controls both the accounts and MAVs you see in the Account Switcher.
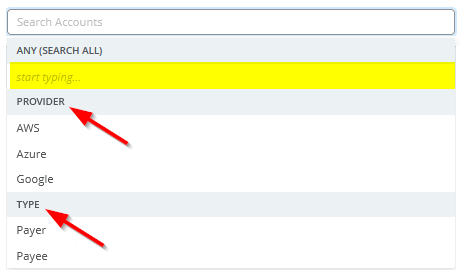
 - You can also filter the list of accounts by:
- typing a name of a selected account
- selecting a cloud provider
- limiting the list to Payer or Payee accounts only
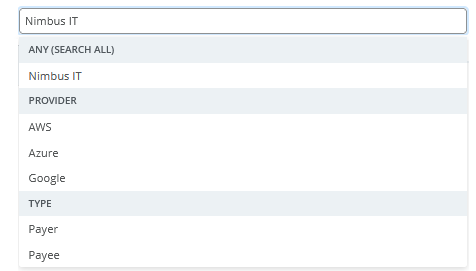
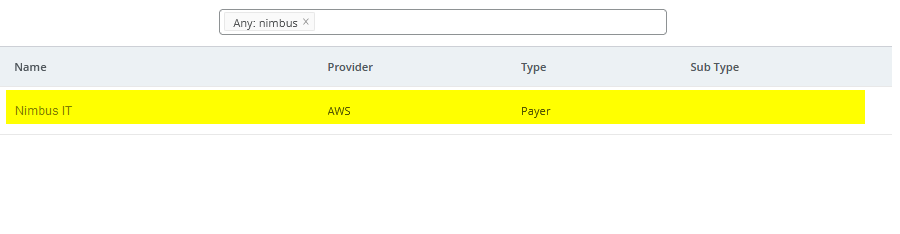
In our example, we typed Nimbus IT to filter the list to only include accounts that match those search terms:
- Click the account row to drill into the selected account.
The modal window closes. CloudCheckr CMx returns you to the page you were working in and more importantly, indicates that you are viewing the Nimbus IT account:

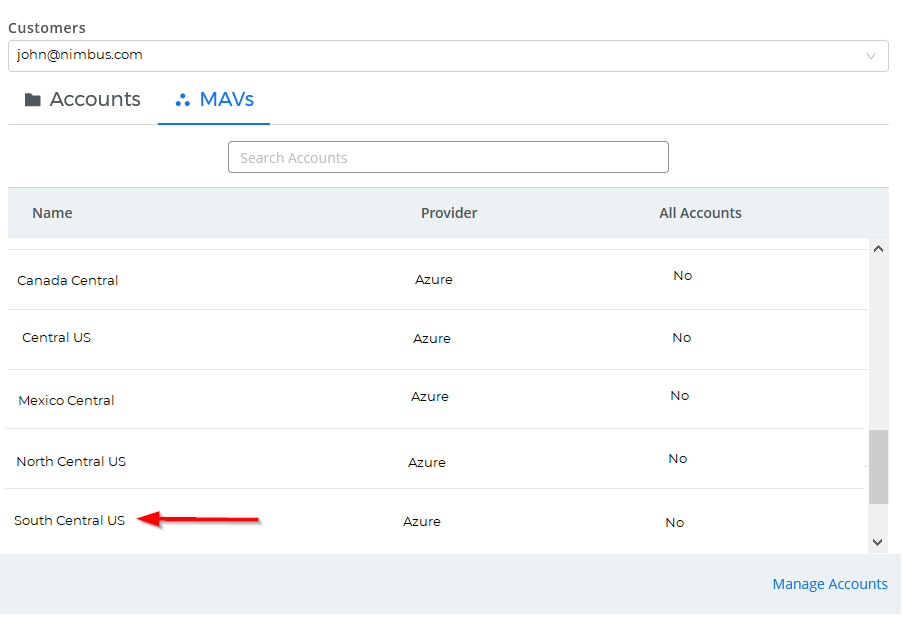
In this example, our customer, John, wants to select the South Central US MAV associated with his Azure deployment.
- In the Header bar, click .
- Under Customers, type john@nimbus.com to refine the list of MAVs to only include those MAVs associated with John.
Your customer selection controls both the accounts and MAVs you see in the Account Switcher.
- Click MAVS.
-
To refine the list, select Azure as your cloud provider.

- Click the selected row to drill into the South Central US MAV.
The modal window closes. CloudCheckr CMx indicates that you are viewing the South Central US MAV:
