Applying Least Privilege Policies Automatically Using CloudFormation
A cross-account role allows you to share resources across AWS accounts. Since your cross-account role works globally, you don't need IAM users to sign in and out of accounts to access these resources.
The CloudFormation template is an alternative to creating a cross-account role manually. It is a JSON file pre-configured with all the parameters and provisions you need to access your AWS resources across multiple accounts in your cloud environment. This template allows AWS to standardize permissions across your deployment automatically.
To create a cross-account role using the CloudFormation template, follow this workflow.
Workflow
Perform the following steps in the AWS Management Console:
Log in to the AWS Management Console.
From the menu bar, right-click your account name, and select My Billing Dashboard from the fly-out menu.
The Billing & Cost Management Dashboard opens.
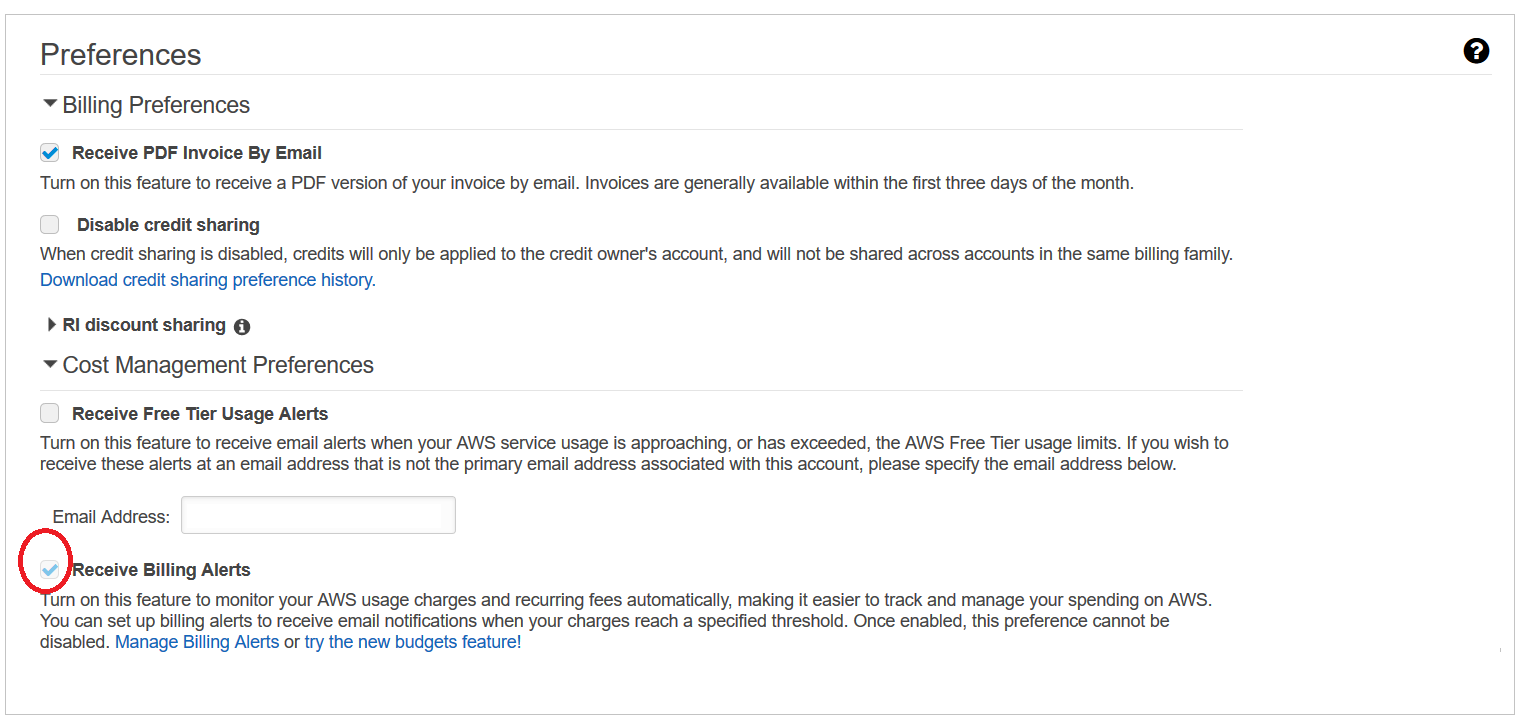
From the dashboard, click Billing Preferences.
The Preferences page opens.
Verify that the Receive Billing Alerts checkbox is selected. (optional)
Perform the following steps in CloudCheckr:
Launch CloudCheckr.
Select your account from the Accounts List page. If you have not created a CloudCheckr account, go to the Create an Account in CloudCheckr topic.
From the left navigation pane, select Account Settings > AWS Credentials.
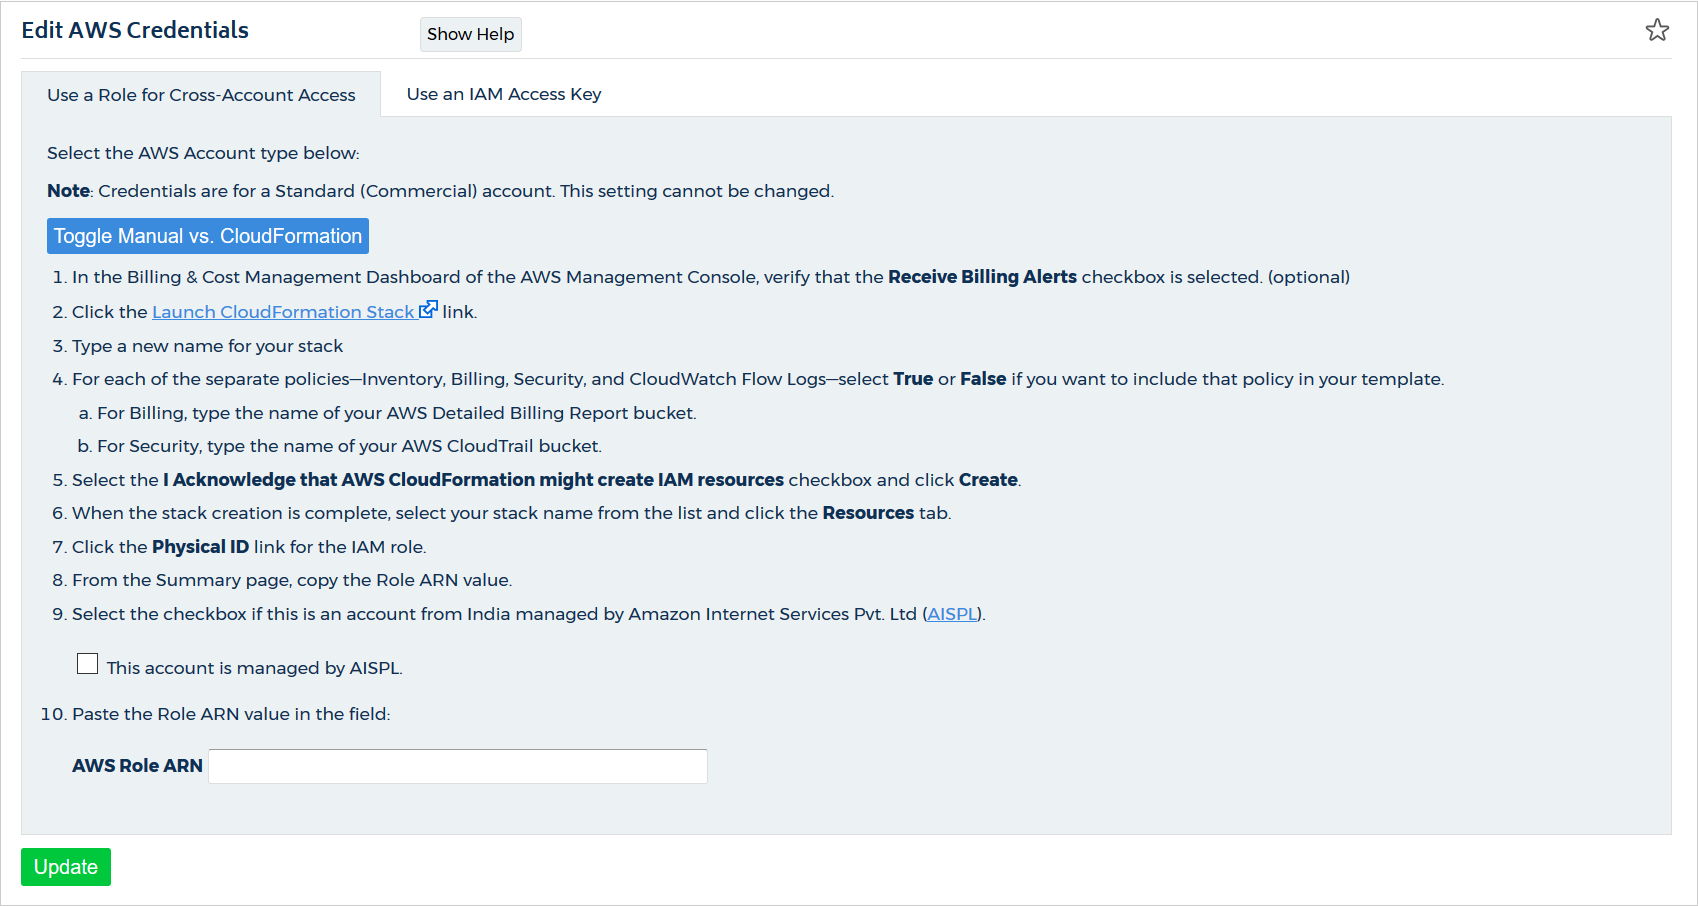
The Credentials page opens.
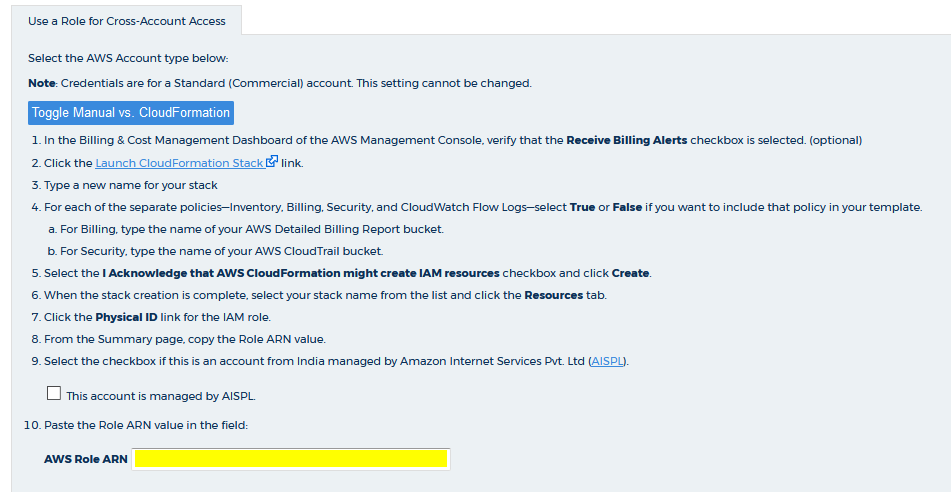
The Use a Role for Cross-Account Access tab displays and provides instructions how to use CloudFormation to create your role.
Click the
Launch CloudFormation Stack link.
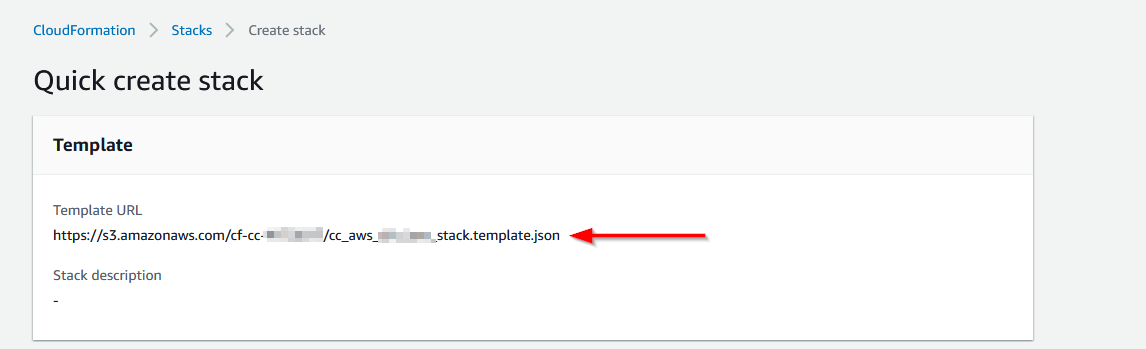
This action opens the Quick Create stack wizard in AWS.
Now that you have access to the Quick Create stack wizard, you can configure your stack.
CloudFormation associates your stack with the template URL that contains all the necessary parameters and provisions:
Under the Stack name section, type a name for your stack.
Keep the stack name as short as possible; it gets appended to the Role ARN value later and that value cannot exceed 64 characters.
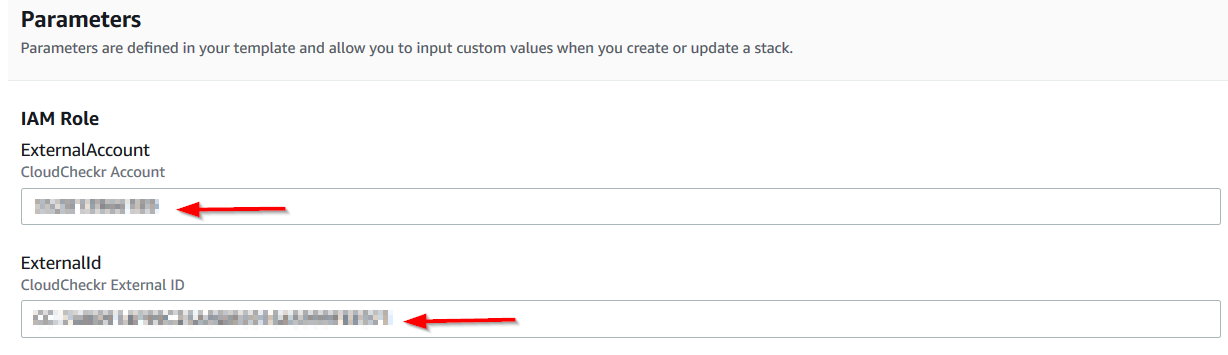
Scroll down to the Parameters section.
CloudFormation autopopulates the CloudCheckr Account and CloudCheckr External ID with the values associated with your AWS account.
Under Account Type, leave the default setting, Standard, since you are creating a cross-account role for a commercial account.
In the Inventory section, select True from the InventoryAndUtilization drop-down menu if you want your stack to include Inventory permissions.
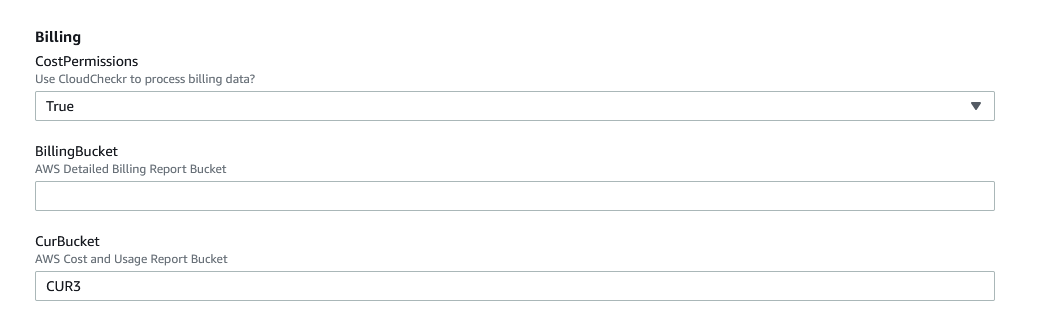
In the Billing section:
select True from the CostPermissions drop-down menu to include the Cost and Billing permissions in your stack
type the name of your S3 bucket in the BillingBucket field only if you are using the Detailed Billing Report (DBR) as your primary billing method
type the name of your S3 bucket in the CurBucket field if you are using the Cost and Usage Report (CUR) as your primary billing method
In this example, we configured a stack that will have Cost and Billing permissions and have access to the CUR bucket, since it is our primary and preferred billing method:
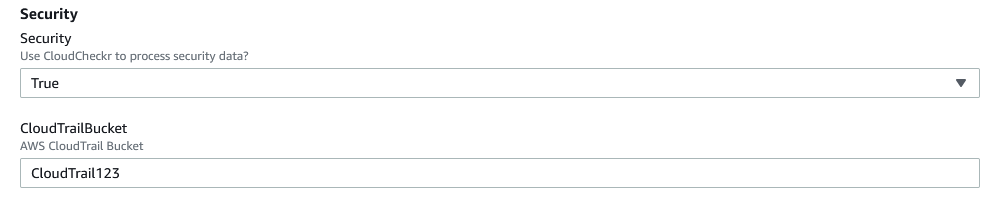
In the Security section:
select True from the from the Security drop-down menu to include the Security and CloudTrail permissions in your stack
type the name of the S3 bucket where AWS stores your CloudTrail data
In this example, we configured a stack that will have Security permissions and have access to a selected CloudTrail bucket:
From the CloudWatchFlowLogs drop-down menu, select True to include the CloudWatch Flow Logs permissions in your stack.
Scroll down to the Capabilities section, select the I Acknowledge that AWS CloudFormation might create IAM resources check box, and click Create stack.
The next screen displays your stack status, which changes from CREATE_IN_PROGRESS to
CREATE_COMPLETE once AWS finishes creating the stack.
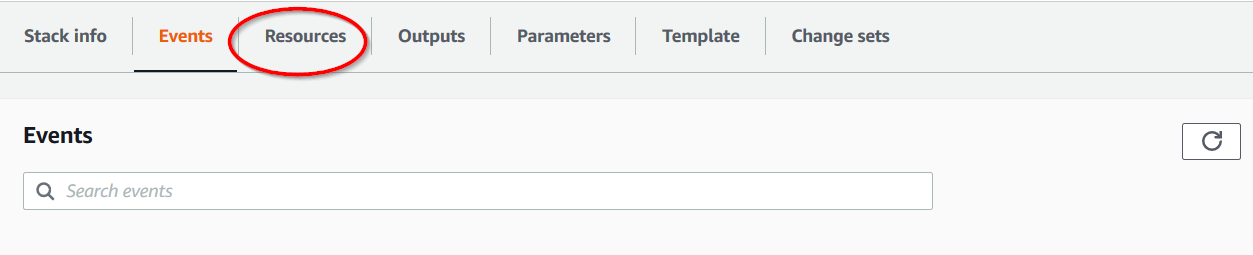
Click Resources.
Click the Physical ID link for the IAM role.
Locate the Role ARN value at the top of the Summary page and click the Copy icon.
Perform the following steps in CloudCheckr:
Return to the Credentials page in CloudCheckr.
Paste the Role ARN value in the AWS Role ARN field.
Click Update.
You now have a cross-account role that will allow you to access the resources in other AWS accounts based your selected permissions.
Click each button to review the exceptions to our default policy structure.
CloudCheckr will attempt to ingest data from all of the AWS core features to populate the Cost, Billing, Security, Inventory, and CloudWatch Flow Log reports. Since CloudCheckr must make calls even to those categories where you have not enabled permissions, you will see Unauthorized Access attempts in your CloudTrail logs.
These logs are only an indication of the CloudCheckr
workflow and in no way reflect an attempt on the part of CloudCheckr to collect unauthorized information from customers.
To help you maintain a secure, least privilege configuration, CloudCheckr's Security/Compliance policy does not include any s3:GetObject permissions. However, you can add add the s3:GetObject permission to the following reports:
We recommend restricting this permission to only selected S3 bucket(s).
List of VPCs report: enables CloudCheckr to ingest data from the Elastic Beanstalk
applications for this report.
The default Security/Compliance policy will only display 0 as the number of Elastic Beanstalk applications within a VPC.
As per the latest AWS requirements, CloudCheckr's CloudFormation template and the Inventory policy do not include the s3:GetEncryptionConfiguration by default.
However, without this permission, CloudCheckr cannot get the information it needs to report on the S3 Bucket Without Default Encryption Enabled Best Practice Check (BPC). If you decide not to add this permission to your policy, we recommend that you ignore or disable this BPC to avoid any false negatives.

 Keep the stack name as short as possible; it gets appended to the Role ARN value later and that value cannot exceed 64 characters.