Tagging Rules
The Tagging Rules report allows you to enforce your tagging policy across your AWS deployment by creating rules that will ensure your resources contain specific tag keys and values.
Procedure
- Launch CloudCheckr.
- Select an account from your Accounts List page.
- From the left navigation pane, choose Cost > Tags (from Detailed Billing) > Tagging Rules.
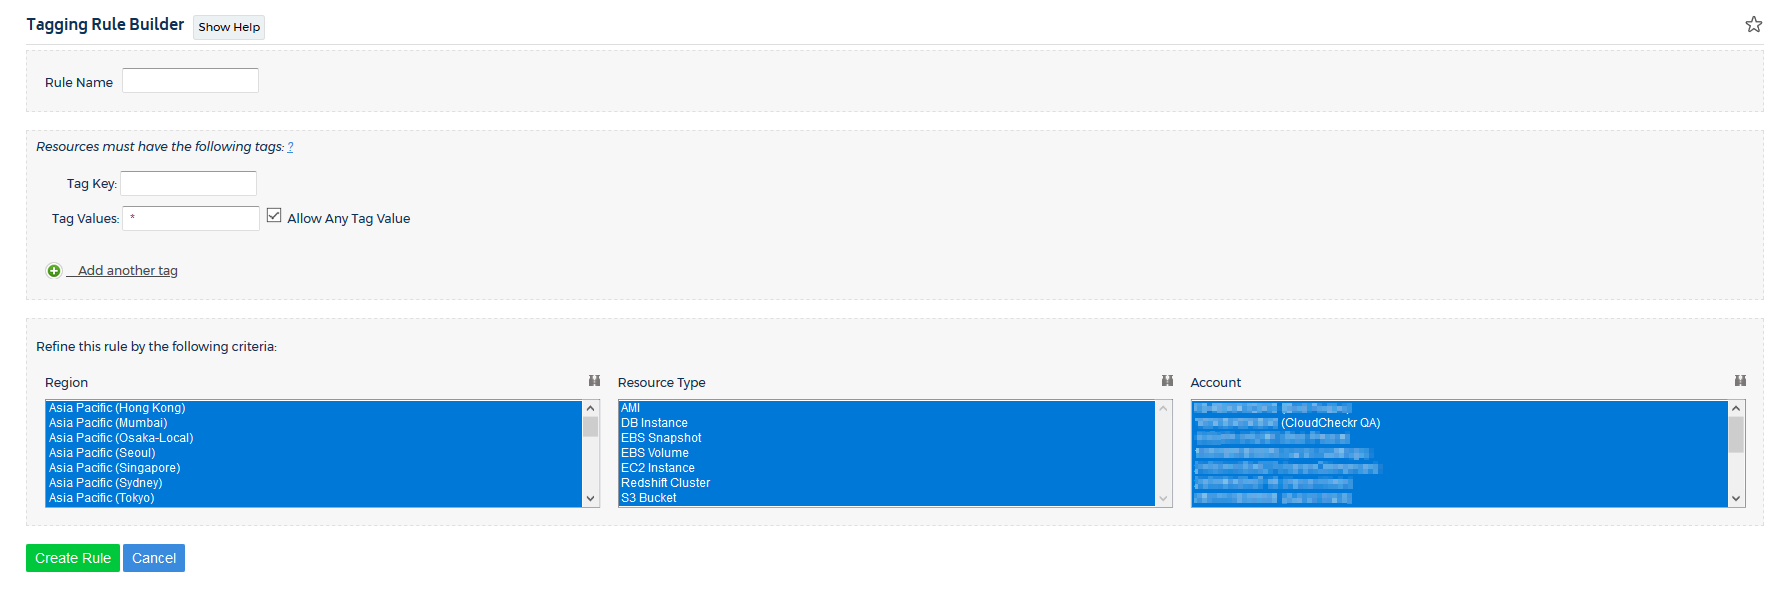
- From the Tagging Rules page, click the green + New Rule button to open the Tagging Rule Builder page.
- Type a name for your rule.
Since CloudCheckr will refer to the rule name in the Improperly Tagged Resources report, provide a unique and easy-to-identify name.
- Define a tag key and tag value(s) for your rule.
Click the buttons to see some examples of tag rules:
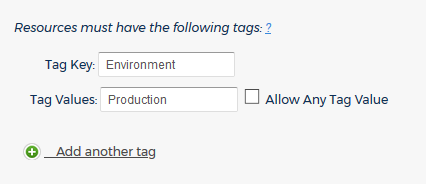
Example 1 shows you how to create a tag rule that contains a tag key and one tag value:
- Type Environment as your tag key.
You can only provide one tag key for each tag rule.
- De-select the Allow Any Tag Value checkbox.
- Type Production as your tag value.
This screenshot shows you what the final rule will look like:
When our application compares your resources with this rule, it will flag any resource that does not have the
Environmenttag key and does not have theProductiontag value.
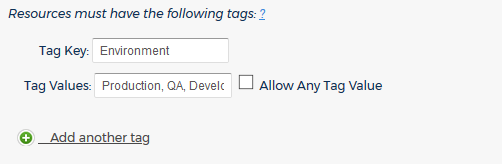
Example 2 shows you how to create a tag rule that contains multiple tag values:
- Type Environment as your tag key.
You can only provide one tag key for each tag rule.
- De-select the Allow Any Tag Value checkbox.
- Type Production, QA, Development in the Tag Values text field.
When you have multiple tag values, you must separate each entry with a comma.
This screenshot shows you what the final rule will look like:
When our application compares your resources with this rule, it will flag any resource that does not have the
Environmenttag key and does not haveProduction,QA, orDevelopmentas its tag value.
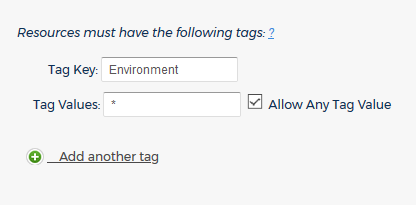
Example 3 shows you how to create a tag rule that allows for any tag value:
- Type Environment as your tag key.
You can only provide one tag key for each tag rule.
- Verify that the Allow Any Tag Value checkbox is selected.
This screenshot shows you what the final rule will look like:
When our application compares your resources with this rule, it will flag any resource that does not have the
Environmenttag key.
Example 4 shows you how to create a tag rule that looks for mutliple tag keys:
- Type Env as your tag key, de-select Allow Any Tag Value, and type Development as your tag value.
- Click
 to add another tag.
 - Type Environment as your tag key, de-select Allow Any Tag Value, and type Development as your tag value.
- Click
to add another tag.
- Type environment as your tag key, de-select Allow Any Tag Value, and
type Development as your tag value.
This screenshot shows you what the final rule will look like:
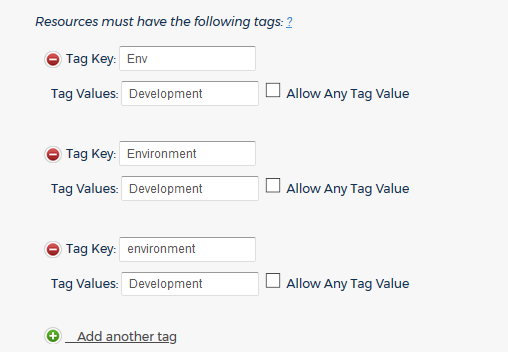
When CloudCheckr compares your resources with this rule, it will flag any resource that does not have
Env,Environment, orenvironmentas the tag key and does not have theDevelopmenttag value.
- Type Environment as your tag key.
- In the Region, Resource, and Account list boxes, select an option or options to refine your rule by location, resource type, or AWS account.
Click
 to see a complete list of options.

- Click Create Rule .
You can add as many rules to your account as you want.
- Reprocess your billing report for any previous months where you applied a rule.