Configure Single Sign-On for Azure Active Directory in CloudCheckr
In this topic, you will learn how to set up Single Sign-On (SSO) with your Azure Active Directory account by configuring:
- Azure Active Directory (the Identity Provider or IdP)
- CloudCheckr (the Service Provider or SP)
Procedure
- Log in to the Azure portal.
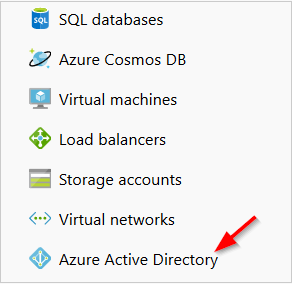
- From the left navbar, click Azure Active Directory.
- In the Manage section of the Azure Active Directory blade, click Enterprise applications.
- Click New application.
- Select Non-gallery application.
- In the Name text field, type CloudCheckr.
- From the bottom of the page, click Add.
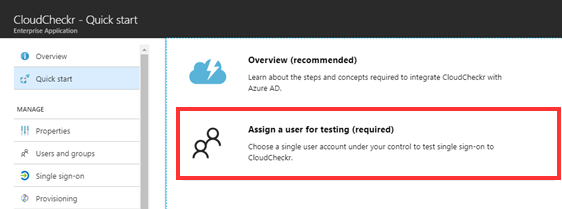
- From the CloudCheckr - Quick start screen, select Assign a user for testing (required).
The Users and Groups blade opens.
- Click Add user.
The Add Assignment blade opens.
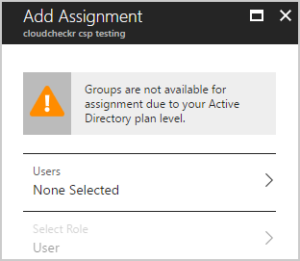
- Select Users.
A list of users displays.
- Select a user from the list and click Select.
- In the Add Assignment blade, click Assign.
- Close any open blades and return to the CloudCheckr - Quick start screen.
- Select Create your test user in CloudCheckr (required).
The Provisioning blade opens. - Verify that the provisioning mode is set to Manual.
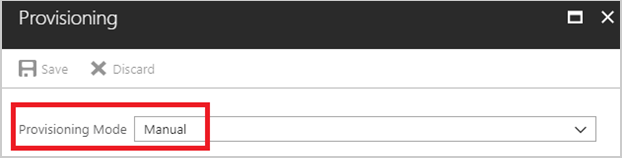
- Click Save and close the blade.
In the steps that prompt you to type a URL, make sure to replace the word region with the name of the region where your platform is deployed:
| Platform | Region |
| US Production | app |
| Europe | eu |
| Australia | au |
| Gov | gov |
| Fed | fed |
- From the CloudCheckr - Quick start screen, click Configure single sign-on (required).
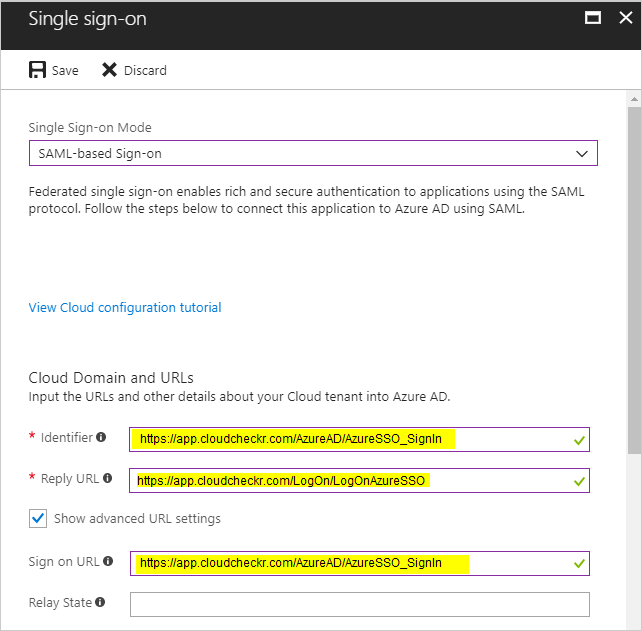
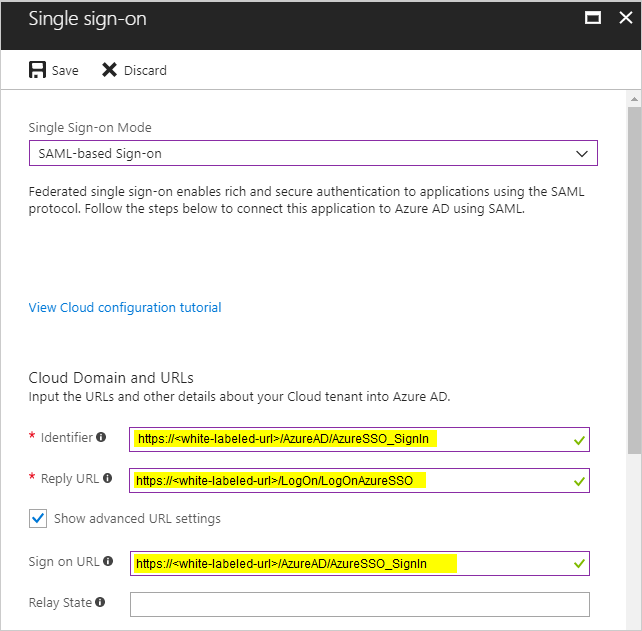
- From the Single Sign-on Mode drop-down menu, select SAML-based Sign-on.
- Go to the Identifier text field and type the URL that is appropriate for your SSO configuration:
iDP-initiated SSO?
(Not White-Labeled)
SP-initiated SSO?
(White-Labeled)
Type this URL:

https://region.cloudcheckr.com/AzureAD/AzureSSO_SignInhttps://white-labeled-url/AzureAD/AzureSSO_SignIn - Go to the Reply URL text field and type the URL that is appropriate for your SSO configuration:
iDP-initiated SSO?
(Not White-Labeled)
SP-initiated SSO?
(White-Labeled)
Type this URL:
https://region.cloudcheckr.com/AzureAD/AzureSSO_SignInhttps://white-labeled-url/AzureAD/AzureSSO_SignIn - Select the Show advanced URL settings check box.
- Go to the Sign On URL text field and type the URL that is appropriate for your SSO configuration:
iDP-initiated SSO?
(Not White-Labeled)
SP-initiated SSO?
(White-Labeled)
Type this URL:
https://region.cloudcheckr.com/AzureAD/AzureSSO_SignInhttps://white-labeled-url/AzureAD/AzureSSO_SignInThis URL could be a subdomain on CloudCheckr’s domain, or the customers domain. - Click Save.
Here is an example of what a completed SSO configuration would look like for a customer who is not white-labeled:
Here is an example of what a completed SSO configuration would look like for a white-labeled customer:
- Once the Enterprise application setup is complete, you can log in to myapps.microsoft.com and select CloudCheckr from the list of applications.
- Please contact Support directly to ensure your CloudCheckr account is properly configured to allow access to Azure Active Directory.