CSV Account Upload
The CSV Account Upload feature allows users to import multiple accounts and credentials in bulk to make account creation easier, faster, and reduce the potential for error that may occur when accounts are added manually.
To successfully add multiple accounts and credentials in bulk, follow the steps in this workflow.
Workflow
Click each text box to reveal each step in the CSV Account Upload workflow:
To use the CSV Account Upload feature in CloudCheckr, you must first create AWS credentials using the IAM access key and secret key.
To add multiple accounts and credentials in bulk, you must provide a .CSV file that contains a complete list of the users and their associated accounts, IAM access keys, and secret keys.
- For each user, copy the IAM access key, secret key, and account name from the separate .CSV files you exported earlier and paste them into one .CSV file.
To download a template, click CSV-Template.csv.Incorrect formatting or empty fields may cause the upload to fail. In this case, the application does not provide an error message. To ensure your upload is successful, remove column headers before you upload the file.
- Save the .CSV file that contains your IAM access keys, secret keys, and account names on your PC.
- Launch CloudCheckr.
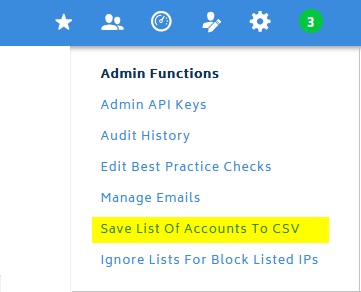
- From the header bar, click the Admin Functions icon and select Save List of Accounts To CSV from the menu.
A dialog box opens. The content of the dialog box depends on your browser. In this example, we used Mozilla Firefox:
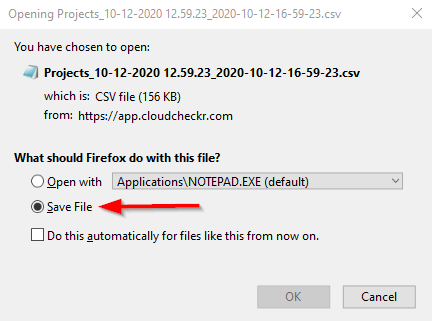
- Click Save File to save the .CSV file that contains the list of accounts you want to configure.
- Click OK.
All accounts listed in the .CSV file now contain credentials.
- From the Projects page in CloudCheckr, select the payer account.
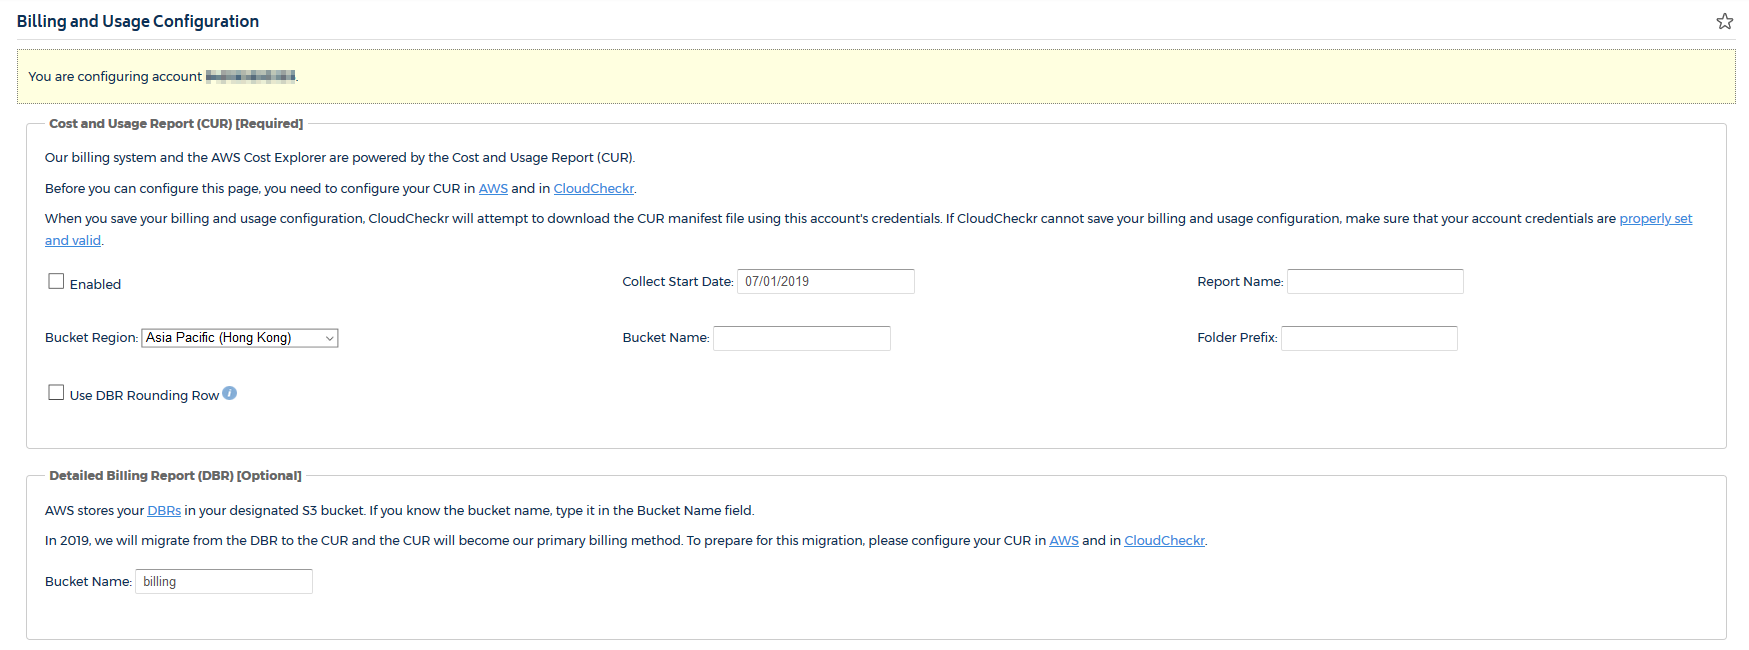
- From the left navigation pane, choose Account Settings > Billing and Usage.
The Billing and Usage Configuration screen opens.
- Scroll down to the Payee-Level Settings section.
- Under the Automatically Register Payee Accounts section, select the Enabled checkbox.

- Click Save Configuration.
When the bill collector runs, which it does hourly, the application will create a separate project for each linked account in the consolidated billing family.
Once the accounts are in the application, you can add credentials using the CloudFormation templates in the AWS Management Console.