Configure a GovCloud Account Using IAM Access Keys
If your organization requires you to use IAM access keys, use the instructions in this topic. If your organization requires a more secure method to credential your GovCloud account and you are using the AMI product, review the Configure a GovCloud Account Using a Cross-Account Role (AMI only) topic.
AWS GovCloud is an isolated cloud region that hosts sensitive data and regulated workloads for customers who must comply with strict US government security and compliance requirements. Only companies or organizations operated by employees who are US citizens working on US soil can access the AWS GovCloud environment.
Because AWSGovCloud operates under such strict requirements, its configuration is a little more complicated than your standard commercial AWS account.
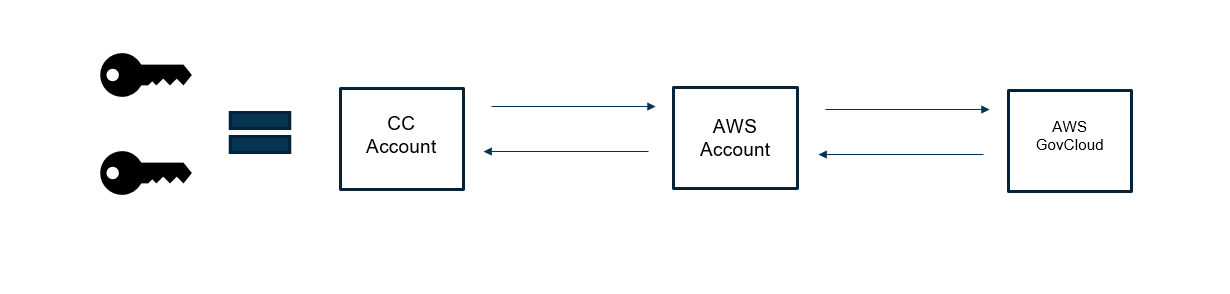
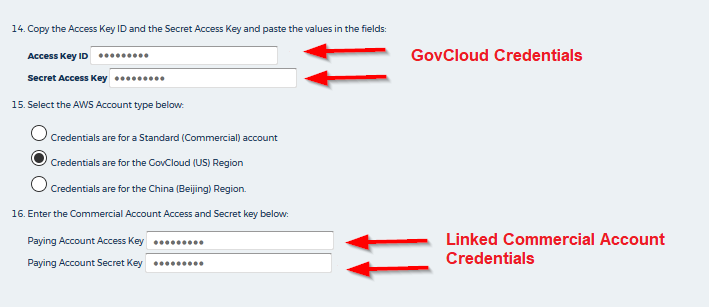
In a standard commercial account, you need one set of credentials—an IAM access key and secret key—to connect your CloudCheckr and AWS accounts:
In a GovCloud configuration, all AWS GovCloud activity, usage, and billing is managed through a standard AWS account or linked commercial account so you need two sets of credentials: one for your GovCloud account and one for your commercial linked account:
Determine Your Payer
Before CloudCheckr can ingest the cost data from your AWS GovCloud account, you must provide the payer credentials.
Who the payer is depends on your GovCloud setup:
Scenario
Use Credentials From
CloudCheckr Configuration
Master Payer account directly linked to GovCloud account
Master Payer
Master Payer and GovCloud accounts
Linked Commercial account is a payee of the Master Payer account
Linked Commercial
Master Payer, Linked Commercial, and GovCloud accounts
Because AWS stores the billing data in the Master Payer account and payees cannot access this data directly, you must set up the Master Payer and its payees as separate accounts.
CloudCheckr will correctly disperse the billing data to each of the payees.
If your Linked Commercial account is one of multiple payees but you used the Master Payer account credentials, you could see duplicate costs in your payee accounts.
Procedure
Click each step to learn how to configure a GovCloud account using a cross-account role.
Since it is the most common setup, these instructions are tailored to the GovCloud scenario where a linked commercial account is a payee of a Master Payer account.
A Master Payer account is required so that CloudCheckr can ingest the cost data from the GovCloud region.
Log in to the AWS Console.
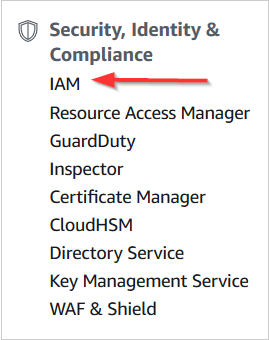
Click All services, locate the Security, Identity & Compliance section, and select IAM.
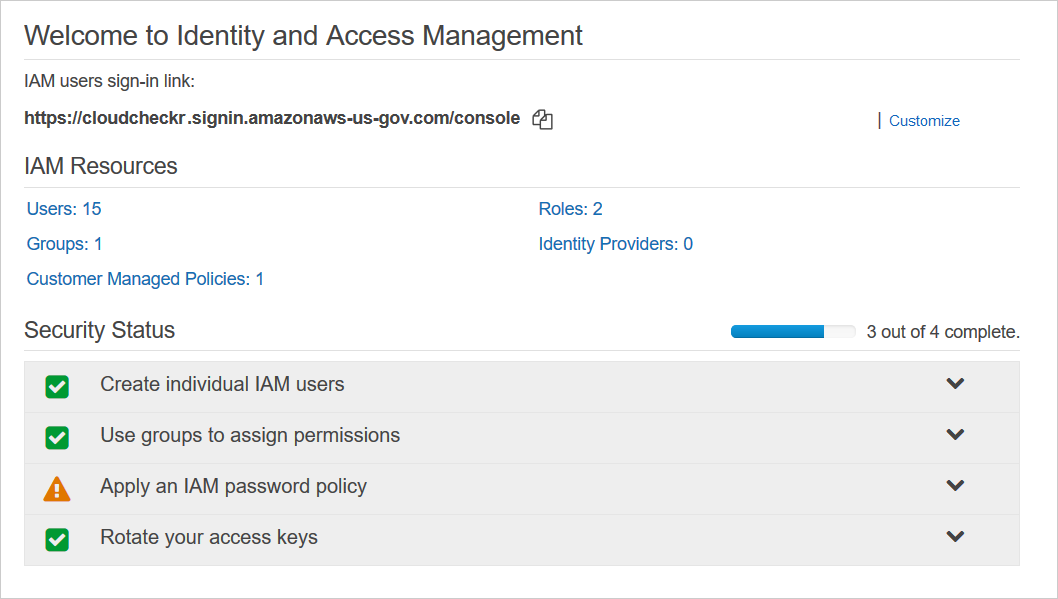
The Welcome to Identity and Access Management screen displays.
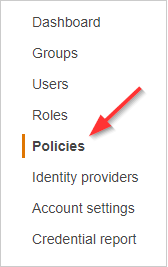
From the dashboard, click Policies.
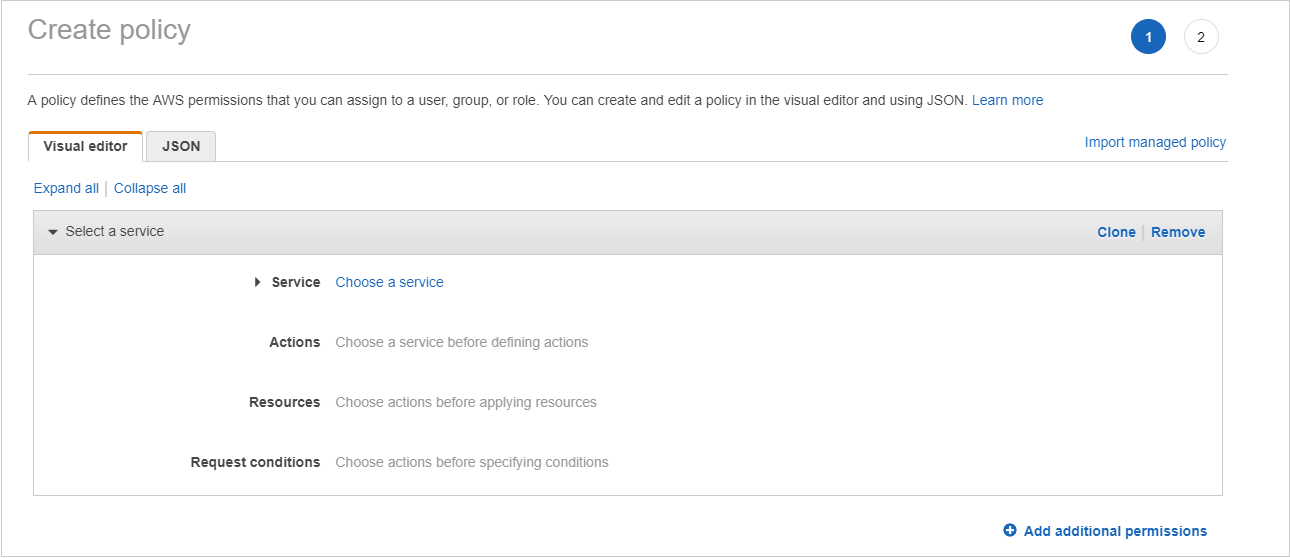
Click Create policy.The Create policy page opens.
Follow this step to add the Cost policy and the Billing policy that corresponds to your billing method.
Click a button to display your selected policy document.
Copy the entire contents of the policy document to your clipboard.
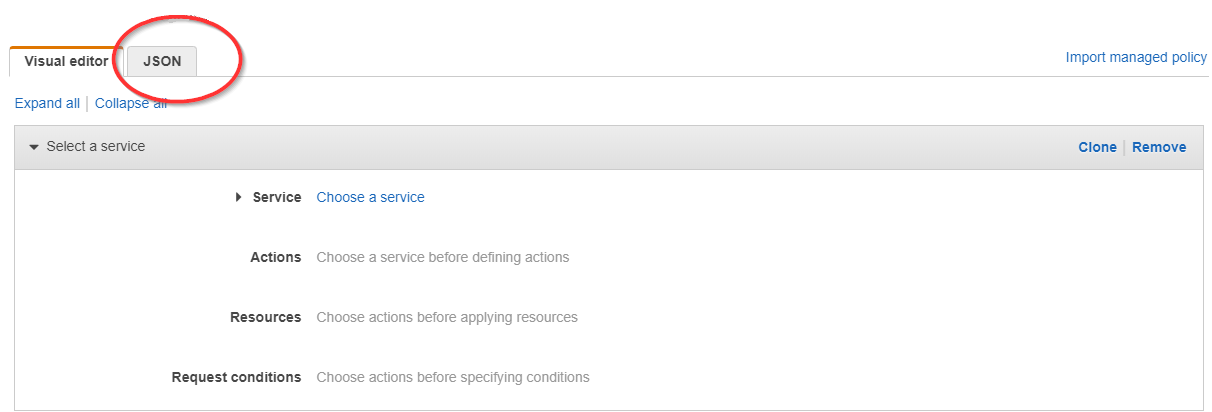
Return to the Create policy page in the AWS GovCloud Management Console.
Click the JSON tab.
Replace the text in the JSON tab with the policy you just copied.
In your Cost and Billing policies, make sure that you replace the dummy S3 bucket name with the name of the S3 bucket where your Detailed Billing Report (DBR) or Cost Usage Report (CUR) data will be stored:
Click Review policy.
Type a name for the policy and click Create policy.
AWS adds the new policy to the list.
Launch CloudCheckr.
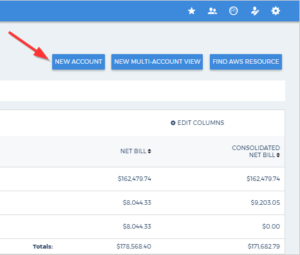
From the right side of the screen, click NEW ACCOUNT.
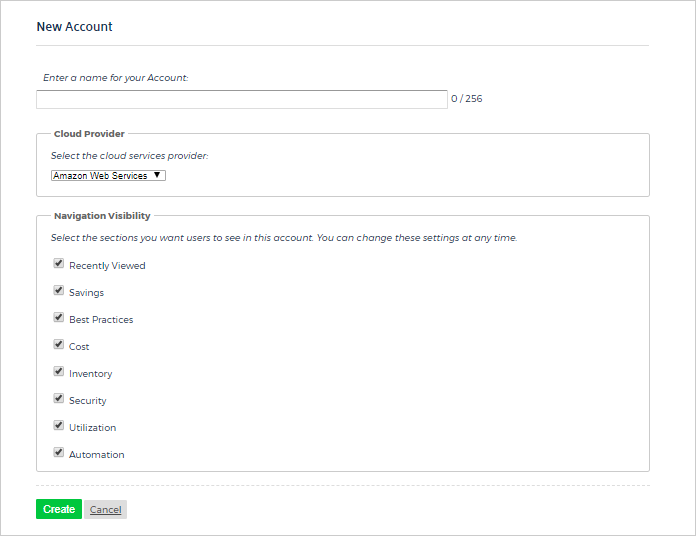
The New Account screen displays.
Type a unique name for your account and in the Cloud Provider section, select Amazon Web Services.
Scroll down to the Navigation Visibility section and select the check boxes next to
the modules and sections you want to be accessible for this account.
At the bottom of the New Account page, click Create.
CloudCheckr opens the Configure Account page. You will need to create a role in AWS before you can complete the configuration.
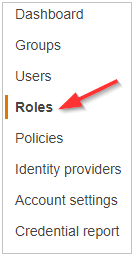
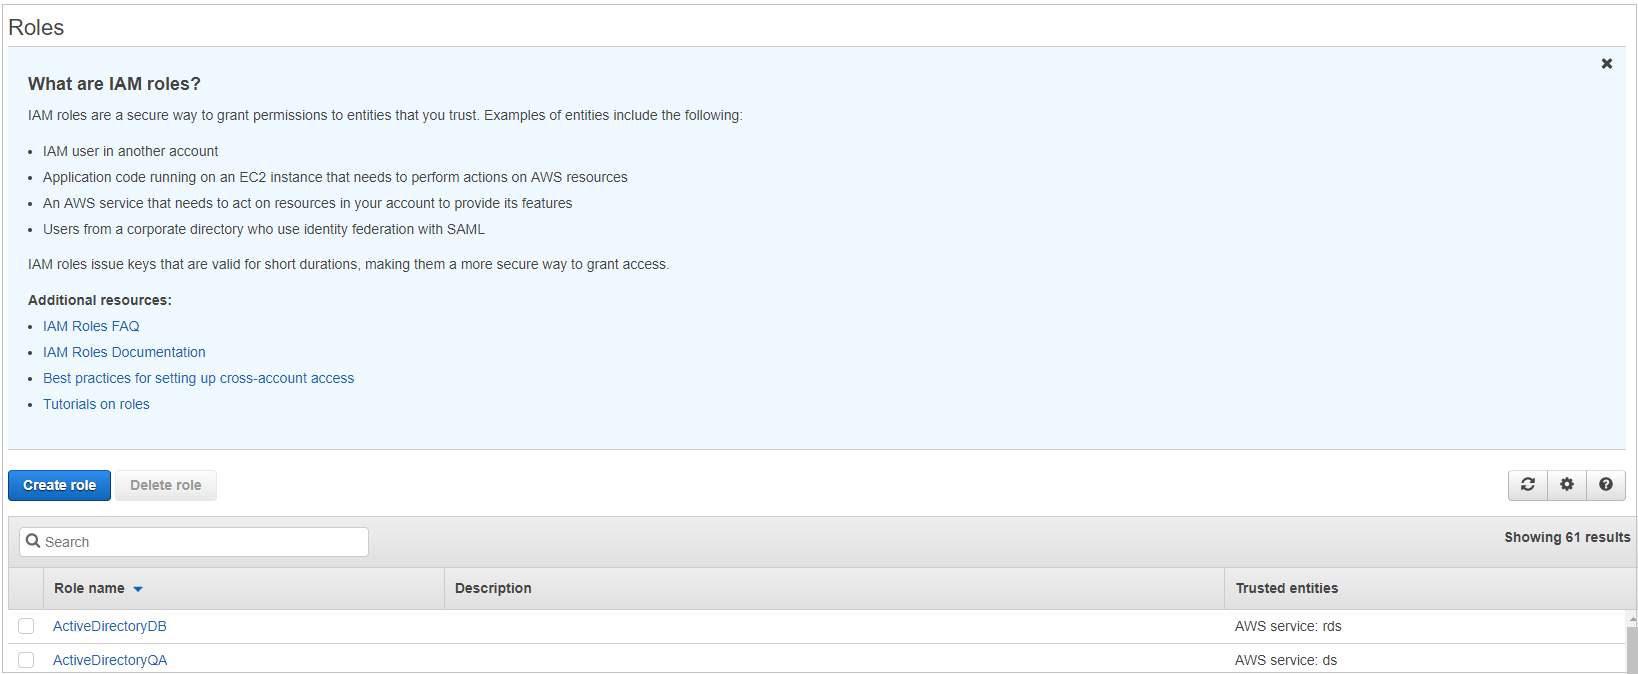
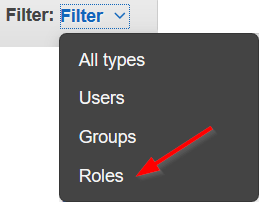
Return to the IAM dashboard and click Roles.
The Roles page opens.
From the middle of the page, click Create role.
The Create role page opens.
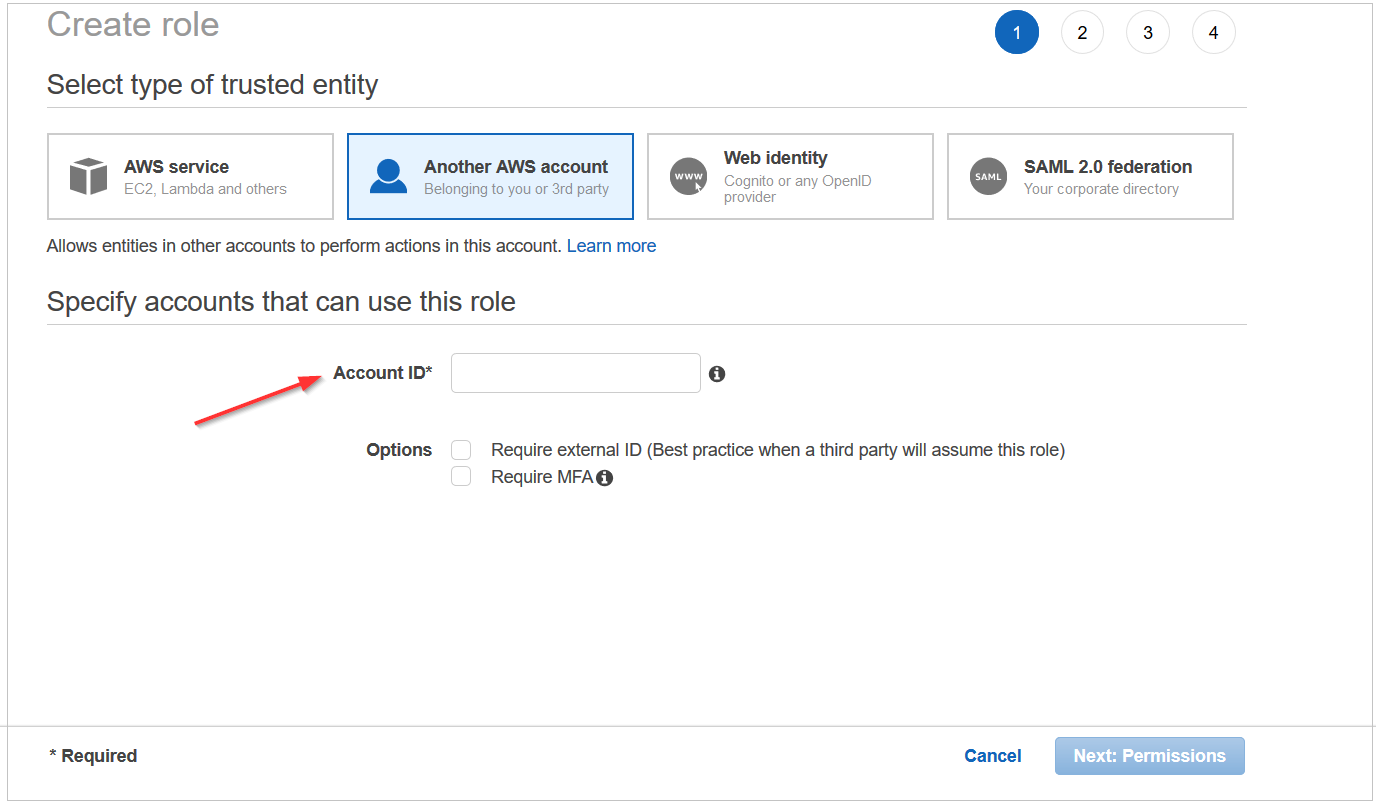
In the Select type of trusted entity section, click Another AWS account.
The screen prompts you to add an Account ID value.
To obtain the Account ID value:
Return to the Configure Accounts page in CloudCheckr.
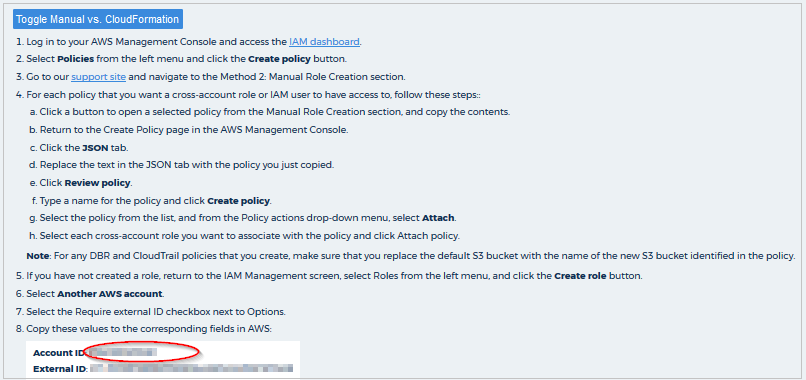
Click the Use a Role for Cross-Account Access tab.
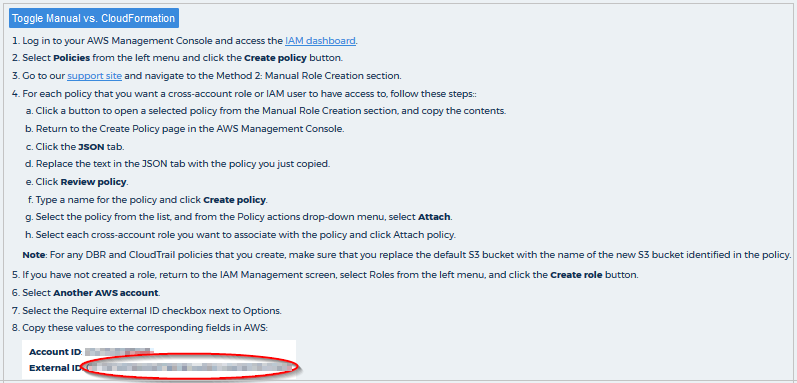
Click Toggle Manual vs CloudFormation to view the instructions on how to create a cross-account role manually.
Copy the Account ID.
Return to the AWS GovCloud Management Console and perform the following steps:
Paste the Account ID.
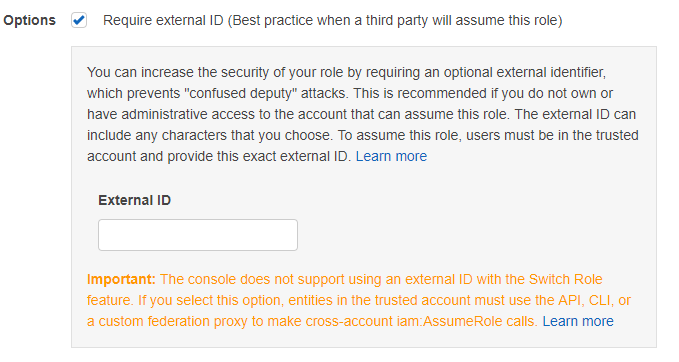
In the Options section, select the Require external ID checkbox.
AWS displays more information about the purpose of the external ID.
To obtain the External ID value:
Return to the Configure Accounts page in CloudCheckr.
Copy the external ID.
Return to the AWS GovCloud Management Console and perform the following steps:
Paste the External ID.
Verify that the Require MFA radio button is not selected.
Click Next: Permissions.
A list of policies displays.
Select the checkboxes next to your Cost and Billing policies and click Next: Tags.
For the purposes of this procedure, we will not add tags.
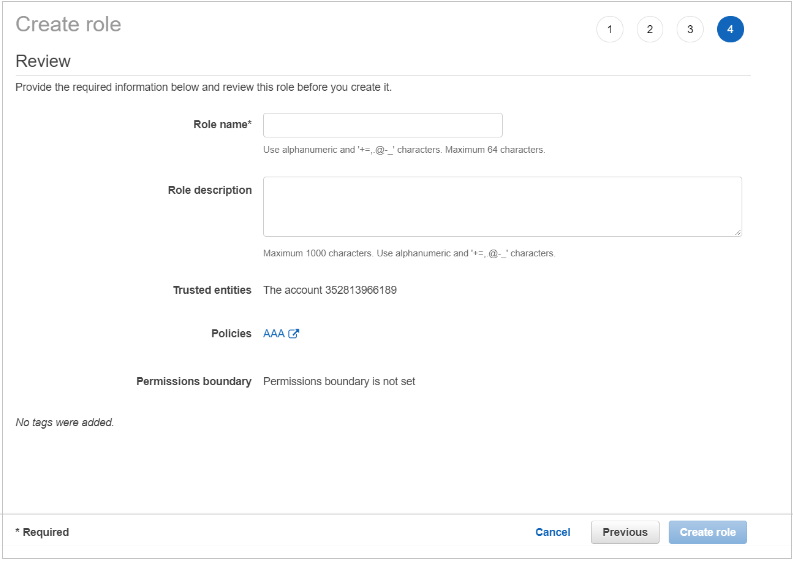
Click Next: Review.
The Review page opens.
Type a name for the role and click Create role.
The role is now displayed in the list.
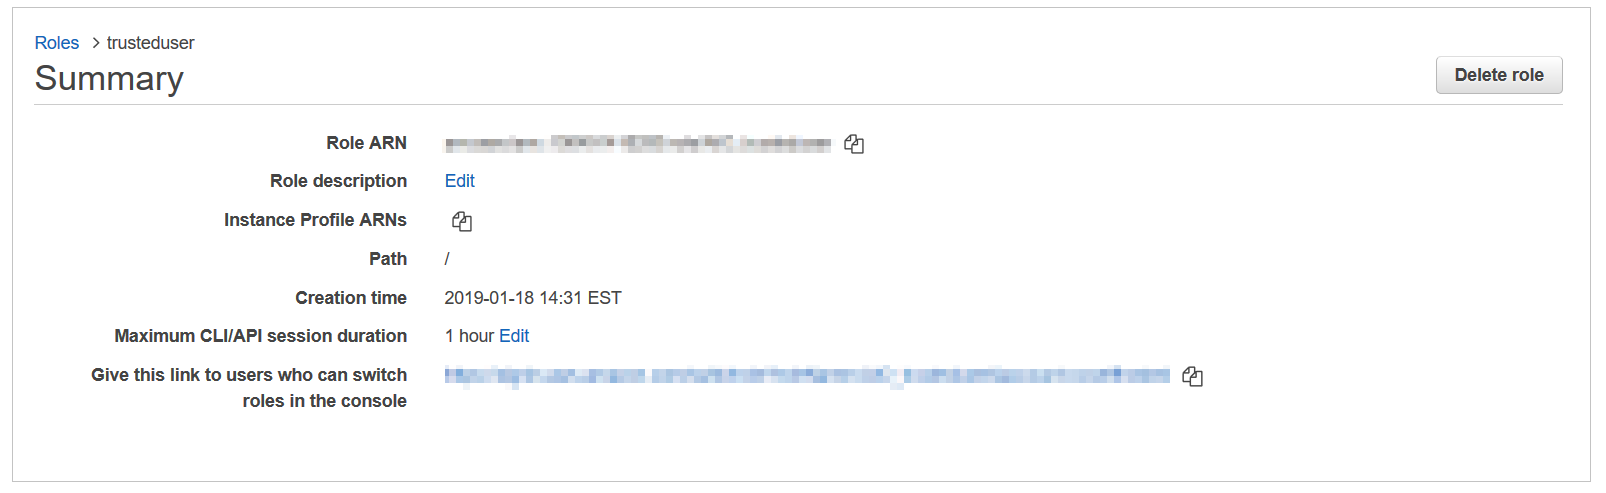
Select the checkbox next to the new role and click the role name.
The Summary page for the selected role opens.
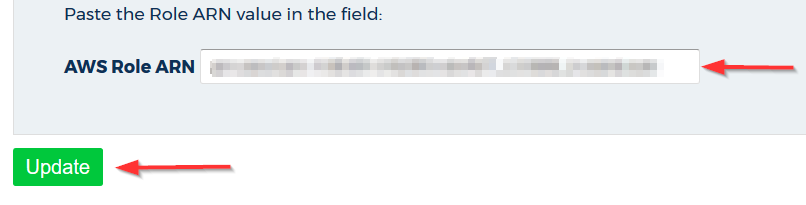
At the top of the page, you will see the Role ARN value.
Copy the entire contents of the policy document to your clipboard.
Return to the Create policy page in the AWS GovCloud Management Console.
Click the JSON tab.
Replace the text in the JSON tab with the policy you just copied.
Click Review policy.
Type a name for the policy and click Create policy.
AWS adds the new policy to the list.
Return to the IAM dashboard and click Users.
Click the Add user button.
On this screen:
Type the username.
Select the Programmatic access check box to generate an access key and secret key ID.
Click Next: Permissions.
Click Attach existing policies directly, select the policies you just created, and click Next: Tags.
Click Next: Review.
Review your choices and click Create user.
Download or copy and save the access key ID and secret key to a safe location and click Close.
You will use these keys as the payer credentials in your GovCloud account since your Linked Commercial account is a payee of the Master Payer account.
Launch CloudCheckr.
From the right side of the screen, click NEW ACCOUNT.
The New Account screen displays.
Type a unique name for your account and in the Cloud Provider section, select Amazon Web Services.
Scroll down to the Navigation Visibility section and select the check boxes next to
the modules and sections you want to be accessible for this account.
At the bottom of the New Account page, click Create.
CloudCheckr opens the Configure Account page. You will need to create a role in AWS before you can complete the configuration.
Return to the IAM dashboard and click Roles.
From the middle of the page, click Create role.
The Create role page opens.
In the Select type of trusted entity section, click Another AWS account.
The screen prompts you to add an Account ID value.
To obtain the Account ID value:
Return to the Configure Accounts page in CloudCheckr.
Click Toggle Manual vs CloudFormation to view the instructions on how to create a cross-account role manually.
Copy the Account ID.
Return to the AWS GovCloud Management Console and perform the following steps:
Paste the Account ID.
In the Options section, select the Require external ID checkbox.
AWS displays more information about the purpose of the external ID.
To obtain the External ID value:
Return to the Configure Accounts page in CloudCheckr.
Copy the external ID.
Return to the AWS GovCloud Management Console and perform the following steps:
Paste the External ID.
Verify that the Require MFA radio button is not selected.
Click Next: Permissions.
A list of policies displays.
Select the checkbox next to the policy or policies you want to attach to this role and click Next: Tags.
For the purposes of this procedure, we will not add tags.
Click Next: Review.
The Review page opens.
Type a name for the role and click Create role.
The role is now displayed in the list.
Select the checkbox next to the new role and click the role name.
The Summary page for the selected role opens.
At the top of the page, you will see the Role ARN value.