Configure an Microsoft 365 Account
To collect resource information on your Microsoft O365, follow this procedure.
Procedure
- Log in to the Azure management portal associated with your subscription type:
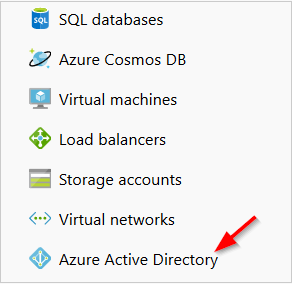
- From the left navbar, click Azure Active Directory.
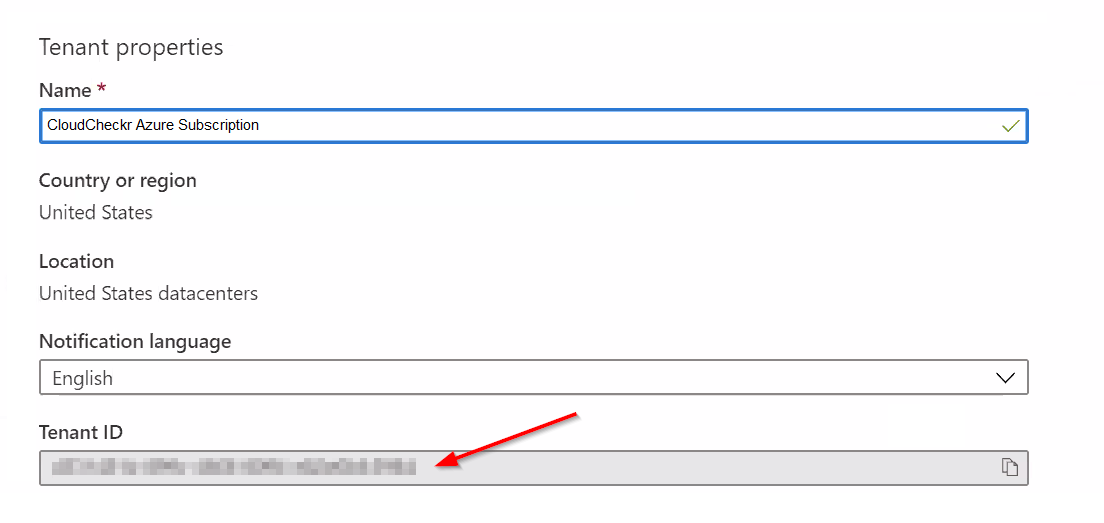
- Select Properties from the list.
- Copy the Tenant ID.
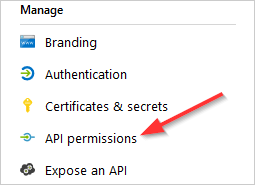
- In the Manage section of the Azure Active Directory blade, click App registrations.
- Click + New registration.
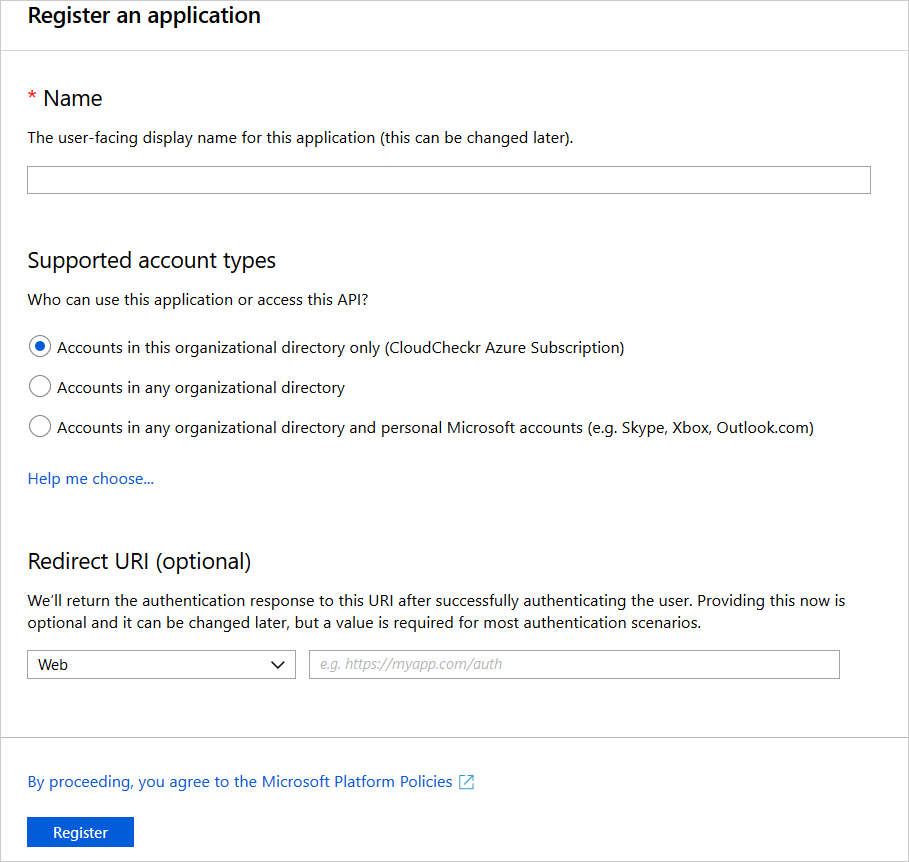
- Create your application:
- Type a name for your application.
- Under Supported account types, leave the default setting: accounts in this organizational directory only
- Under Redirect URI (optional), leave the default drop-down option, Web, and in the blank text field, type https://localhost
- Click Register.
- Copy the Application ID.
- In the Manage section of the application blade, click Certificates & secrets.
- Under Client secrets, click + New client secret.
- Type a name for the client secret, select when you want it to expire, and click Add.
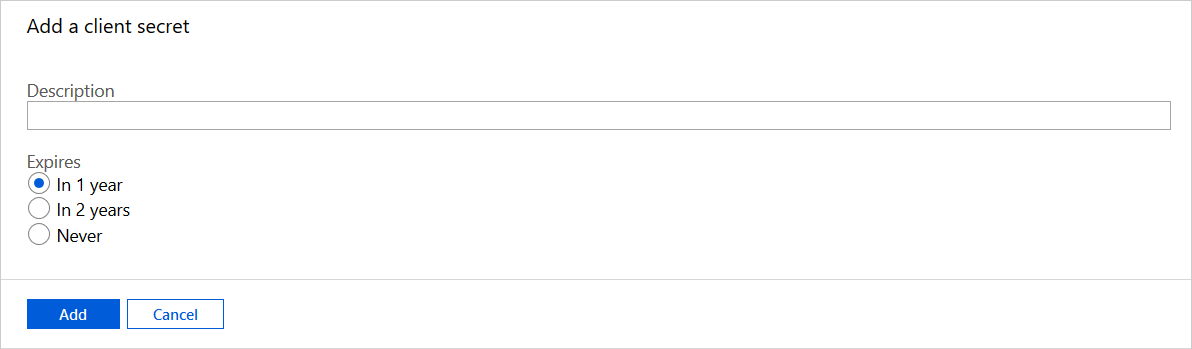
- Copy the client secret and save it immediately since you will not be able to view it again.
- Click the name of your application from the list.
- From the Manage section of the application blade, select API Permissions.
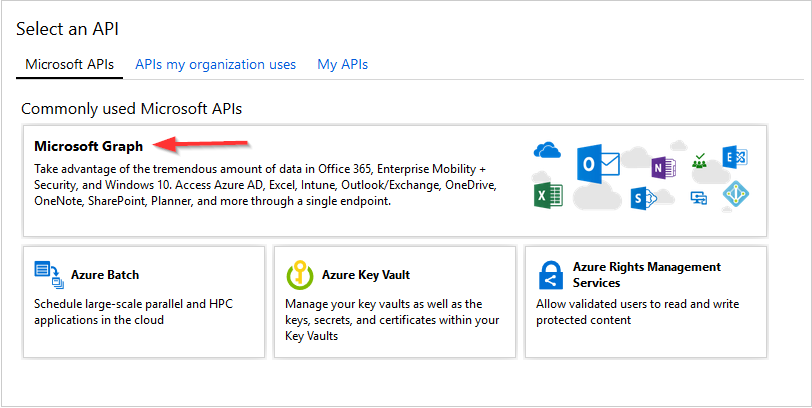
- Click + Add a permission.

- From the Select an API blade, select Microsoft Graph from the list.
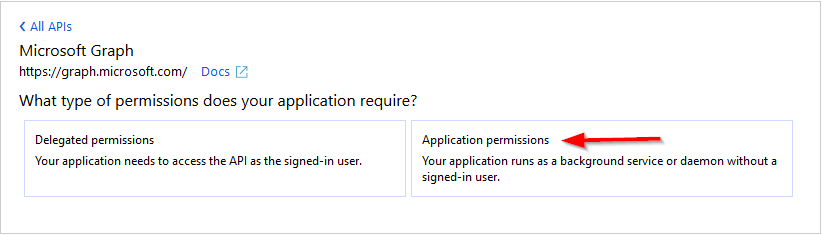
- Select application permissions.
- Add the permissions:
- Type Read Directory Data and select that permission from the list.
- Type Read All Usage Reports and select that permission from the list.
- Click Add permissions.
- Scroll down to the Grant consent section and click Grant admin consent for CloudCheckr Azure Subscription.

- Click Yes to grant the required permissions.

- Launch CloudCheckr.
- From the Projects page, select an Azure partner.
- From the Accounts page, click NEW ACCOUNT.
The New Account page opens.
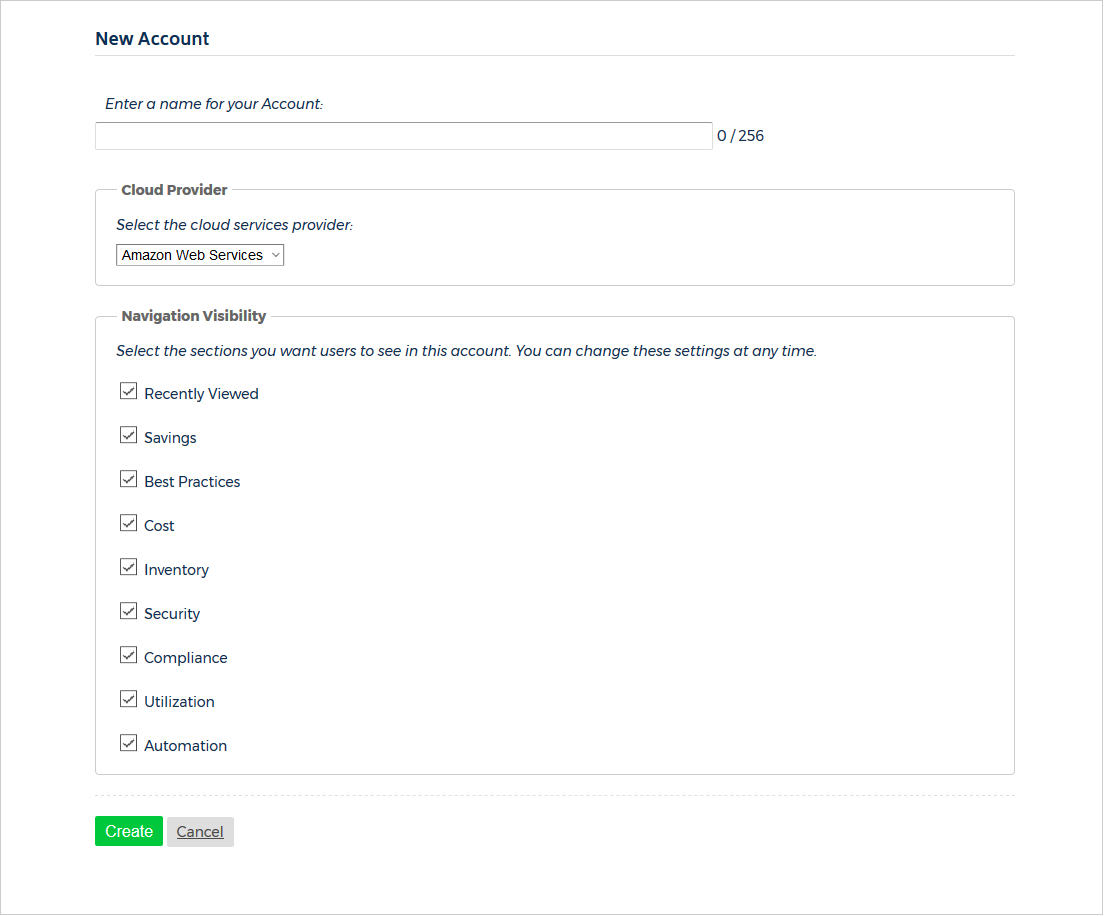
- Type a unique name for your account.
- From the Cloud Provider section, select Microsoft Azure from the drop-down menu.
- In the Navigation Visibility section, select the checkboxes next to the sections or modules that you want to be visible in the Azure account.
- At the bottom of the page, click Create.
The Configure Account page opens.
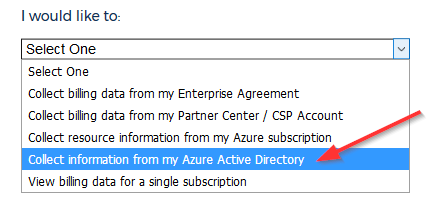
- From the Configure Account page, select Collect Information from my Azure Active Directory from the drop-down menu.
- Paste the Tenant ID into the field associated with the Directory ID.
- Paste the Application ID into the Application ID field.
- Paste the client secret into the field associated with the key value.
This screen identifies the fields where you need to paste those values:
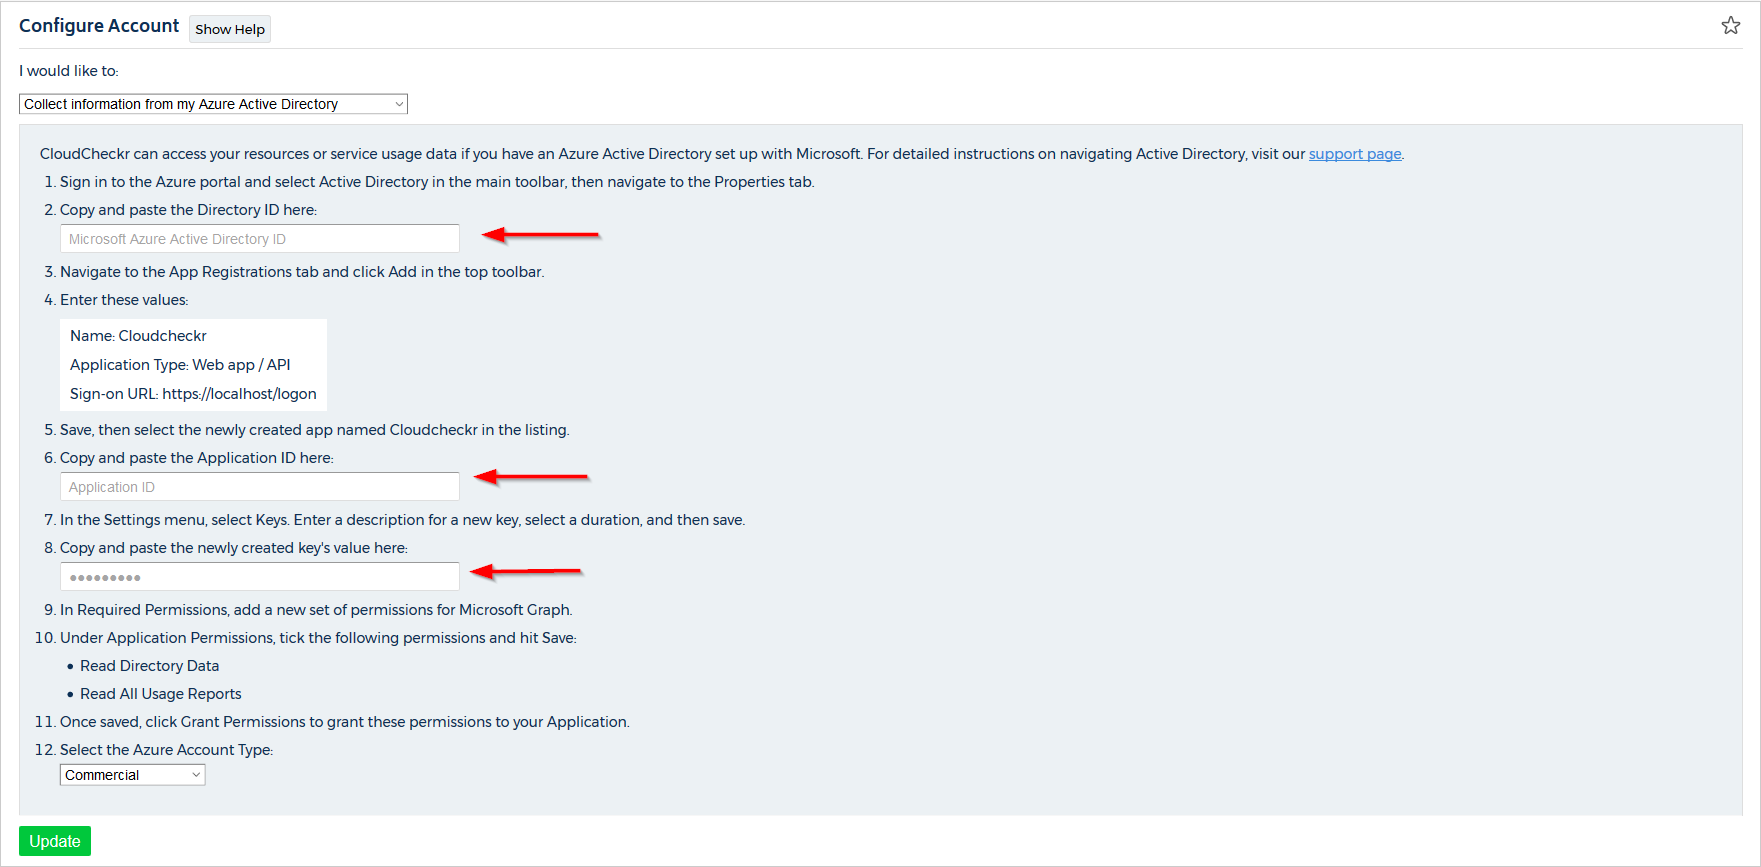
- From the Azure Account Type drop-down menu, select Commercial, Government, or Azure Germany.
- Click Update.
- Return to the Azure portal.
- On the left navbar, click Azure Active Directory.
- In the Manage section of the Azure Active Directory blade, click App registrations.
A list of the registered applications display.
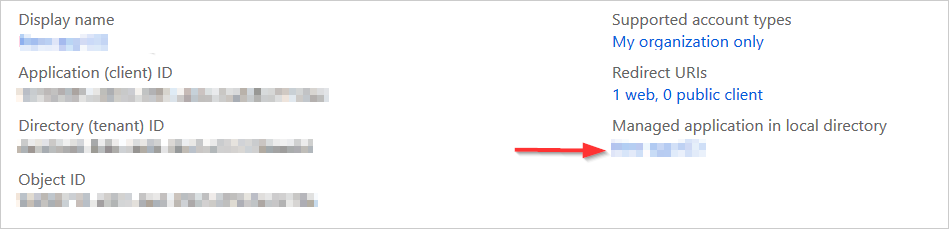
- Click the name of your application.
Details about your app display on the right side of the screen.
- Under Managed application in local directory, click your application name.
The Enterprise Application blade opens.
- From the Security section of the Enterprise Application blade, select Permissions.
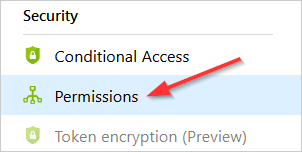
A list of your application's permissions will display.
- Verify that the two permissions for the Microsoft Graph API are listed.
If you don't see the correct permissions, repeat Step 2: Add Permissions and make sure that you click Yes in step 8 to ensure that Azure adds those permissions.