Configure the Cost and Usage Report in AWS
CloudCheckr has integrated the CUR, AWS's next-generation billing tool, into our application.
In this topic, you will learn how to configure the CUR in AWS.
Prerequisite
You must enable at least one Cost Allocation tag in AWS before you can configure the CUR in AWS.
Procedure
Follow the steps in this workflow to configure the CUR in AWS:
- Log in to the AWS Management Console.
- From the menu bar, click your account name, and select Billing & Cost Management.
- From the dashboard, click Data Exports.
- Click Create.
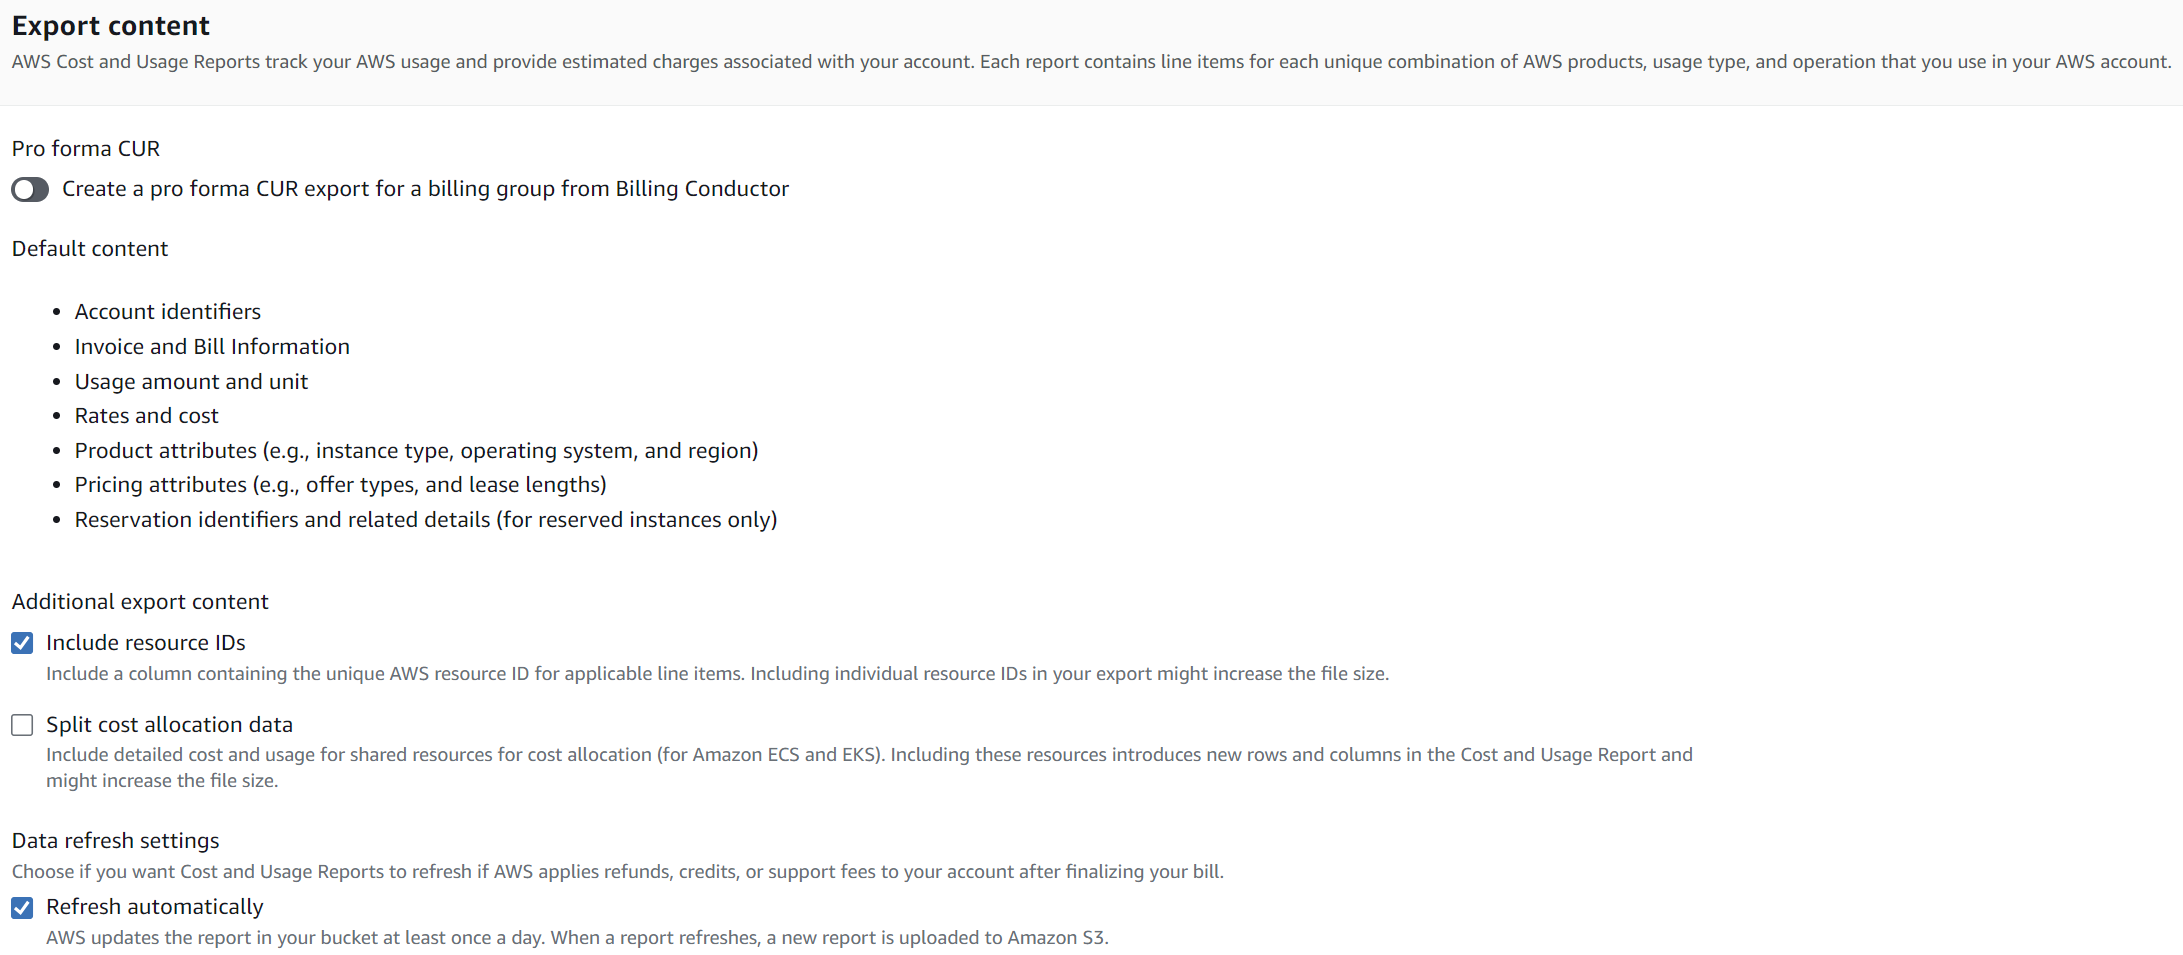
- Select Legacy CUR Export and enter a export name.
- Select the Include resource IDs checkbox, so that your report will include all the IDs from your individual resources.
- Under Data Refresh Settings, check Refresh Automaticaly. This option allows AWS to refresh the CUR and upload a new report to your S3 bucket any time it detects billing charges from closed months.

- Under Data Export Storage Settings, click Configure.
- The Configure S3 Bucket wizard opens.
- Type a name for your new S3 bucket.
- From the drop-down menu, select the region that you want to associate with your bucket.
- Click Next.
The Verify Policy page of the wizard opens.
AWS provides you with the default S3 bucket policy:
***Please note, versioning must be enabled after creation, unless the policy is edited at the time of creation.***
***Note: versioning is not enabled through the default S3 policy***
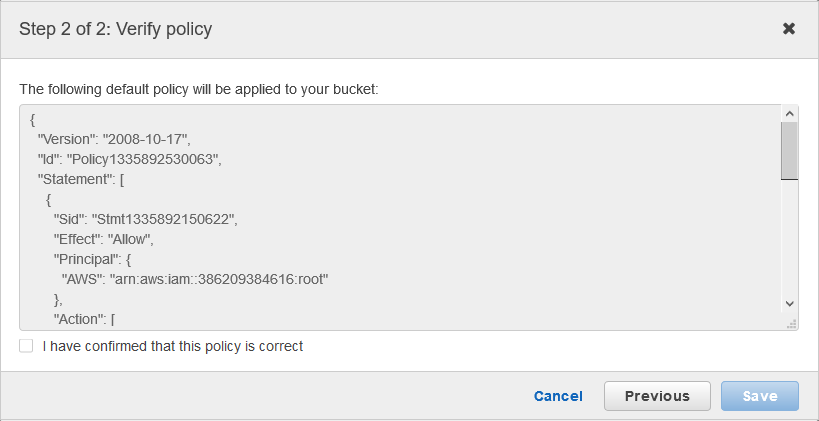
- Select the I have confirmed that this policy is correct checkbox and click Save.
- In the Report path prefix field, type CUR.
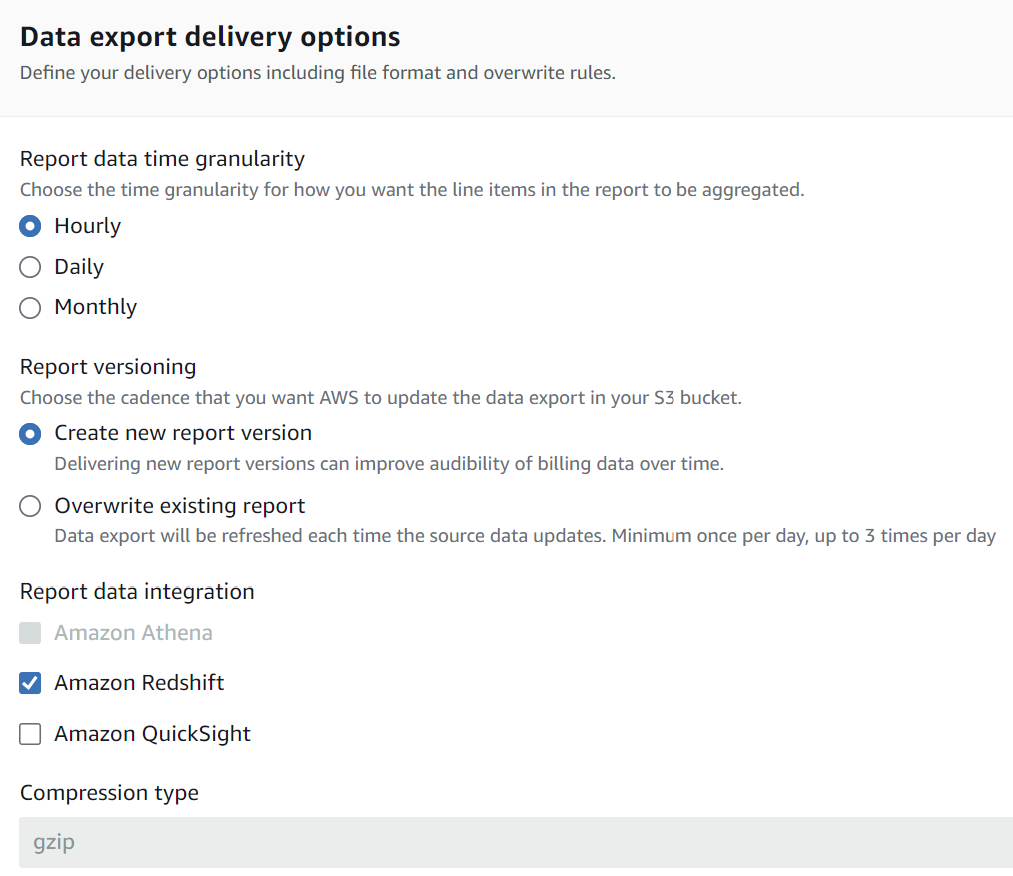
- Under Time granularity, select hourly so that your CUR gets updated multiple times a day.
- Under Report versioning, select whether you want AWS to overwrite the previous version or deliver a new report.
- Under Enable report data integration for, select Amazon Redshift as your resource.
This is where AWS will upload your CUR data for further analysis.
- Notice that AWS automatically selects GZIP as your compression type and CSV/TXT as your file format.
You cannot edit the compression type or file format.
Here is an example of what your screen will look like after you complete the Delivery options page:
- On the bottom of the Delivery options page, click Next.
The Review page opens.
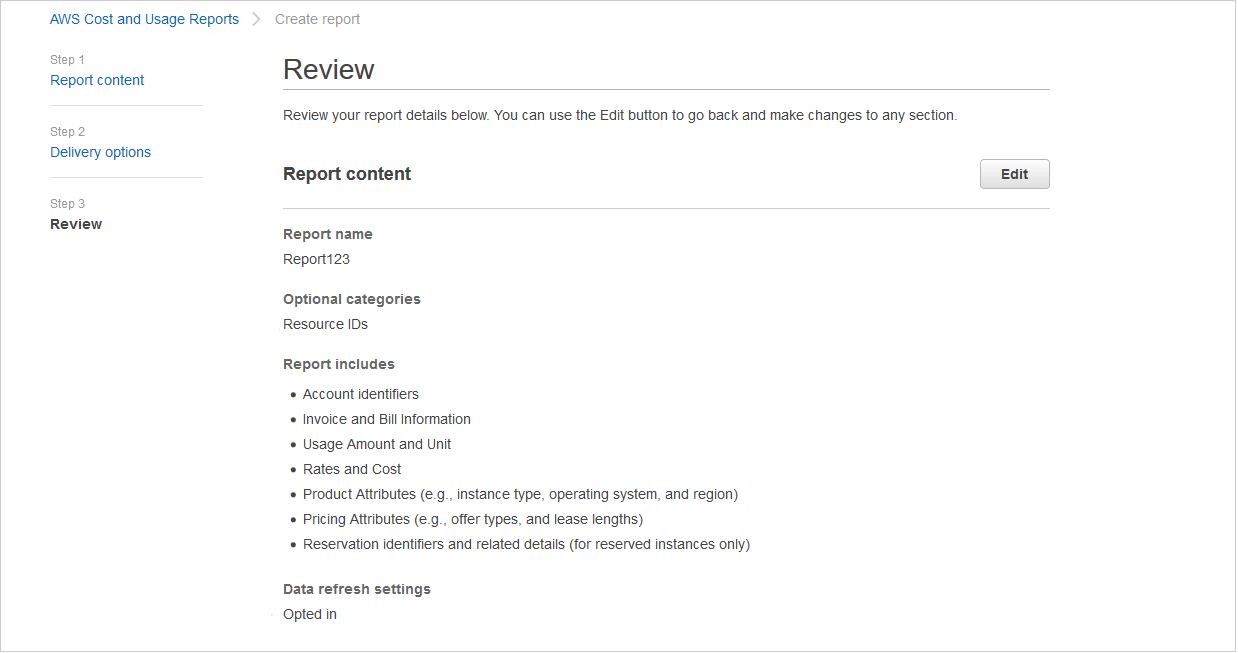
- Under Report content, make sure, at a minimum, that you:
- included Resource IDs
- opted in for the Data Refresh settings
- Scroll down to the Delivery options and make sure, at a minimum, that you selected:
- hourly as the time granularity
- Redshift for data integration
- GZIP for compression type
- text/csv for file format
- Once you are satisfied with your settings, click Review and Complete.
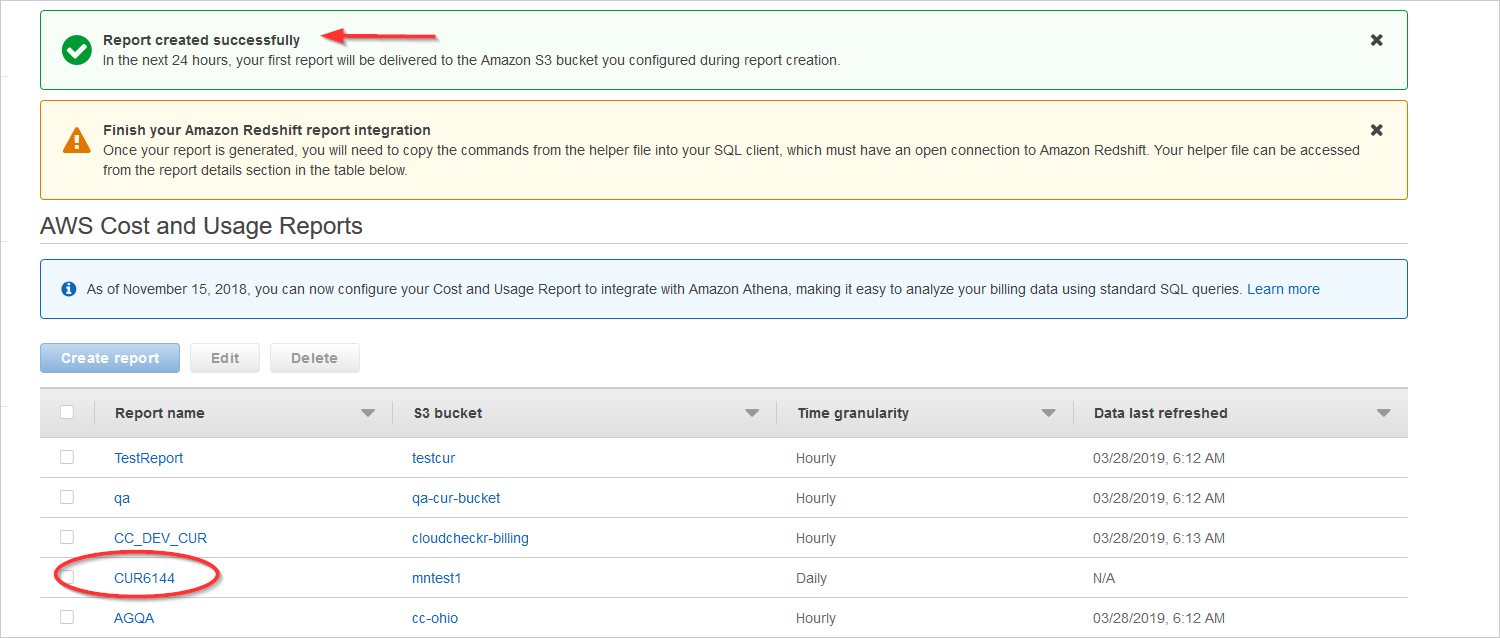
A message indicates that AWS successfully created the CUR and will deliver it to your S3 bucket within the next 24 hours.
Your new report is also included in the list.
If you are onboarding your AWS account using the CUR, continue to the next step: Configure the Cost and Usage Report in CloudCheckr.