Modify a Google Cloud Account in CloudCheckr CMx
As a CloudCheckr CMx customer, you can modify details for any account listed in the Accounts tab on the Account Hierarchy page.
However, what you can modify depends on the cloud provider associated with your selected account.
This topic will show you how to modify your settings for a Google Cloud account.
Procedure
If you are already in the Accounts tab, skip to Step 3.
- Launch CloudCheckr CMx.
- Type Account Hierarchy in the Search bar to access the Account Hierarchy page.

- Click
 in the row of a selected Google Cloud account.
The Edit Account sub-drawer opens.
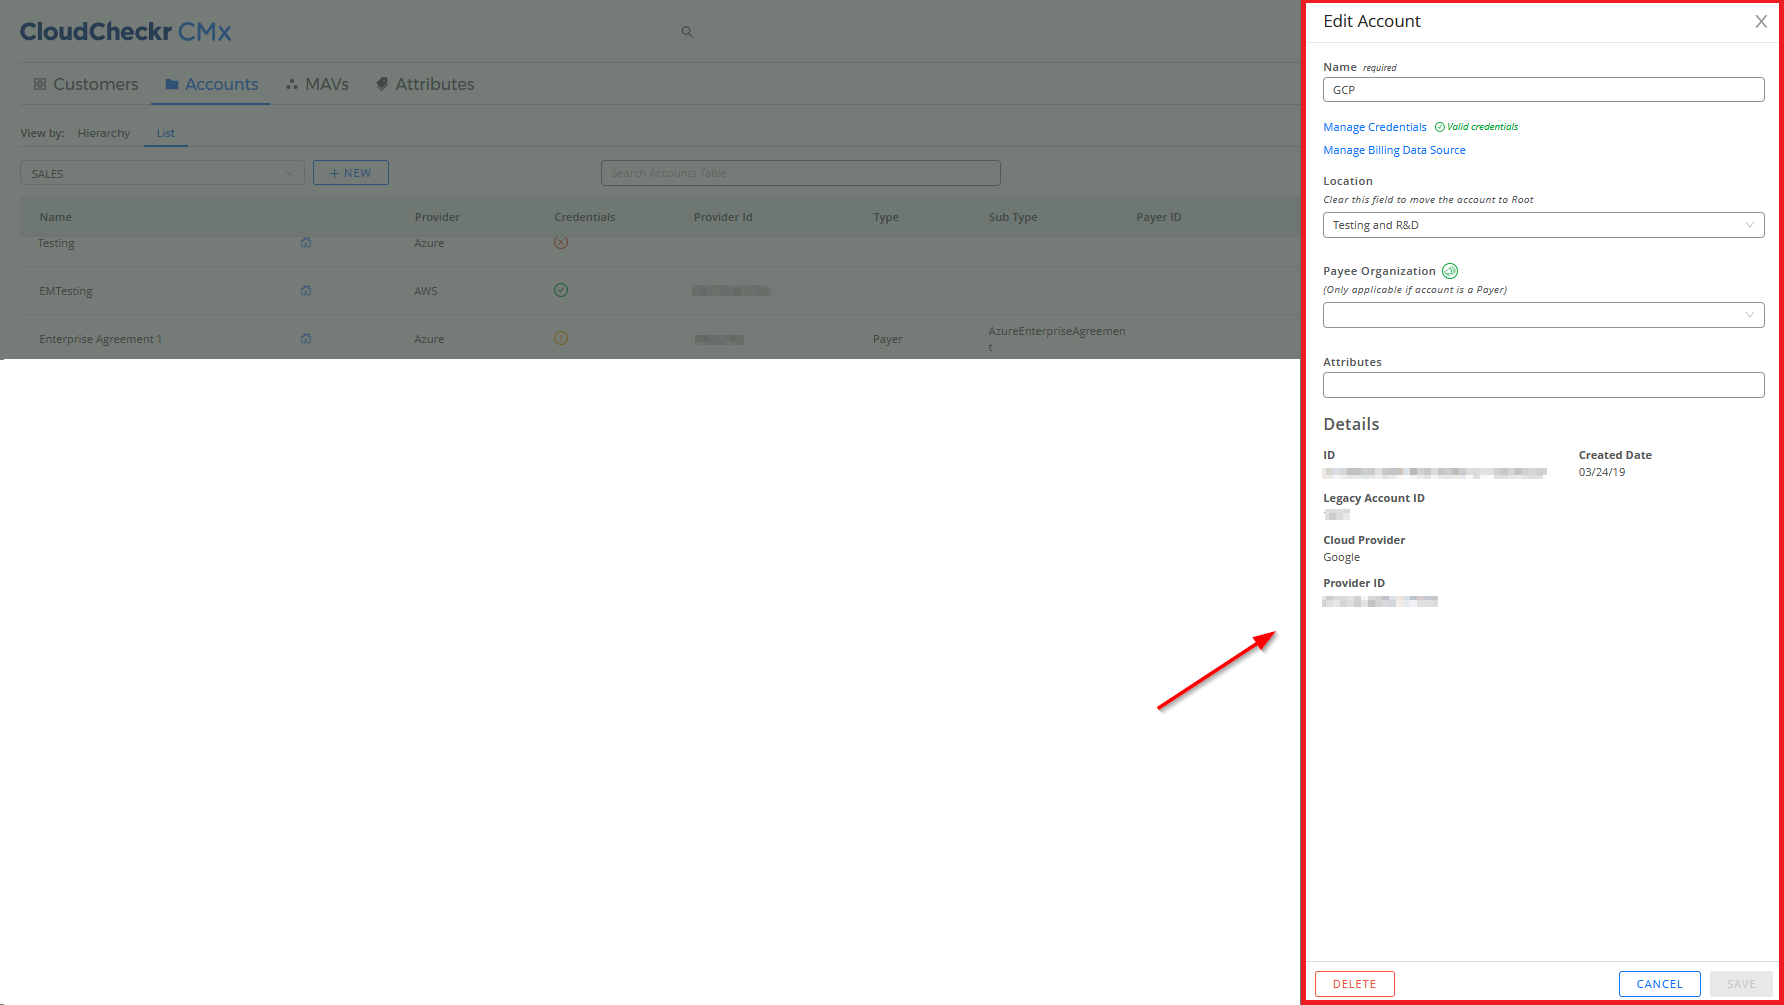
Here is a close-up of the Edit Account sub-drawer:

- Modify your account by peforming any or all of the following actions:
- change the name of the account
- click the Manage Credentials link to open the Credentials sub-drawer where you can add or modify your account credentials
- click the Manage Billing Data Source link to open the Edit Billing Data Source sub-drawer to change your billing setup
- select a folder from the Location drop-down menu to move your account to another location or folder in the account hierarchy
- change how you want to organize your Payee accounts
- add or delete attributes associated with your account
- view details such as the CloudCheckr and Google Cloud account IDs
- delete an account