Configure Single Sign-On in Okta for CloudCheckr CMx
In this topic, you will learn how to set up Single Sign-On (SSO) for your Okta account in CloudCheckr CMx by configuring:
- Okta (the Identity Provider or IdP)
- CloudCheckr CMx (the Service Provider or SP)
Workflow
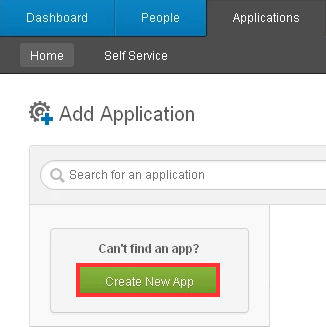
- In your Administration console, go to Applications tab, and click Create New App.
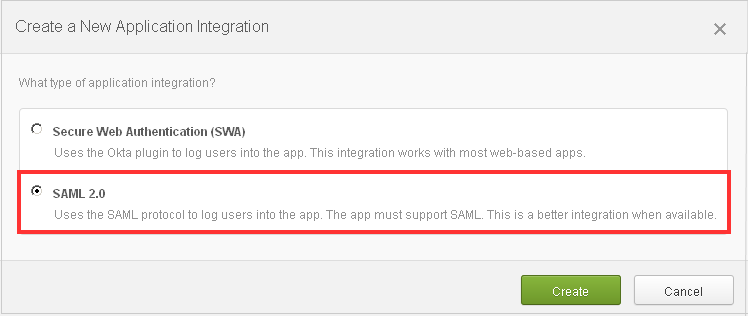
- Select the SAML 2.0 option.
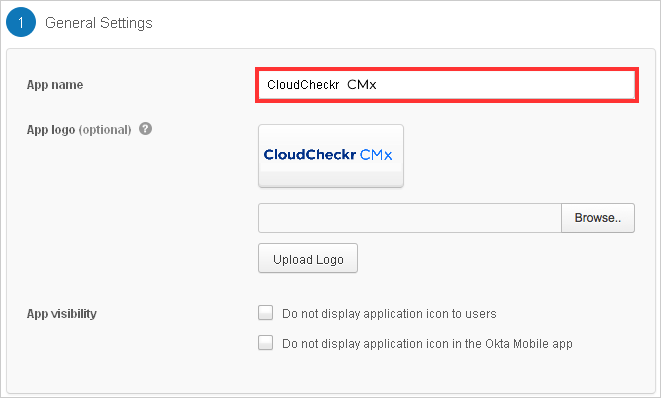
- Under General Settings, go to the App name text field and type CloudCheckr CMx
- Choose the Single Sign-On URL and Audience URI (SP Entity ID) that match the region you use to access CloudCheckr:
If you are a CloudCheckr enterprise customer who purchased our white label package, contact Customer Success or Support to confirm your authorization endpoint.
Region Single Sign-On URL Audience URI (SP Entity ID) US https://auth-us.cloudcheckr.com/auth/sso/saml2/Acs https://auth-us.cloudcheckr.com/auth EU https://auth-eu.cloudcheckr.com/auth/sso/saml2/Acs https://auth-eu.cloudcheckr.com/auth AU https://auth-au.cloudcheckr.com/auth/sso/saml2/Acs https://auth-au.cloudcheckr.com/auth GOV https://auth-gov.cloudcheckr.com/auth/sso/saml2/Acs https://auth-gov.cloudcheckr.com/auth Federal https://auth-fed.cloudcheckr.com/auth/sso/saml2/Acs https://auth-fed.cloudcheckr.com/auth - For the Recipient URL and Destination URL, select Yes.
- Provide the following information:
- Name ID format: EmailAddress
- Default username: Email
- Response: Signed
- Assertion: Signed
- Authentication context class: X.509 Certificate
- Request compression: Compressed
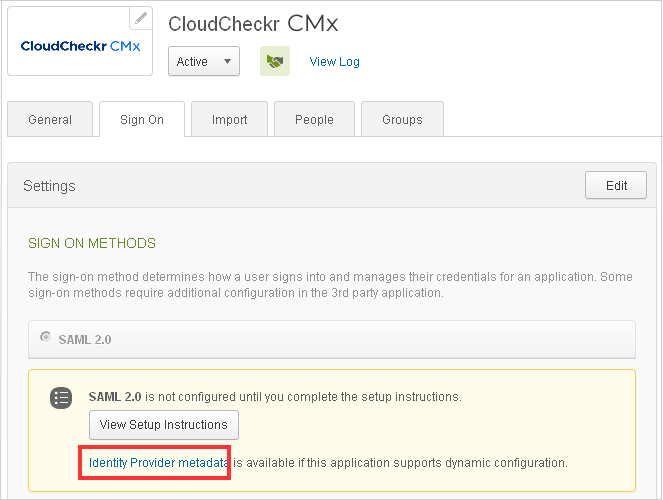
- On the Sign On tab of the new application, click the Identity Provider metadata link to download an XML file that contains the metadata from Okta that CloudCheckr CMx requires to complete the setup.
- On the People tab, click the Assign Application button to select the link that users will see when they log onto CloudCheckr CMx.
Email addresses as SSO usernames are required, so if your users do not have email, you must provide an email address.
- Create a support ticket in the Flexera Community that indicates you configured your SAML information.
- Attach the XML file that you downloaded in the previous procedure to your ticket.
Although CloudCheckr will provision your users for the first-time logon, your organization must enable specific permissions and account access for your CloudCheckr CMx users. For more information, see the Access Management and Roles topics.