Users in CloudCheckr CMx
A user is the actual end-user with a valid CloudCheckr username and password that enables them to log in to the application.
Users are a component of CloudCheckr's Role Based Access Control (RBAC), which is a method for managing access based on the roles assigned to those users.
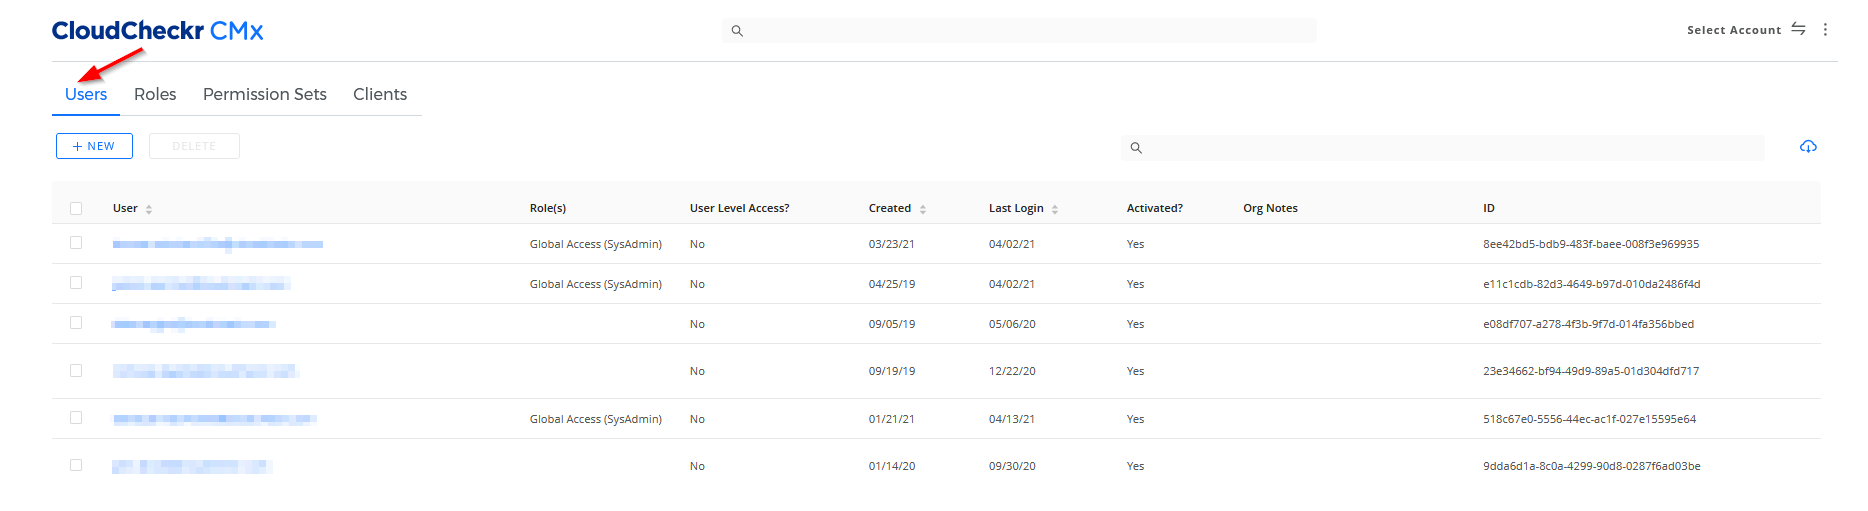
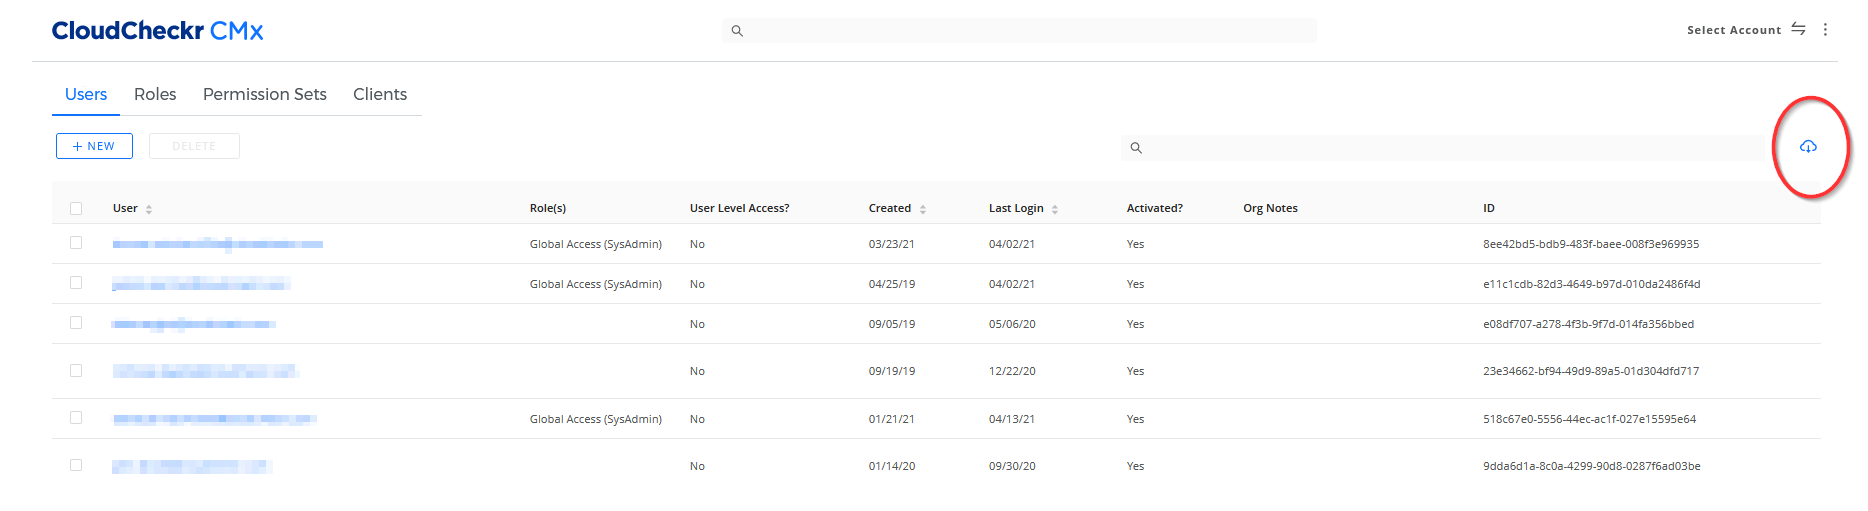
The Users tab in Access Management is where you can view, search for, modify, or create a user.
Prerequisite
There must be a valid email address associated with the user you want to create in CloudCheckr CMx.
Procedures
Click a button to learn more about the actions you can perform in the Users tab:
This procedure shows you how to create a user in CloudCheckr CMx and assign a group role to that user.
A role is a collection of permissions that a user inherits which enable them to perform certain tasks or operations in CloudCheckr CMx.
- Click the Settings icon and select Access Management > Users.
- Click the + NEW button.
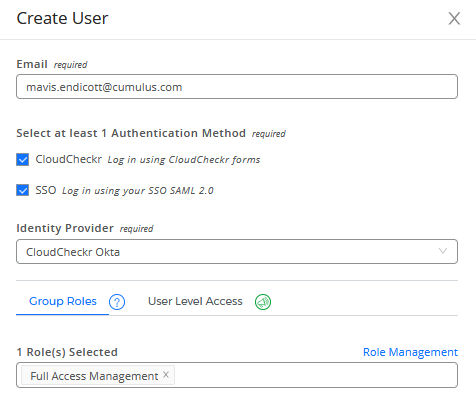
The Create User sub-drawer opens.
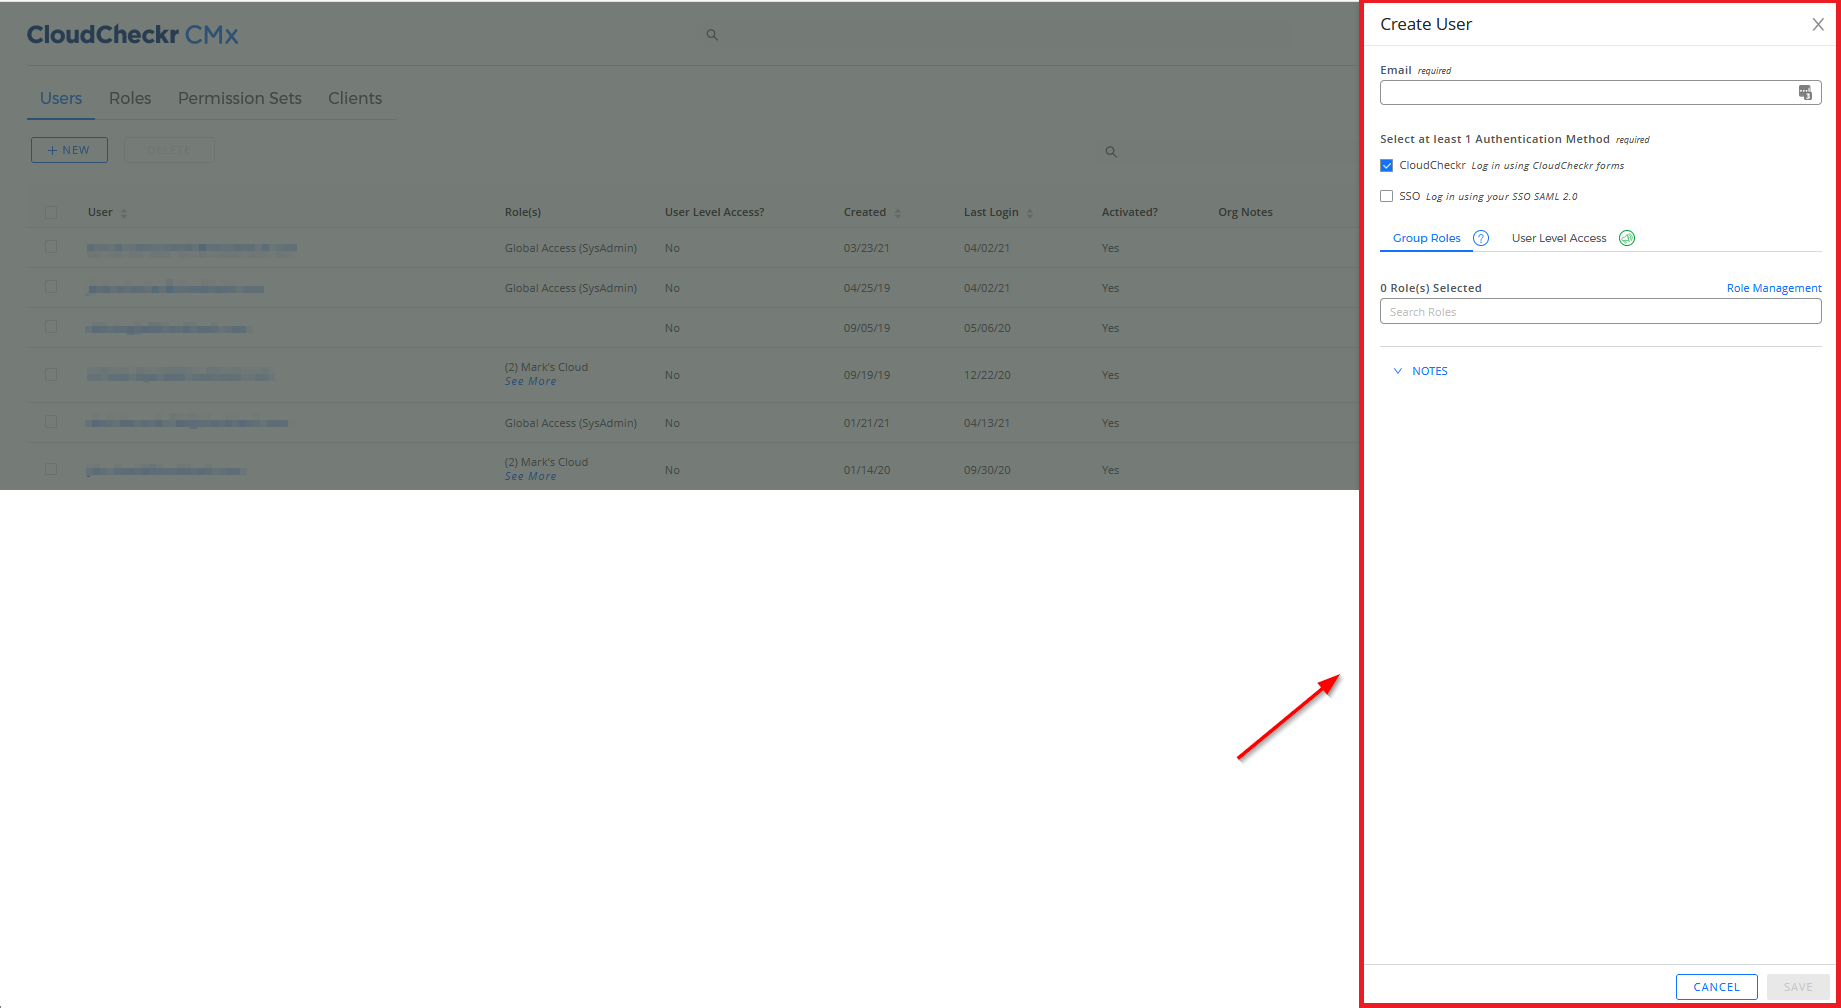
- Type the user's email address.
- Select at least one authentication method:
Method Description CloudCheckr
authenticate using the end-user's CloudCheckr email and password
SSO
authenticate using CloudCheckr SSO
- If you select SSO, you must select an Identity Provider from the drop-down list:
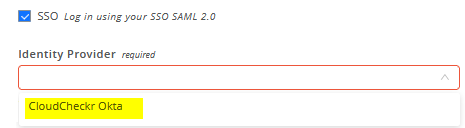
- If you select SSO, you must select an Identity Provider from the drop-down list:
- Assign a role to your user using one of these two methods:
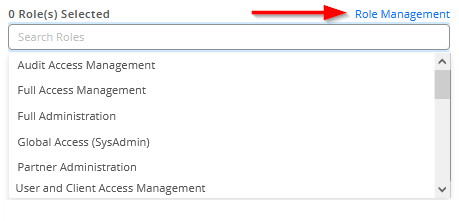
- Select a default or custom role from the drop-down list.
Click Roles to view the list of our default roles:
Role Name
Description
Partner Administration
Allows you to perform all administrator activities including admin tasks on any child customers such as access management, account management, customization, and managing reports.
Full Administration
Allows you to perform all administrator activities such as access management, account management, customization, and managing reports.
Full Access Management
Allows you to create and edit users, clients, roles, and permission sets.
User and Client Access Management
Allows you to add, edit, and delete user and client settings but only view permission sets and roles.
Audit Access Management
Only allows you to view users, clients, roles, and permission sets.
- Click
Roles Management to access the Roles page where you can create a new role:
 You cannot assign more than 10 roles to a user.
- Select a default or custom role from the drop-down list.
- Type any helpful personal and/or organizational notes if applicable.
Here is an example of a user with the Full Access Management role who can authenticate with a CloudCheckr username and password or via SSO using Okta:
- Click SAVE.
For many CloudCheckr customers, roles have no real value—especially if the end-users of those customers have their own cloud provider account and only need read-only permissions for that account in CloudCheckr CMx.
This procedure shows you how to create a user in CloudCheckr CMx and assign a permission set and a CloudCheckr CMx account directly to the user.
- Click the Settings icon and select Access Management > Users.
- Click the + NEW button.
- Type the user's email address.
- Select at least one authentication method:
Method Description CloudCheckr
authenticate using the end-user's CloudCheckr email and password
SSO
authenticate using CloudCheckr SSO
- If you select SSO, you must select an Identity Provider from the drop-down list:
- Click SAVE.
Before you can define your user-level access, you must first save the user.
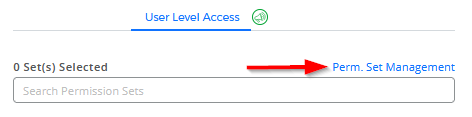
- Click the User Level Access tab.
- Assign user-level access to your new user using one of these two methods:
- Select a default permission set from the drop-down list.
Click Permission Sets to view the list of our default permission sets:
Permission Set Name
Description
Full Access Management
Allows you to manage who can access the system and all authorization-related resources—including users, clients, roles, permission sets.
To apply this permission set, you must have full access to the customer (access to all of their accounts).
User and Client Access Management
Allows you to manage users and clients, but only allows you to view roles and permission sets.
To apply this permission set, you must have full access to the customer (access to all of their accounts).
Audit Access Management
Allows you to audit access to the system and view all authorization-related resources.
To apply this permission set, you must have full access to the customer (access to all of their accounts).
Manage Accounts (General accounts)
Allows you to manage general cloud provider accounts such as AWS, Azure, or Google Cloud accounts.
To apply this permission set, you must have full access to the customer (access to all of their accounts).
Manage Accounts (Groups)
Allows you to manage account groups.
Manage Accounts (MAVs)
Allows you to manage Multi-Account Views (MAVs).
Manage Automation reports
Allows you to add, edit, or delete data in the Automation reports.
Manage Best Practice reports
Allows you to add, edit, or delete data in the Best Practice reports.
Manage Billing reports
Allows you to add, edit, or delete data in the Billing reports.
Manage Cost reports
Allows you to add, edit, or delete data in the Cost reports.
Manage Resources reports
Allows you to add, edit, or delete data in the Resource (Inventory) reports.
Manage Savings reports
Allows you to add, edit, or delete data in the Billing reports.
Manage Security reports
Allows you to add, edit, or delete data in the Security reports.
View Automation tasks
Allows you to view Automation reports.
View Best Practice reports
Allows you to view Best Practice reports.
View Billing reports
Allows you to view Billing reports.
View Compliance reports
Allows you to view Compliance reports.
View Cost reports
Allows you to view Cost reports.
View Resources reports
Allows you to view Resources (Inventory) reports.
View Savings reports
Allows you to view Savings reports.
View Security reports
Allows you to view Security reports.
- Click
Perm. Set Management to access the Permissions Set page where you can create a new permission set:
- Select a default permission set from the drop-down list.
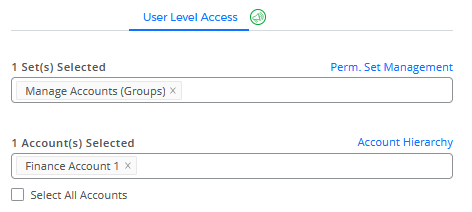
- Assign an account or accounts to the user using one of these two methods:
- Select an account from the drop-down list or click Account Hierarchy to access the Account Hierarchy page where you can create a new account, or
- Select the Select All Accounts checkbox to associate your user with all accounts in your project.
- Type any helpful personal and/or organizational notes if applicable.
Here is an example of a user with the Manage Accounts (Groups) permission set in the Finance Account 1:
- Click SAVE.
In the Users tab, you can export a list of users to a CSV file.
- Click the
 located on the right side of the page:
Your next steps will depend on which browser you are using. - Follow any on-screen prompts to open or save the new CSV file.