Configure a CPV App for an Azure CSP Commercial Account
This topic will show you how to configure a Control Panel Vendor (CPV) app for your Azure CSP commercial account. To comply with Microsoft's new Cloud Solution Provider (CSP) security model, CloudCheckr has modified the way we interact with the Microsoft Partner Center API. CPV allows you to make calls to the API while providing added protection to your data and infrastructure from potential security risks. Because of this new requirement, you must create a CPV app if you are using a CSP account to authenticate to CloudCheckr's self-hosted application.CPV configuration only applies to CSP accounts and is not required for Enterprise Agreements, Subscription, and Active Directory accounts.
Prerequisites
Before you configure your CPV app, you must:- credential the Azure pricing job in your self-hosted application
- complete step 1 in the Azure Active Directory: Single Sign-On Guide to configure a subdomain and certificate for your self-hosted application
- verify that self-hosted application can make calls to the Microsoft API
Create the CPV Application
In the Azure portal, you will create a CPV app, which will contain the Partner Center API that CloudCheckr needs to collect your CSP billing data.- Log in to the Azure portal.
The Microsoft Azure Dashboard opens.
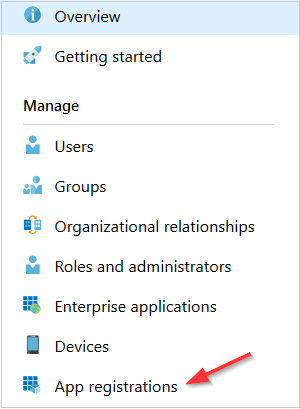
- From the left navbar, select Azure Active Directory.
- In the Manage section of the Azure Active Directory blade, click App registrations.
- Click New registration.
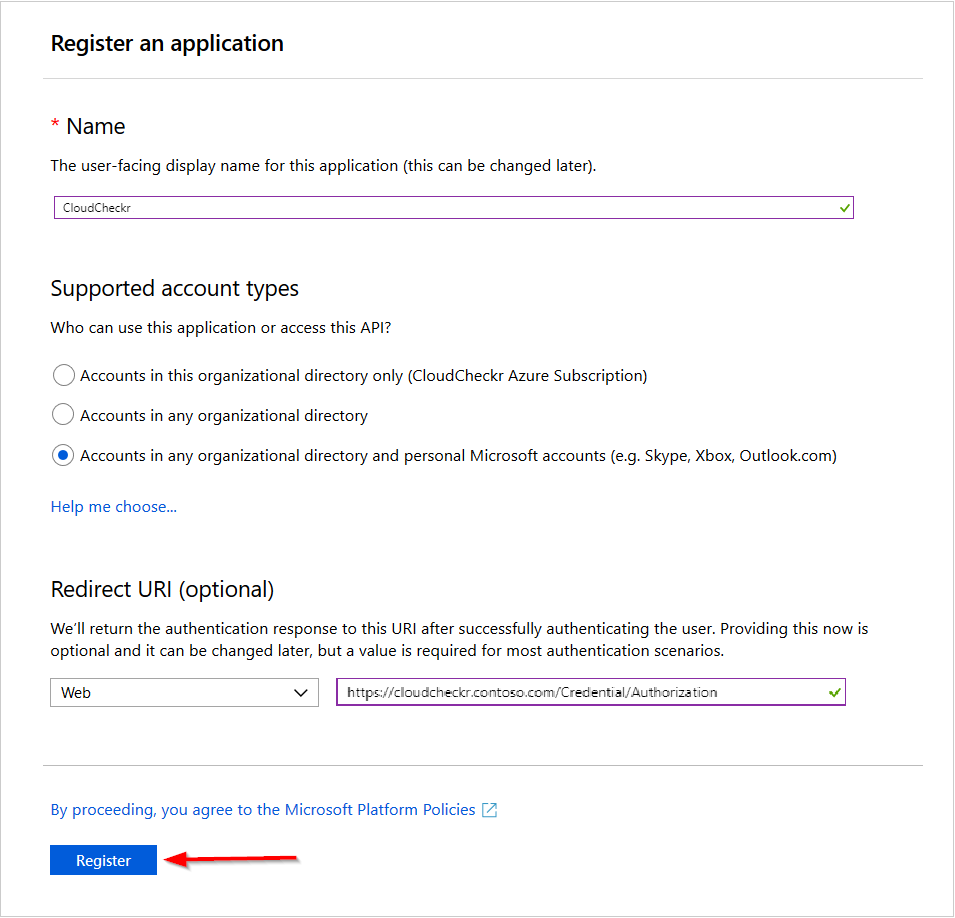
- Provide the following information in the Register an application dialog box:
- In the name field, type the application name.
- Under Supported account types, select the Accounts in any organizational directory - Multitenant) and personal Microsoft accounts radio button.
- Under the Redirect URI (optional) section, select Web and select the correct credential/authorization from the drop-down menu.
In this example, we selected https://cloudcheckr.contoso.com/Credential/Authorization.
- Click Register.
- In the Manage section of the application blade, click Certificates & secrets.
- Under Client secrets, click New client secret.
 The Add a client blade now displays.
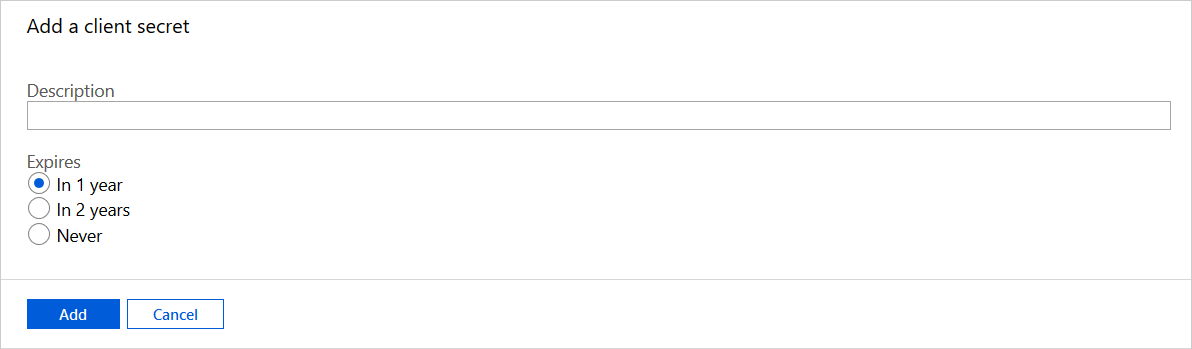
- Type a name for the client secret, select when you want it to expire, and click Add.
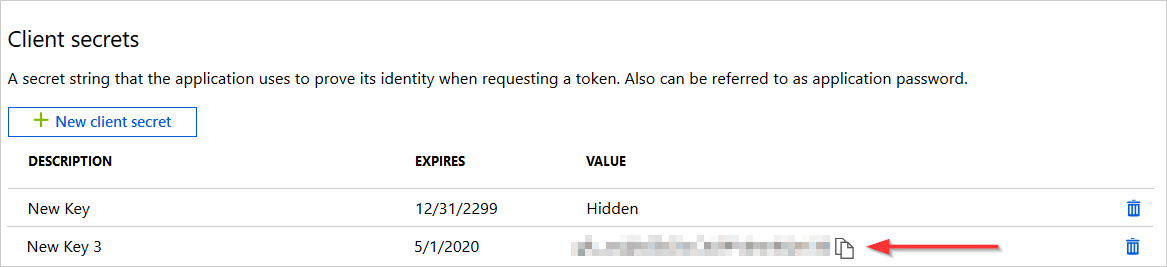
Azure creates a new client secret.
- Copy the value of the client secret and save it immediately since you will not be able to view it again. You will need this during your CloudCheckr configuration.
 When your client secret expires, you must return to the Client secrets section to generate a new one and add it to CloudCheckr.
 - In the Manage section of the application blade, click API permissions.
- Click Add a permission.
- Under Select an API, select the APIs my organizations uses link.
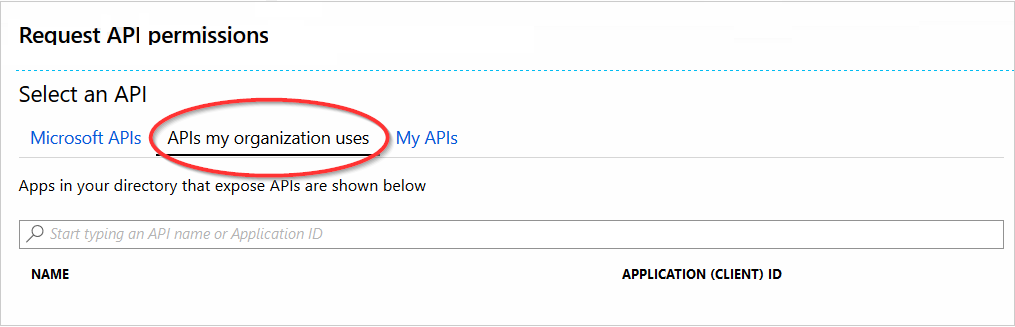
- In the Search bar, type Microsoft Partner Center to search for the app that will expose the appropriate API.
- Select Microsoft Partner Center, click Delegated Permissions, and select the user_impersonation permission.
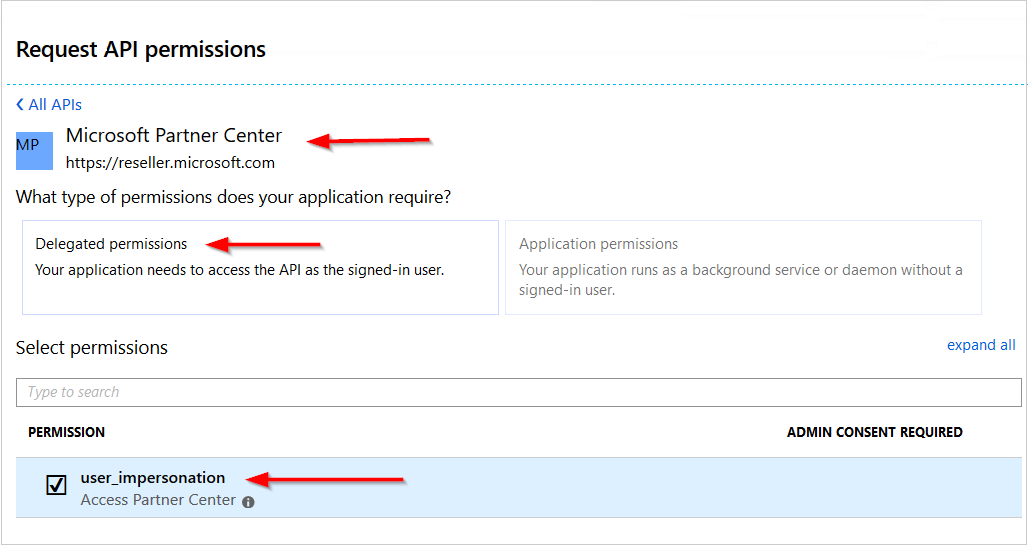
- Click Add Permissions.
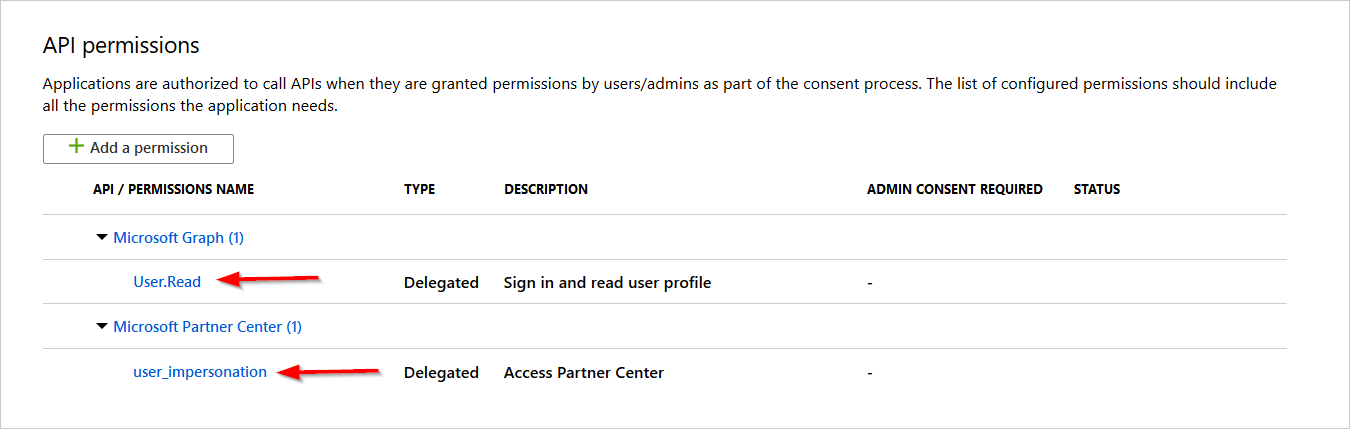
The API Permissions tab displays the two permissions:
- Azure includes the User.Read permission from the Microsoft Graph API by default.
- The user_impersonation permission is the one you just added.
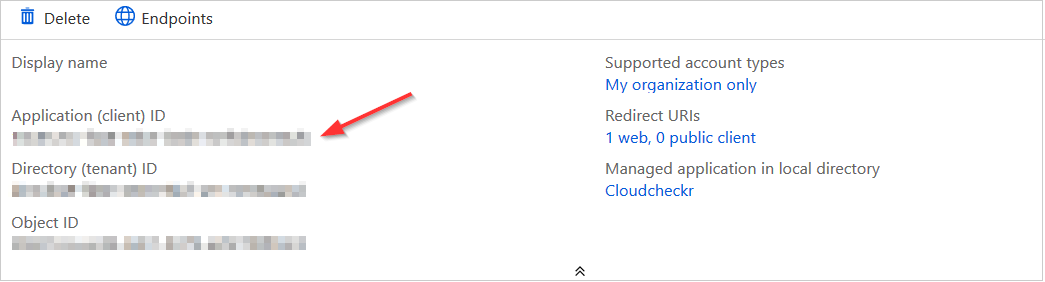
- Return to the Application blade and click Overview to view the application details.
- Copy the application ID.
Register the CPV Application
- Log in to the Microsoft Partner Center.
- From the left navbar, click CPV.
The App registrations sub-menu displays.
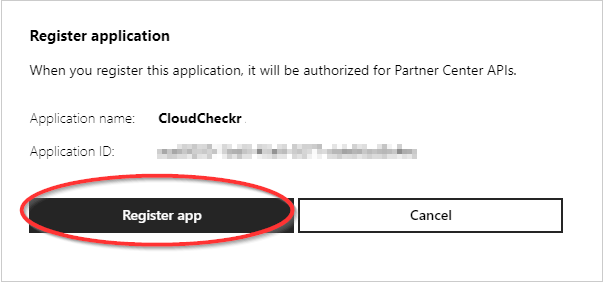
- Next to Application registrations, click the Register an existing app menu and select the app that gives CloudCheckr permission to collect your CSP pricing data.
- From the Register application pop-up message, click Register app.
Configure the CPV App in CloudCheckr
- Log in to self-hosted version of CloudCheckr as a SysAdmin. Because you have not selected a partner yet, you will only see the Settings icon in the header bar.
- From the list, select SystemJobs.
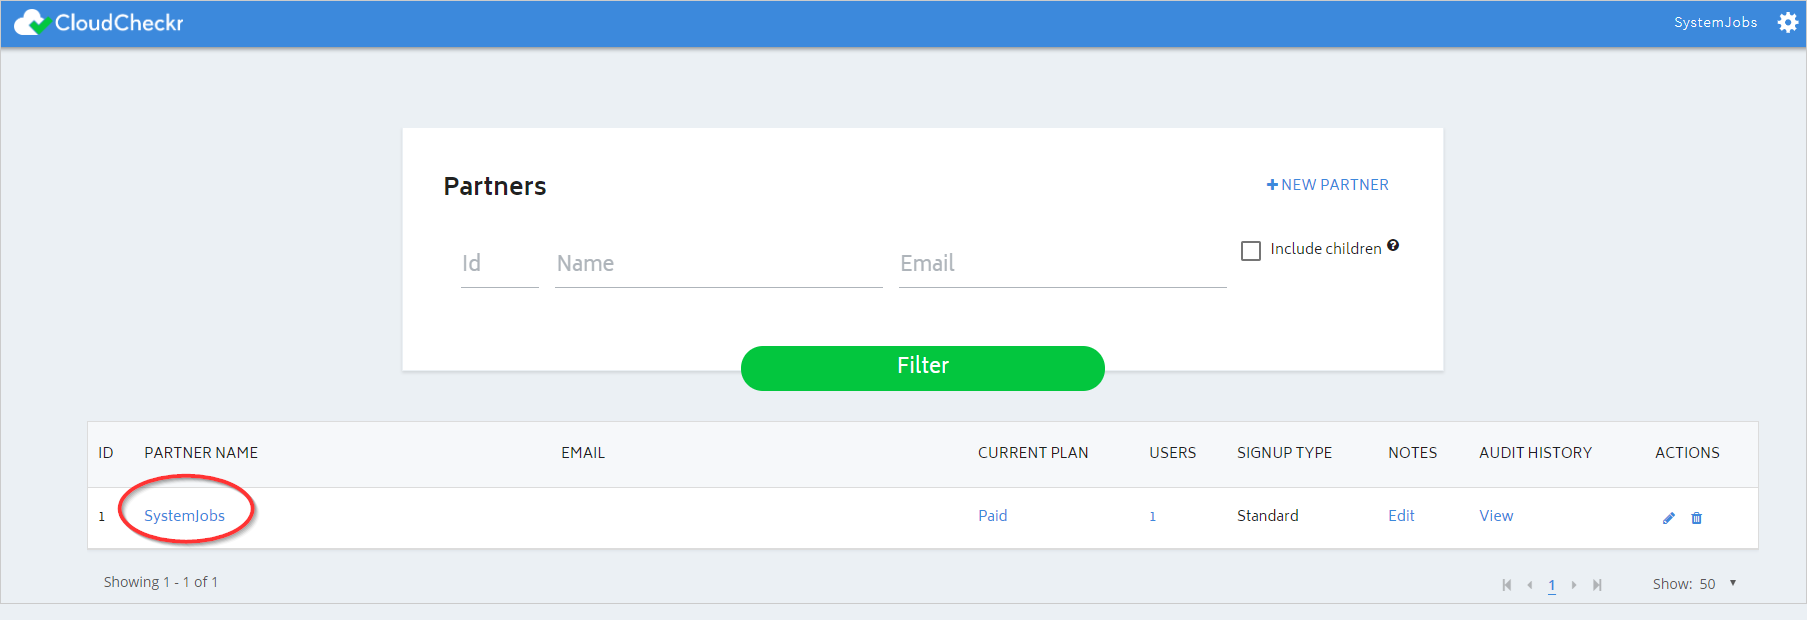
Now that you have selected a partner, more functions will be available to you in the header bar.
- From the header bar, click the Settings icon and choose System > Configuration.
The Application-wide Configurations page opens.
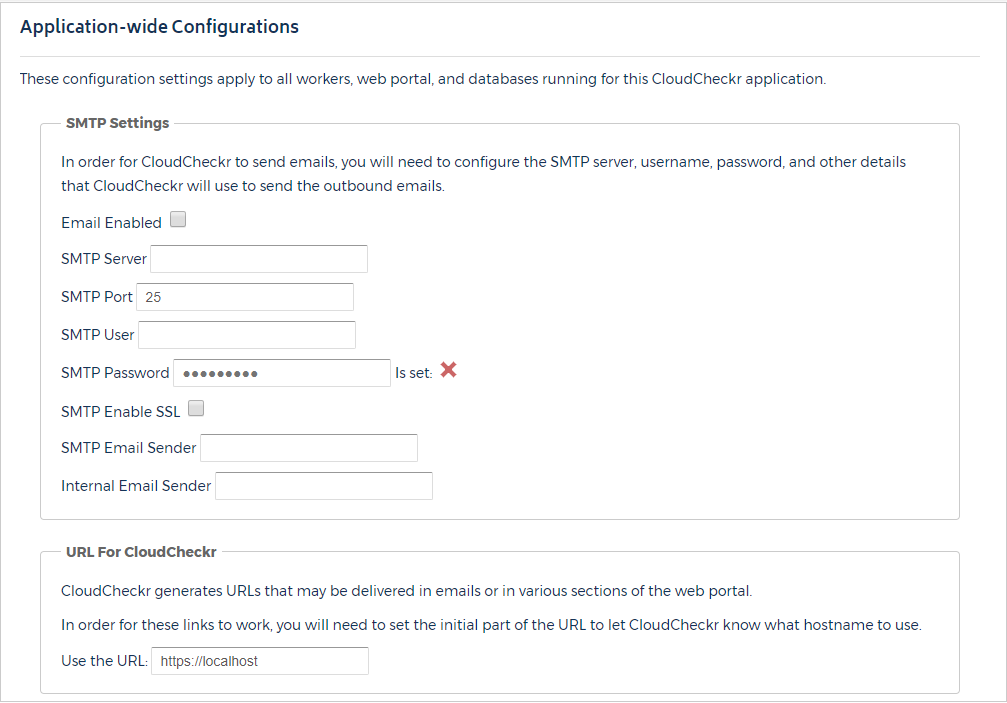
- Scroll down to the Azure CPV Credential section and paste the Application ID and secret key, which is the client secret from your CPV app.

- Click Save Settings.