Configuring a Google Cloud Account in CloudCheckr CMx
To connect your Google Cloud account to CloudCheckr CMx, you must create and configure a Google Cloud account in the CloudCheckr CMx environment.
This workflow shows you what steps you must perform in CloudCheckr CMx and in your Google Cloud Platform Console to create a successful configuration.
Workflow
Click the drop-down boxes to review and follow each step in this workflow.
Launch CloudCheckr CMx.
In the Search bar at the top of the screen, type Account Hierarchy.
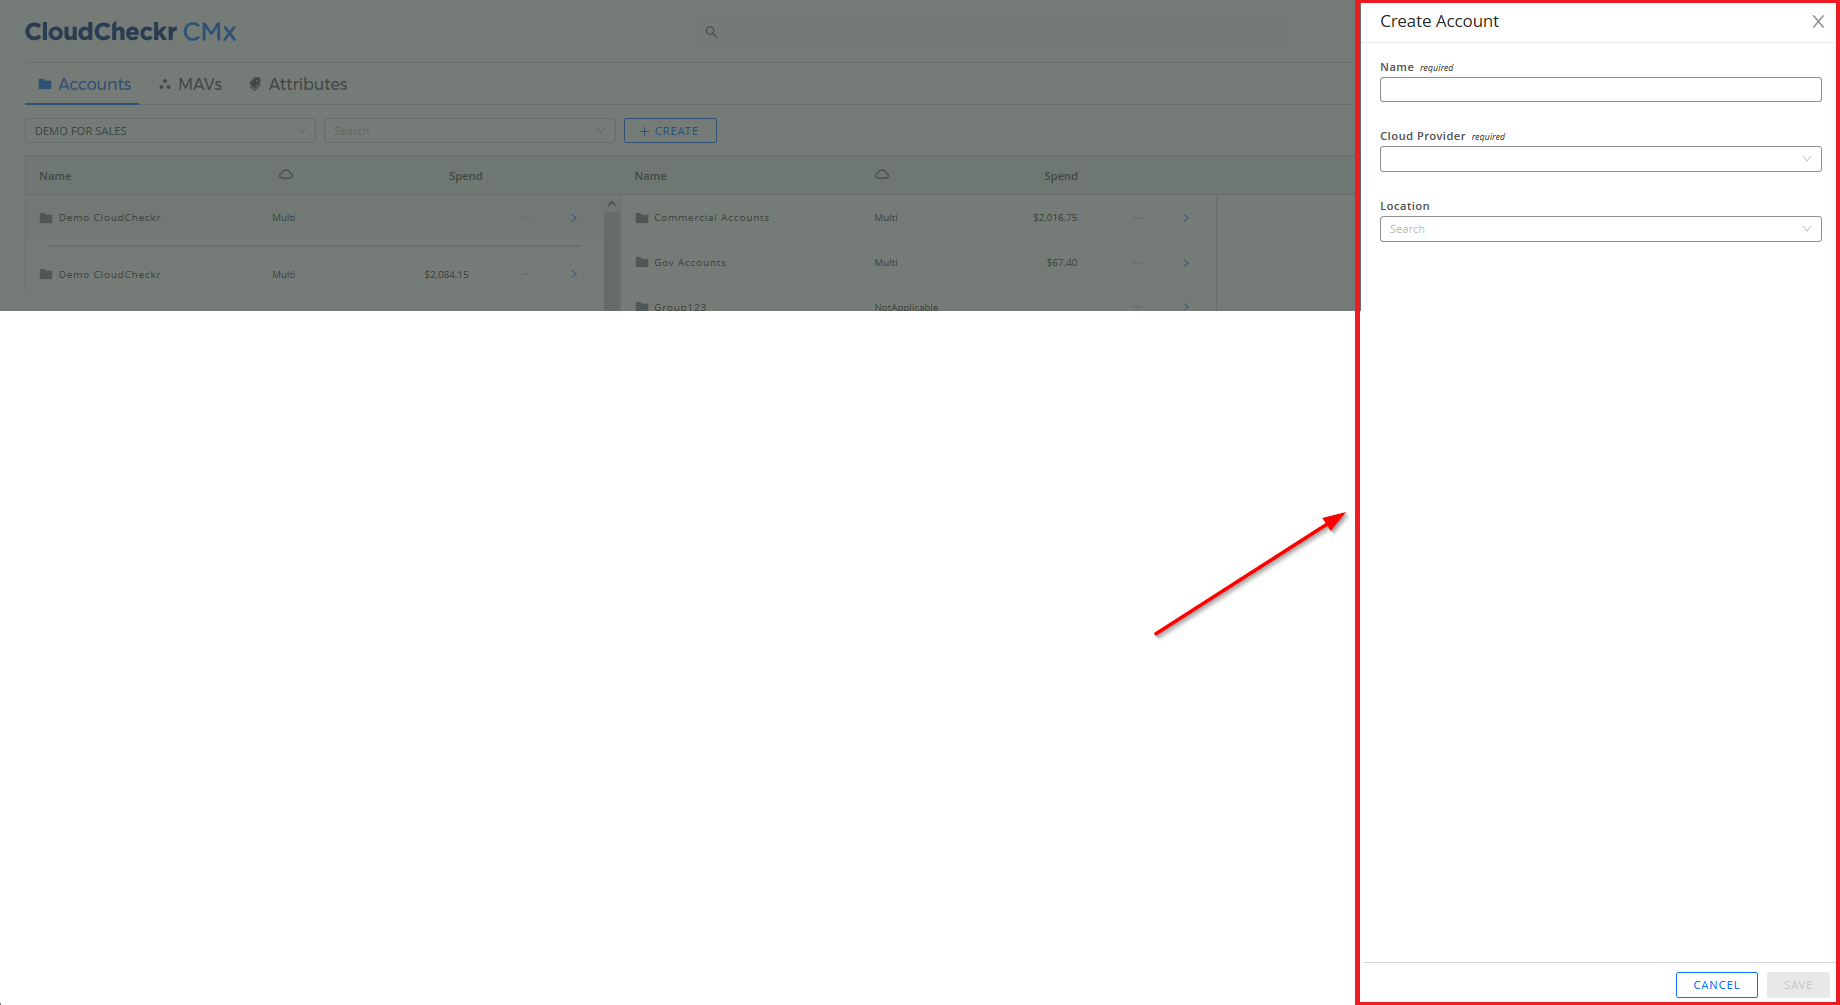
From the Accounts tab, click the + CREATE button.
Select Account from the fly-out menu. The Create Account sub-drawer opens.
Type a name for your account.
From the Cloud Provider drop-down list, select Google.
From the Location drop-down menu, select an option if you want to place your account within an existing folder.
Click Save.
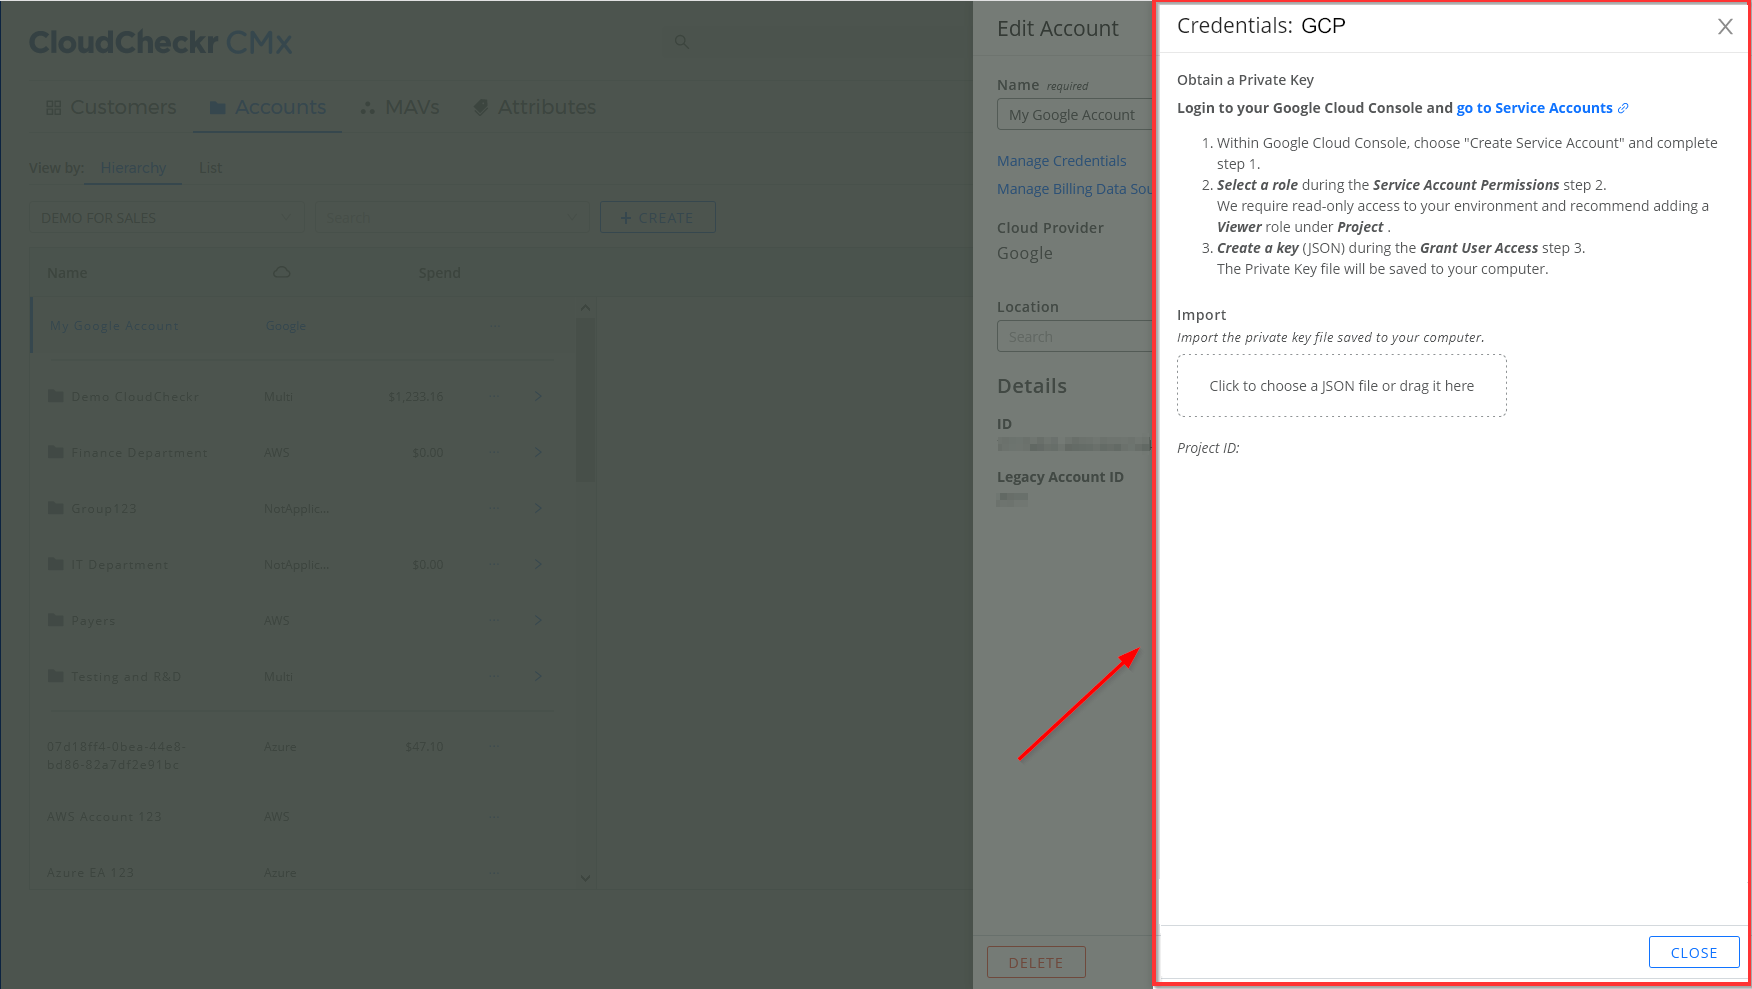
A service account is a type of account used by an application or a virtual machine (VM) instance—not by an individual user. Identified by its email address, a service account lets you control access to the resources in your Google projects.
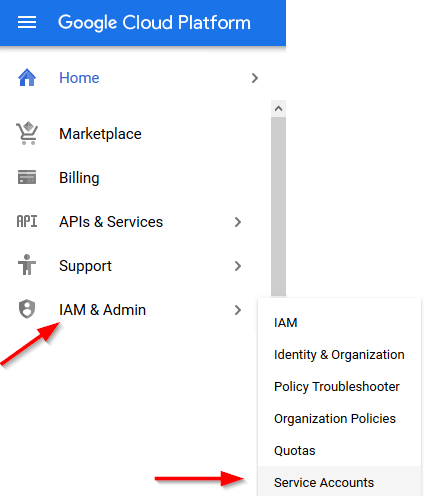
In the Google Cloud Platform Console, select IAM & Admin > Service Accounts
.
Click Select a Project and choose your project from the list.
Click the Create Service Account button.
Type a name for your service account.
Select a role you wish to grant to your service account.
CloudCheckr CMx requires read-only access for your environment. We recommend the Project Viewer role.
Click Save.
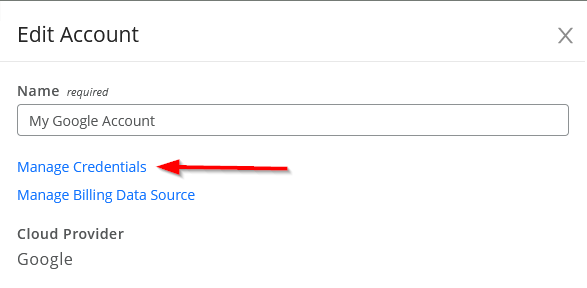
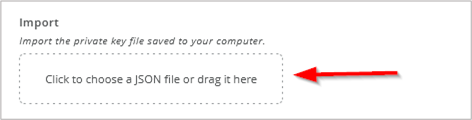
To use a service account outside of Google Cloud, you must create service account keys as a secure way to establish the identity of the service account.
Return to the Services Account page in the Google Cloud Platform Console.
Copy the Project ID, BigQuery Dataset ID, and BigQuery Table ID to a safe and easily accessible location. You will need these values in the final procedure, Step 6: Add Your Google Cloud Billing Data To CloudCheckr CMx.
Return to CloudCheckr CMx.
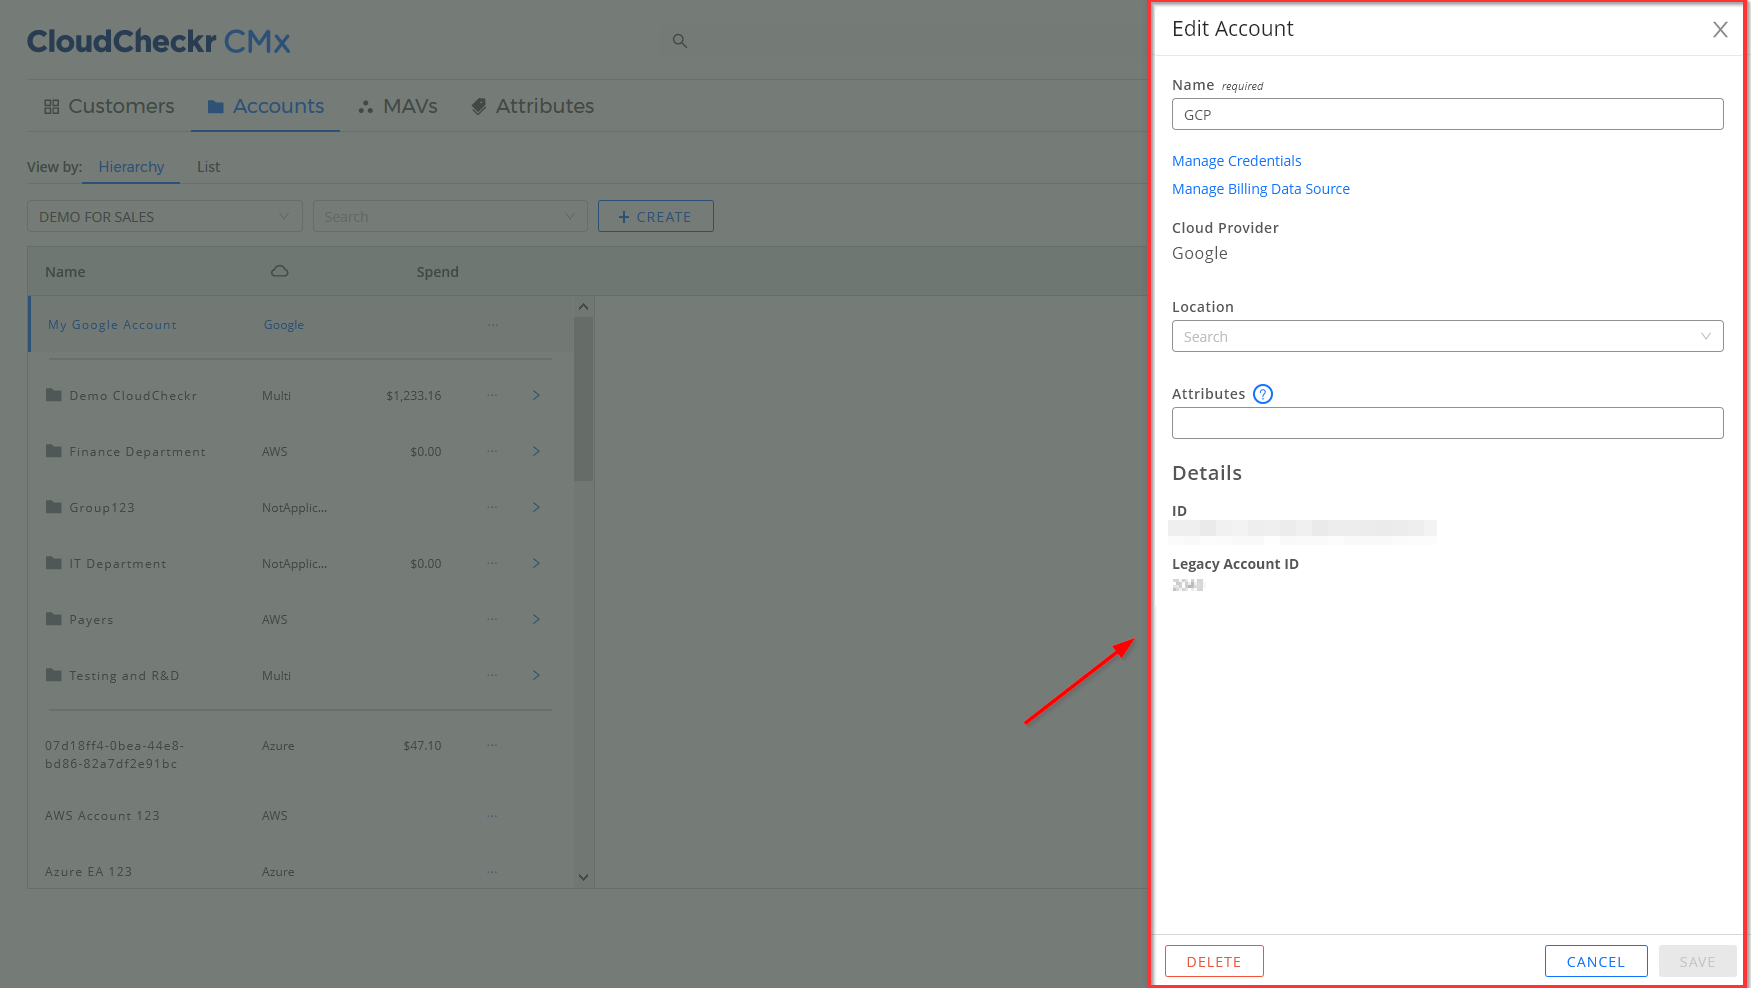
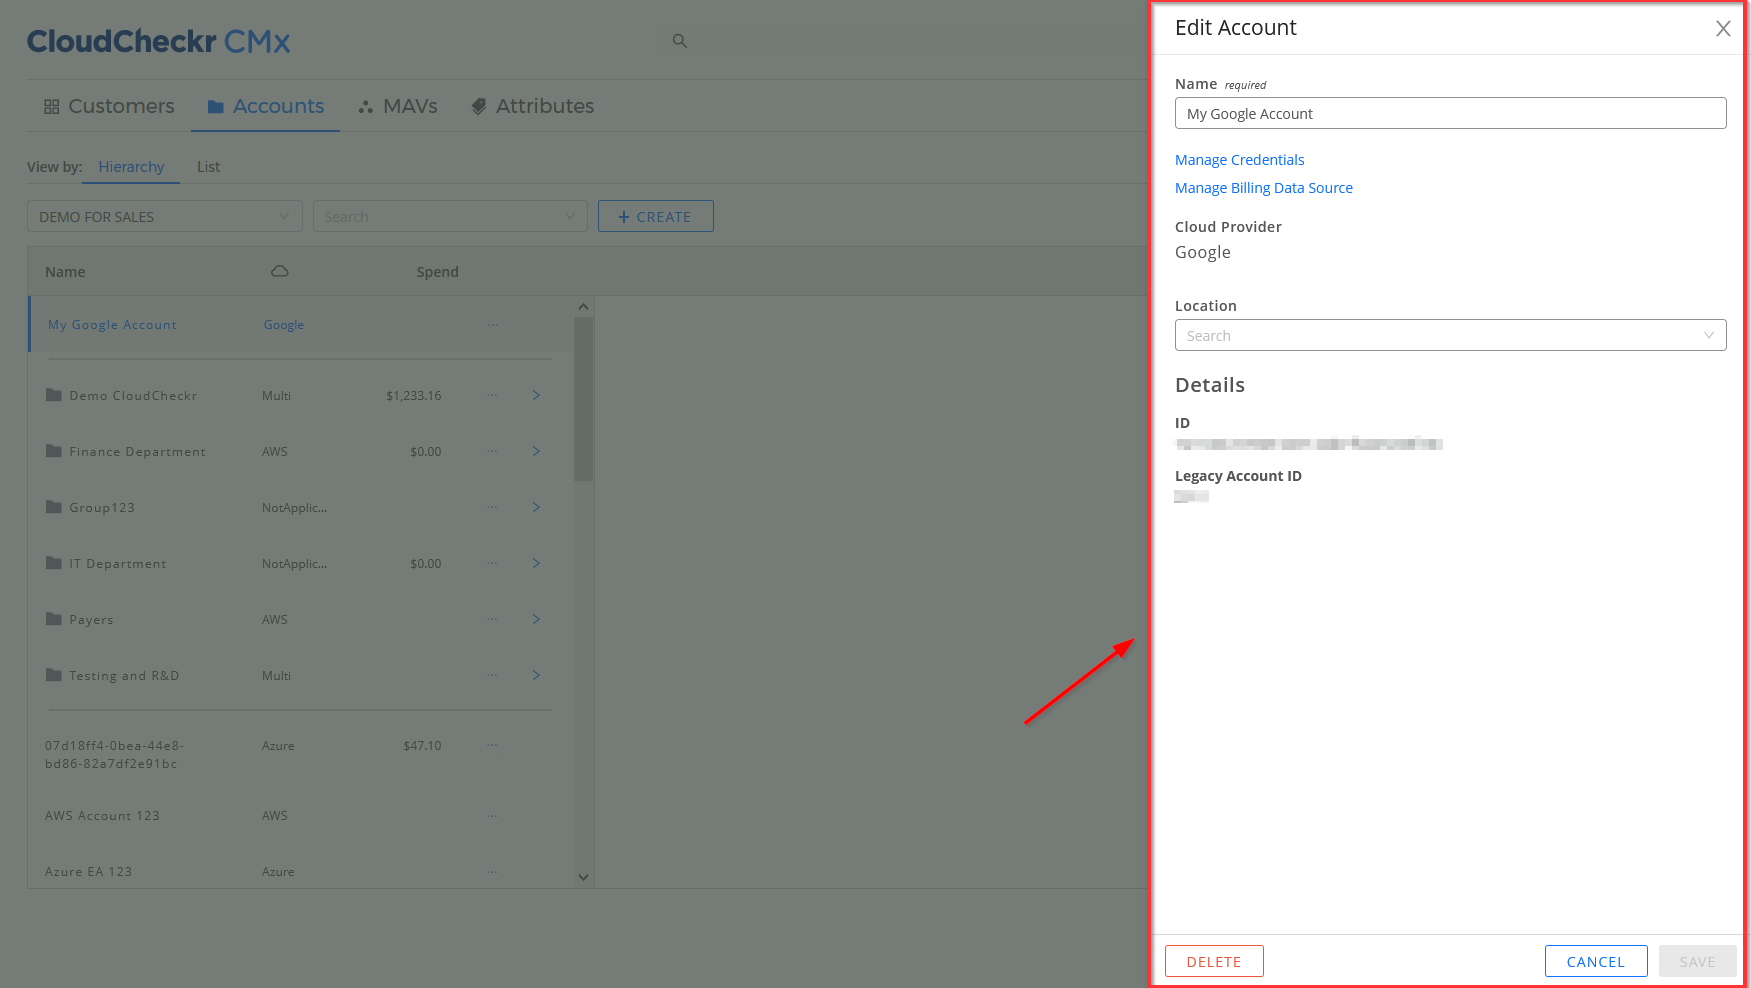
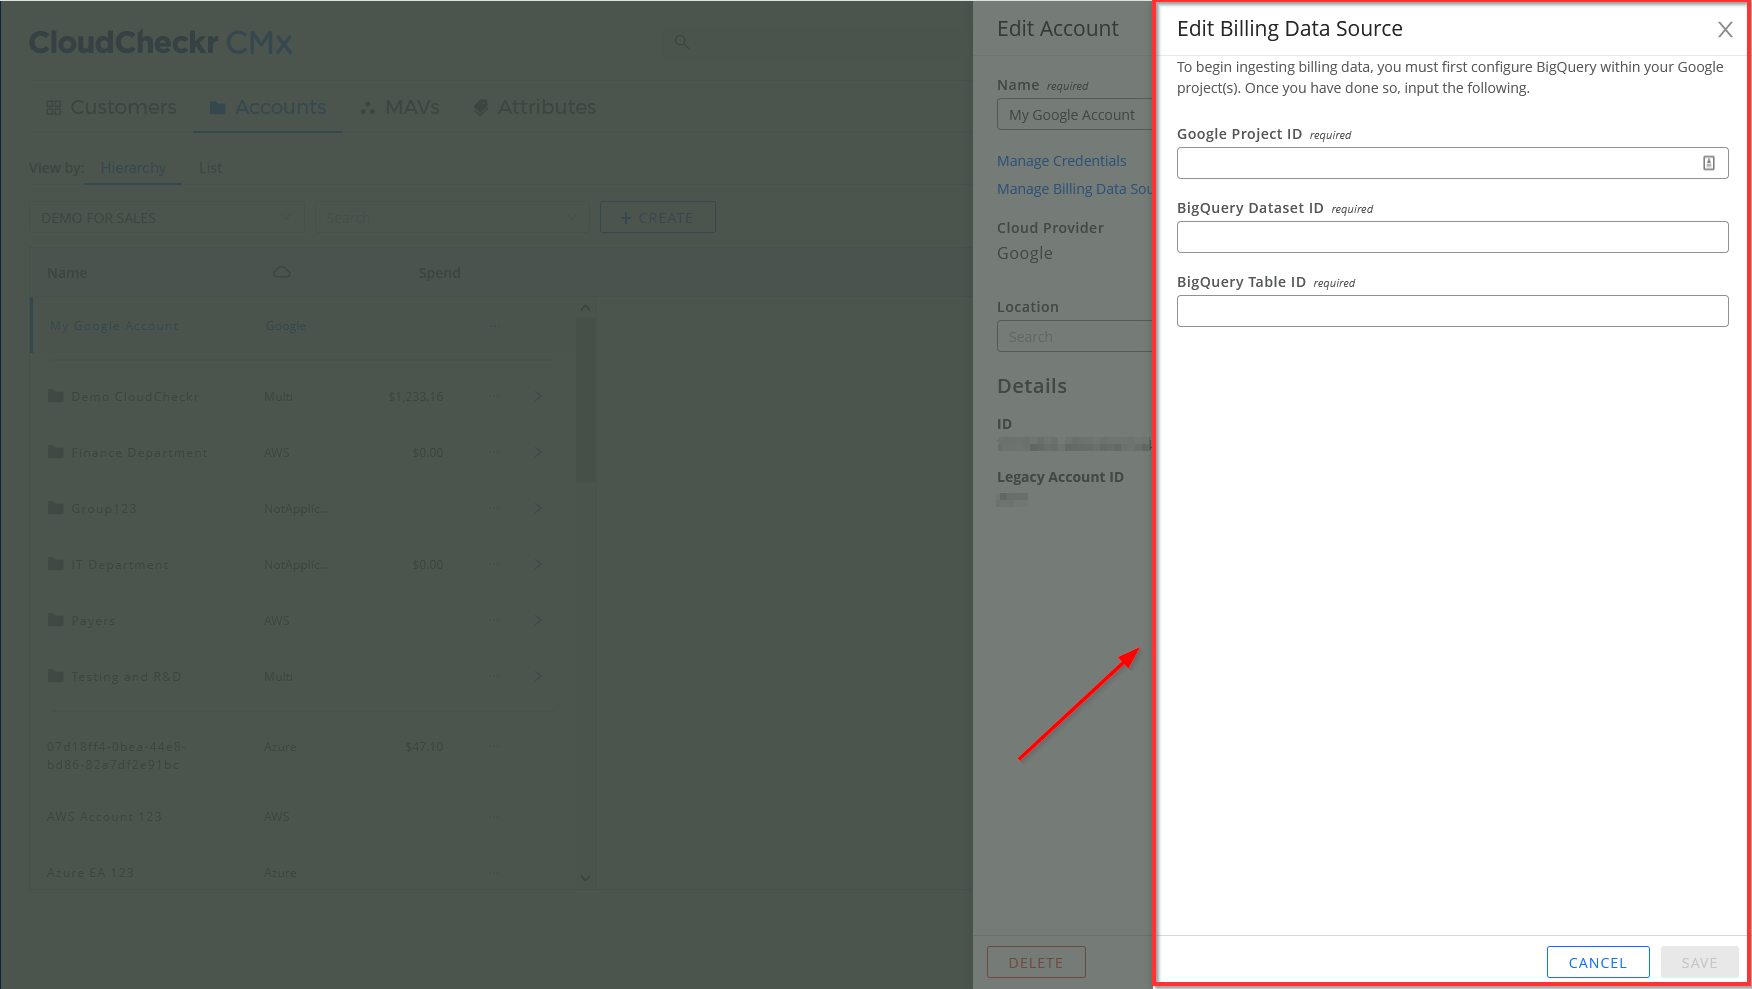
From the Accounts tab on the Account Hierarchy page, select the CloudCheckr account where you want to add the Google Cloud billing data. The Edit Account sub-drawer opens:
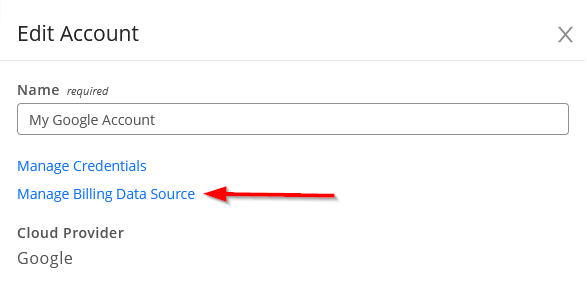
Click the Manage billing data source link.
The Edit Billing Data Source sub-drawer opens.
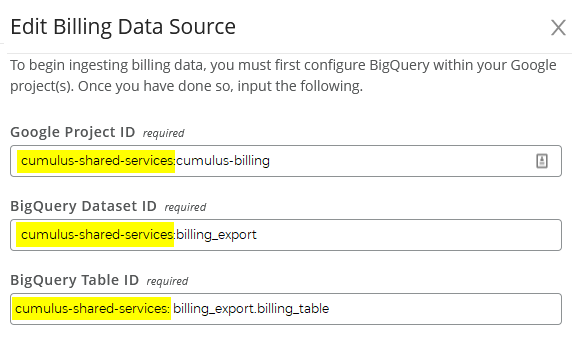
Remove any prefixes from the Google Project ID, BigQuery Dataset ID, and BigQuery Table ID: In this example, you would need to remove cumulus-shared-services:
Paste the revised IDs into the appropriate fields. If you do not remove the prefixes from your data or there is any other reason why CloudCheckr CMx cannot process your Google Cloud billing configuration, you will see an error message like this one:
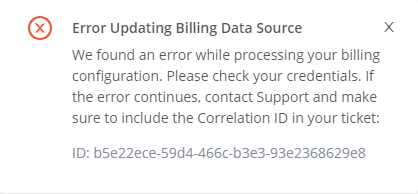
As per the message, check your credentials and try to save your billing configuration again. If the error persists, contact Support and provide them with your unique Credential ID.

 As per the message, check your credentials and try to save your billing configuration again. If the error persists, contact Support and provide them with your unique Credential ID.