Create a User in CloudCheckr
To create a user in the CloudCheckr application, you need to have an Admin role. This procedure will show you how to create a user, assign permissions to them, and activate the user.
Workflow
Follow these steps to learn how to create a user:
- From the header menu, click the Settings icon and select Partner / Account > Users.
The Users page opens.
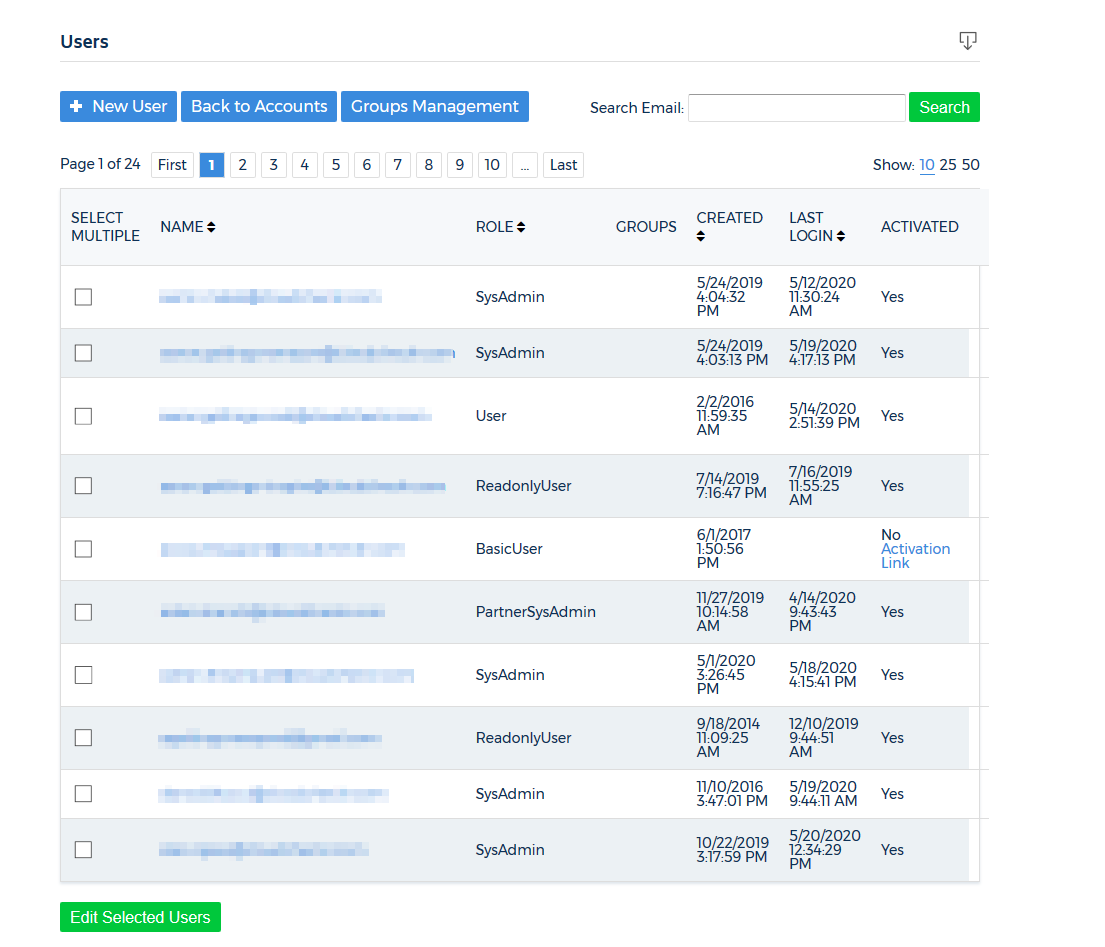
- Click + New User.
- On the New User page, type the email address of the user.
You need a valid email address to activate a user in CloudCheckr.
If you are creating multiple users, separate each user's email address with a comma.
- Scroll down to the Roles section.
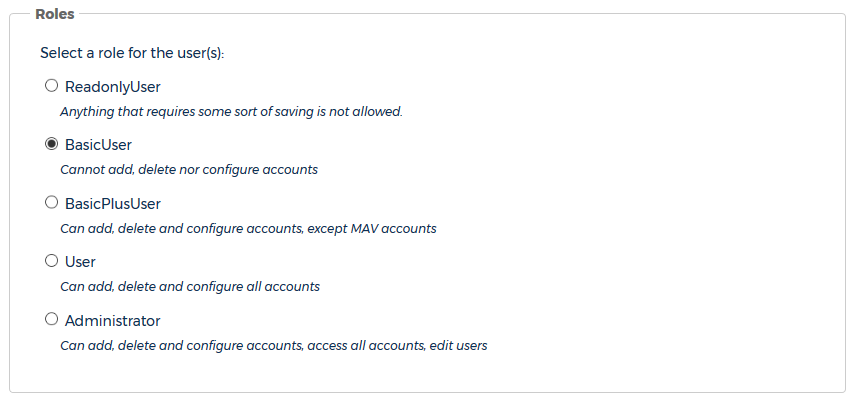
- Select a role.
The table describes the roles available in our application and the privileges associated with these roles.
Role
Description
ReadonlyUser
can view reports and other data but cannot add, edit, or delete accounts
BasicUser
cannot add, delete, or configure accounts
BasicPlusUser
can delete and configure all accounts except MAV accounts
User
can add, delete, and configure accounts
Administrator
can add, delete, configure, and access all accounts and edit the user
Since the roles of BasicUser or User role are similar, it may be hard to decide which is right for you. Click Compare Roles to learn more.
This table identifies what you can and cannot do with the BasicUser and User roles:
Role
Can:
Cannot:
BasicUser
- Configure email settings
- Create and edit saved filters
- Create and edit alerts
- See and use API keys
- Use automation
- Create and edit custom inventory reports
- Use Fix Now functionality in Best Practice Checks
- Create and edit dashboards
- Add projects
- Configure projects
- Delete projects
- Create and edit users
- Modify Cost Usage Report settings
- Modify account-level tags
- Modify service limits
- Edit EC2 tags for dashboard
- Manage integrations
User
- Configure email settings
- Create and edit saved filters
- Create and edit alerts
- See and use API keys
- Use automation
- Create and edit custom inventory reports
- Use Fix Now functionality in Best Practice Checks
- Create and edit dashboards
- Add projects
- Configure projects
- Delete projects
- Create and edit users
- Modify Cost Usage Report settings
- Modify account-level tags
- Modify service limits
- Edit EC2 tags for dashboard
- Manage integrations
Group permissions allow customers with a large user base to quickly assign users to groups where it would be tedious to apply and manage individual user permissions.
- User A is added to Group 1 and Group 2
- Group 1 provides User A with access to the Billing Dashboard for Account 1
- Group 2 doesn't provide User A with access to the Billing
Dashboard for Account 1
As a result, User A has access to the Billing Dashboard for Account 1.
- Scroll down to Group Permissions in the Granted Access section.
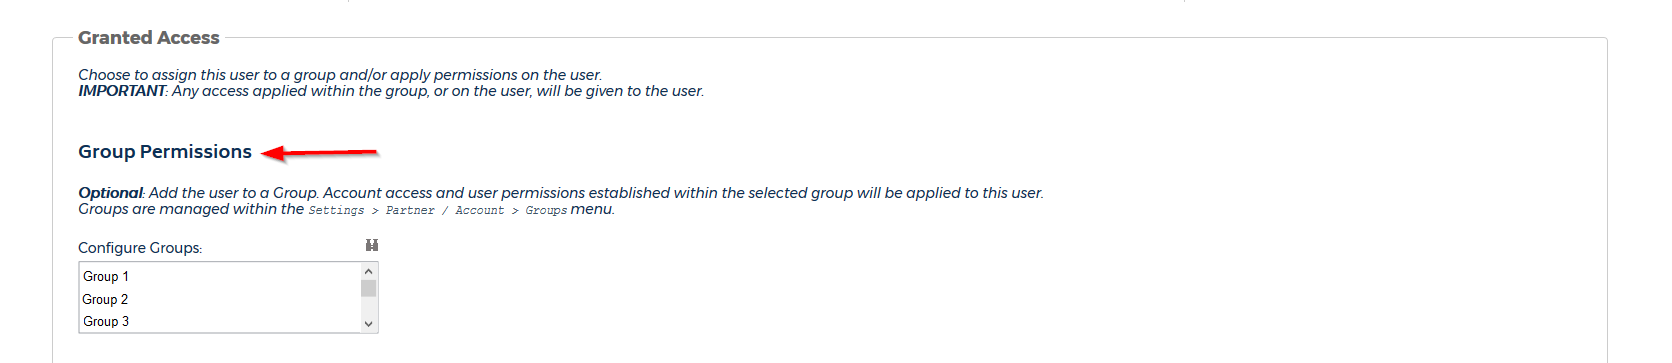
- Under Configure Groups, select a group or groups using one of the following methods:
- click to select a single group
- press CTRL and click to select multiple groups not in sequential order
- press Shift and click to select all groups
- click
 to search or filter from the complete list of groups.
- Click Create.
Even if a user has access to all assigned group permissions, there might be restrictions based on their role. For example, if a user has the role of ReadonlyUser, they can't edit accounts even if they are assigned group permissions that provided edit capabilities.
- Scroll down to the User Permissions in the Granted Access section.

- Click the tab corresponding to your cloud provider.
For this procedure, we selected AWS.

- Review the Configure What Costs Are Visible to a User to identify what types of AWS costs you want to be visible for your users.
- Click Access to learn more about what the user can access in the AWS environment:
Account or Report
Description
Access
This column allows you to identify if you want the user to have access to one account or multiple accounts.
Full Access: access all reports and functions and for all accounts on the list
All: access a selected report or function for all accounts on the list
Savings
All: access Cost Savings reports for all accounts on the list
 : access the Cost Savings reports for the selected account
Best Practices
All: access Best Practices Checks reports for all accounts on the list
: access the Best Practice checks for the selected account
Alerts
All: access alerts for all accounts on the list
: access the alerts for the selected account
Cost Reports
This column allows you to identify if you want the user to have access to the cost reports.
You must select the All check box or the check box for an individual account in the Access column for a user to have access to the cost reports.All: access Cost reports for all accounts on the list
: access the Cost reports for the selected account
Resource Utilization Reports
All: access Resource Utilization reports for all accounts on the list
: access the Resource Utilization reports for the selected account
Inventory
All: access Inventory reports for all accounts on the list
: access the Inventory reports for the selected account
Security
All: access Security reports for all accounts on the list
: access the Security reports for the selected account
Automation
All: access Automation reports for all accounts on the list
: access the Automation reports for the selected account
Edit Emails
All: edit emails for all accounts on the list
: edit emails for the selected account
Blended Costs
All: see the blended costs in the Cost reports for all accounts on the list
: see the blended costs in the Cost reports for the selected account
If you selected any options in the Cost Reports column, you must choose one of the cost types: blended, unblended, or list.If the customer can see blended or unblended costs, they will be able to see any cost modification due to cost configurations in the partner tools in comparison to what was billed to the reseller/managed service partners (MSPs).Unblended Costs
All: see the unblended costs in the Cost reports for all accounts on the list
: see the unblended costs in the Cost reports for the selected account
If you selected any options in the Cost Reports column, you must choose one of the cost types: blended, unblended, or list.If the customer can see blended or unblended costs, they will be able to see any cost modification due to cost configurations in the partner tools in comparison to what was billed to the reseller/managed service partners (MSPs).List Costs
All: see the list costs in the Cost reports for all accounts on the list
: see the list costs in the Cost reports for the selected account
If you selected any options in the Cost Reports column, you must choose one of the cost types: blended, unblended, or list.Trending Reports
All: access Trending reports for all accounts on the list
: access the Trending reports for the selected account
Trending reports are located in the Inventory module.Change Monitoring
All: access Change Monitoring reports for all accounts on the list
: access the Change Monitoring reports for the selected account
Change Monitoring reports are located in the Security module.Account Notification
All: see account notification that indicates missing permissions for all accounts on the list
: see account notification that indicates missing permissions for the selected accountClick the Notification icon in the header menu to open the fly-out menu with notifications.See Partner Tools
All: see Partner Tools for all accounts on the list
: see Partner Tools for the selected account
Partner tools are located in the Cost module.This column is only relevant if you enabled the user to have access to the Cost reports.Edit Partner Tools
All: edit Partner Tools for all accounts on the list
: edit Partner Tools for the selected account
Partner tools are located in the Cost module.This column is only relevant if you enabled the user to have access to the Cost reports.See API Keys
All: see API key menu for all accounts on the list
: see API key menu for the selected account
The API is not bound by user permissions. All data is available via the API. - Select the checkboxes next to the accounts and reports you want the user to access.
- Click Create.
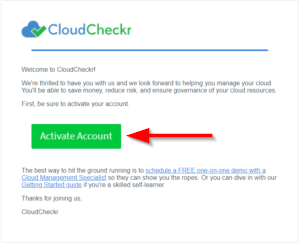
Once you create the user, CloudCheckr sends an activation email to the user's email address.
- Click Activate Account.
- On the Set a Password page:
- Type a password.
- In the Confirm Password text field, re-type the password.
- Click Update.
CloudCheckr identifies the user as being activated on the Users page.
