Configure SP-Initiated Single Sign-On in CloudCheckr CMx
With Service Provider (SP)-initiated Single Sign-On (SSO), you log into your identity provider (IdP) from the CloudCheckr CMx user interface.
This procedure will show you to configure your SP-Initiated SSO in CloudCheckr CMx.
Prerequisites
To use SP-Initiated SSO, you must:
- be an enterprise customer
- purchase the Standard (includes a basic sub-domain) or Premium (includes a fully-customized domain) white label package
- have a custom URL
Here is a quick summary of the levels of customization we offer in CloudCheckr CMx where:
 = fully customizable
 = partially customizable
NA = not available
|
Feature |
In-App Customization |
Standard |
Premium |
|
Header Logo |
|
|
|
|
Browser Tab Favicon |
|
|
|
|
Color and Theme |
|
|
|
|
Landing Page Text | NA |
|
|
|
Customer Signup/Login Pages |
NA |
|
|
|
Email Domains | NA |
|
|
|
URL | NA |
CloudCheckr subdomain |
|
Procedure
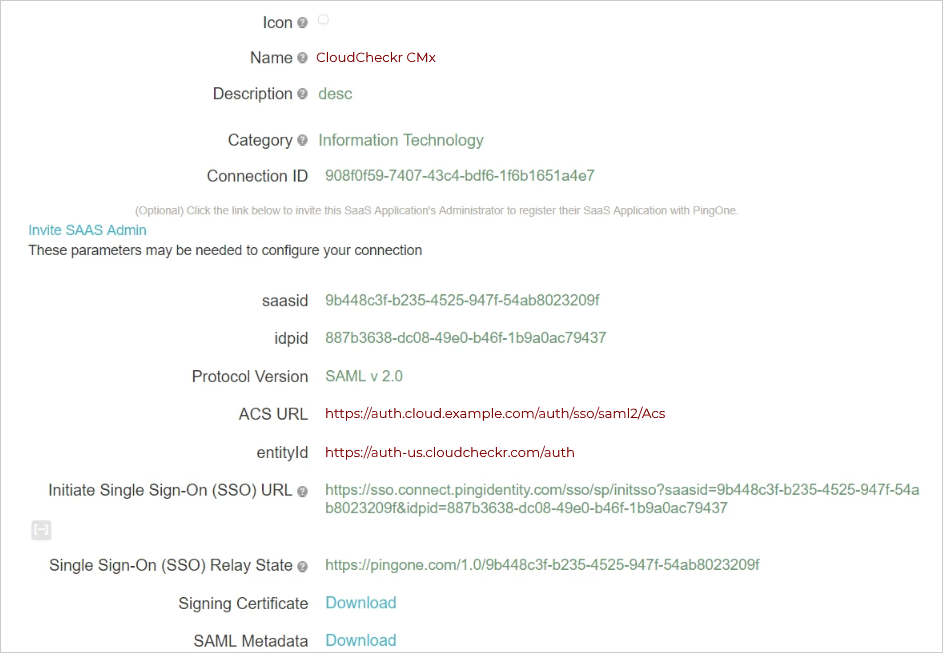
- Follow the procedure for
IdP-initiated SSO, but replace auth-us.cloudcheckr in the ACS URL with your custom auth URL.
The screenshot shows an example from the setup for PingOne:
- Navigate to the white label (WL) login screen.
You can get to this page through a link or logging out of the white-abeled customer.
- Click the SSO Login button next to the identity provider (IdP) you want to use.
If this customer has multiple IdPs, PingOne will display a button for each IDP.
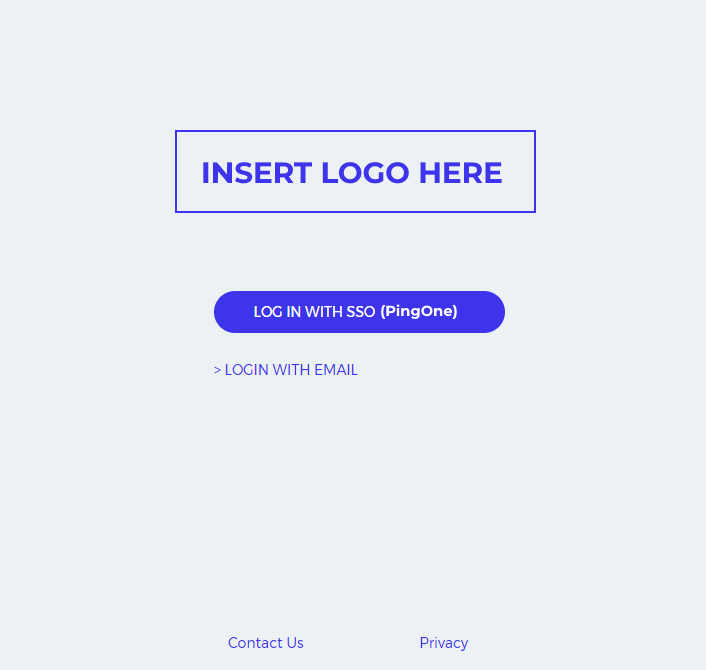
The IdP prompts you to login with your IdP credentials.
- Once you are logged in to your IdP, PingOne will proceed with the SSO process.