Custom Usage Rates in Azure
This report allows you to override the usage rates set by Microsoft. When you set a new rate for a consumed service, category, meter name, etc., that values is what is used to calculate a new list cost of the charge. These changes will only impact list cost. They will not affect standard or retail cost.
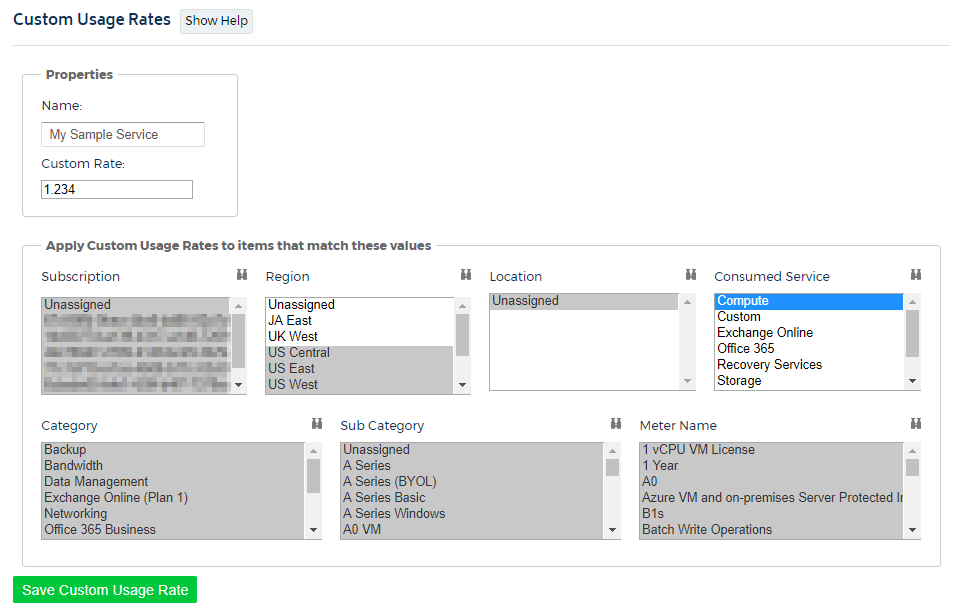
Creating a Custom Usage Rate
- Go to Cost > Azure Partner Tools > Configure > Custom Usage Rates.
- Click Create New Rate to access your options.
- You can create a custom rate for any service, which will automatically be reflected in real-time when the customer views their List Cost billing data, or at the end of the billing cycle when the customer receives their invoice from CloudCheckr.
You can configure the following fields:
Name | Enter in a description for your custom rate. This will be for internal purposes only, so you can track your work. |
Hourly Rate | Enter in the hourly rate for the service in question. |
Apply Custom Usage Rates to items that match these values | Select which categories will be affected by the custom usage rate. For example, you might create a custom rate for A) all usage in one subscription, B) only compute usage in one subscription, or C) only usage by a specific meter name. |
Next Steps
Reloading your Usage Data
In order for your changes to be reflected within already-populated data, you will need to reload your historical usage data. So, if you create a custom usage rate on February 15 but you want to modify the entire calendar year, you will need to reload the months of January and February.
You can get more guidance on this on our reloading usage reports page.
Seeing the Changes
The modified usage rates will show up in CloudCheckr's List Cost. When you give your clients view their cost data as list cost, they will see these customized rates whenever they log into their CloudCheckr account, and the amounts will continually update moving forward in time.